Today, we will be designing and fabricating an automatic phase selector panel also known as an auto phase selector. This design is used in households or industries where they need to know which phase is the most stable and to automatically switch to that phase. We will begin the design by listing all the components needed for this design.
Components/Materials for The Automatic Phase Selector Panel
The table below shows the bill of materials used for this design and their specifications. You can check for the cost and availability of any of these materials on our online shop. You can also message us on WhatsApp to know if they are available and their cost.
The materials above needed to be assembled before anything can be done. Once these materials are complete we can proceed to the next step which is using the schematic diagram to wire the component parts together.
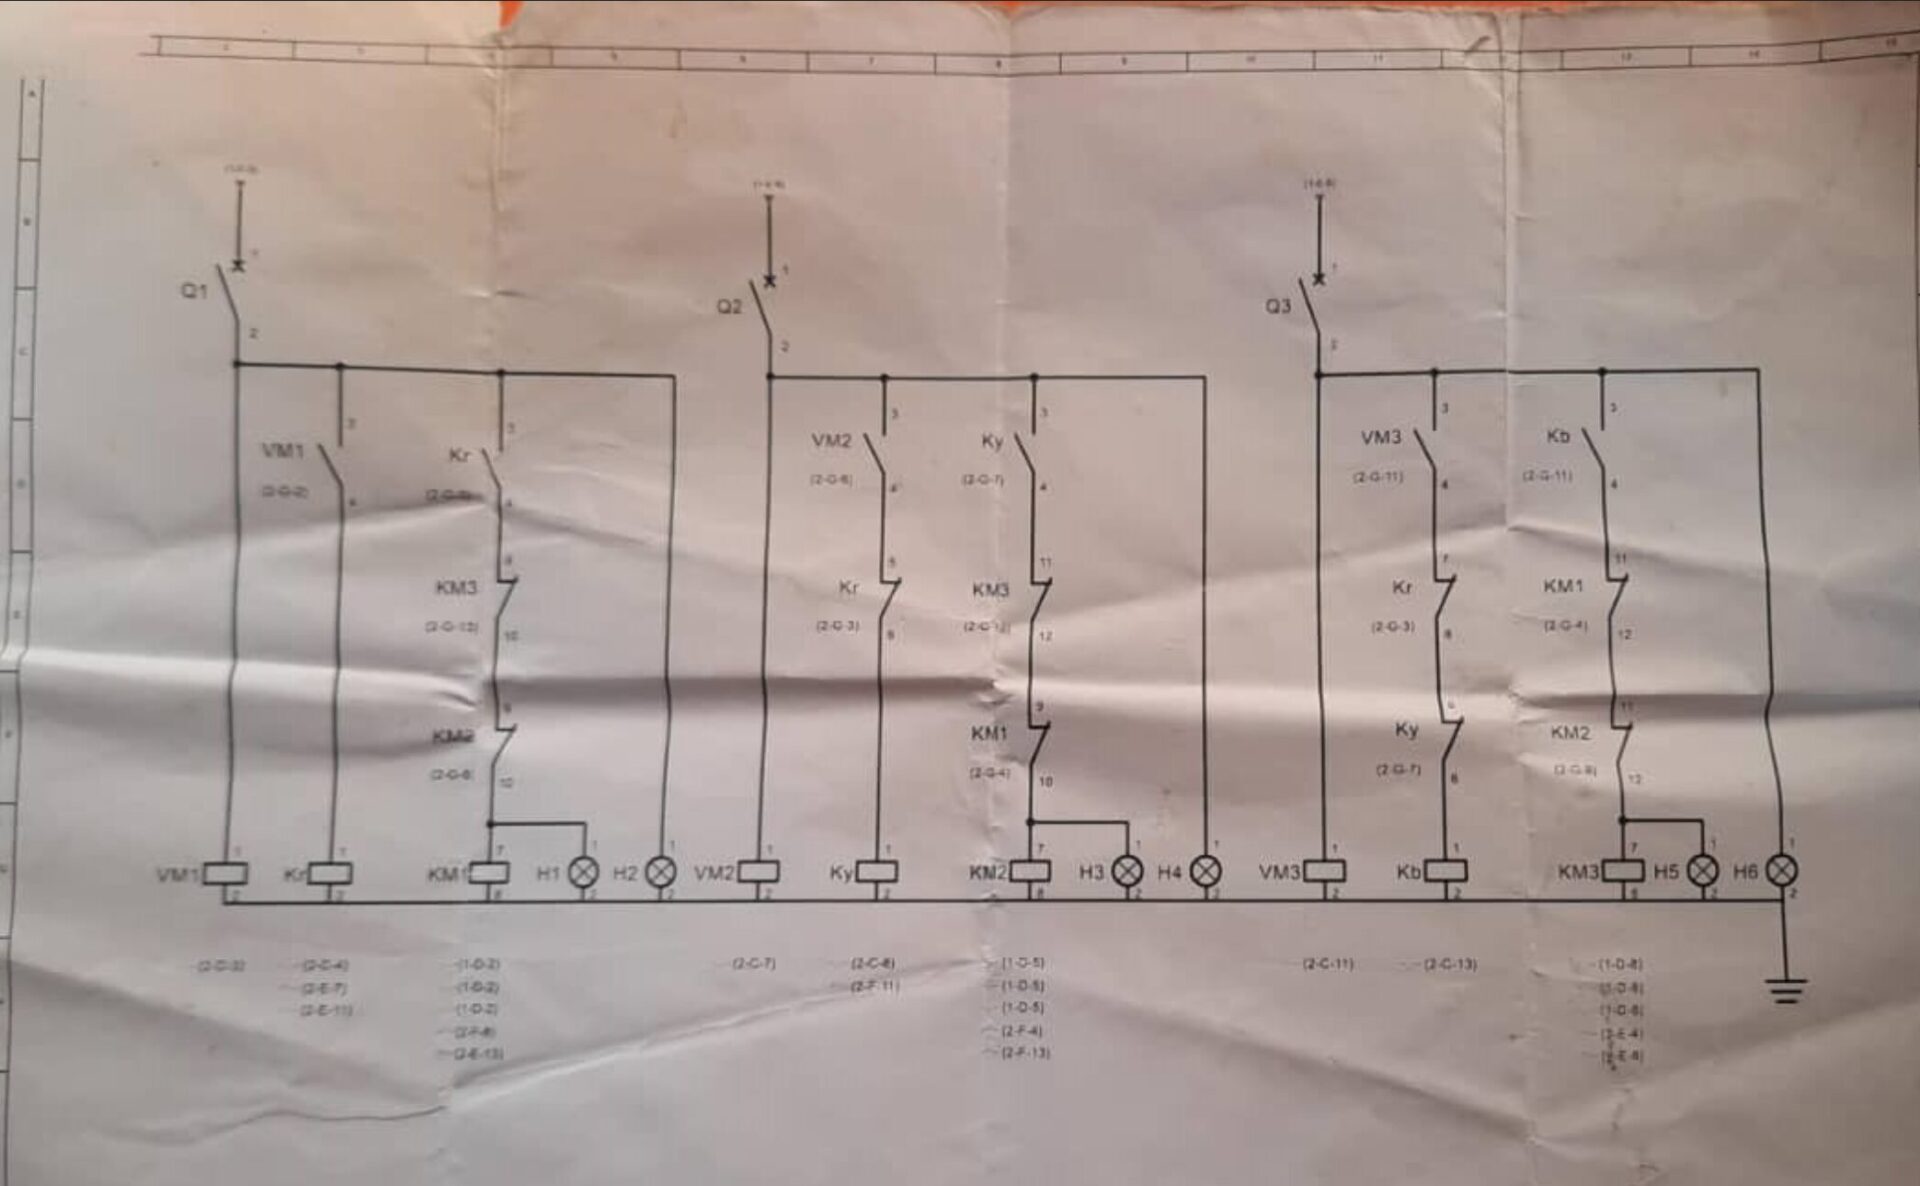
Automatic Phase Selector Panel: The Schematic Diagram
| Components | Quantity |
|---|---|
| AC MCB | 3 |
| Pilot lamp | 3 |
| Emmagency stop button | 1 |
| Voltage indicator | 3 |
| AC relay | 3 |
| Voltage monitor | 3 |
| Cable connector | 6 |
| Contactor | 3 |
| Din ray | Full length |
| Trunk | Full length |
| Cable tie | 1 pack |
| 10mm Power cable | 10 yard |
| Control cable | 12 yard |
| 10mm Cable log | 1 pack |
| Auxiliary Contactor | 3 |
| Panel Box | 1 |
| small cable log | 1 pack |
| Miscellaneous |
Above is the control side of the schematic diagram for the automatic phase selector panel. Its explanation is given below as well as the connection wiring. You can get the full diagram from the GitHub page here.
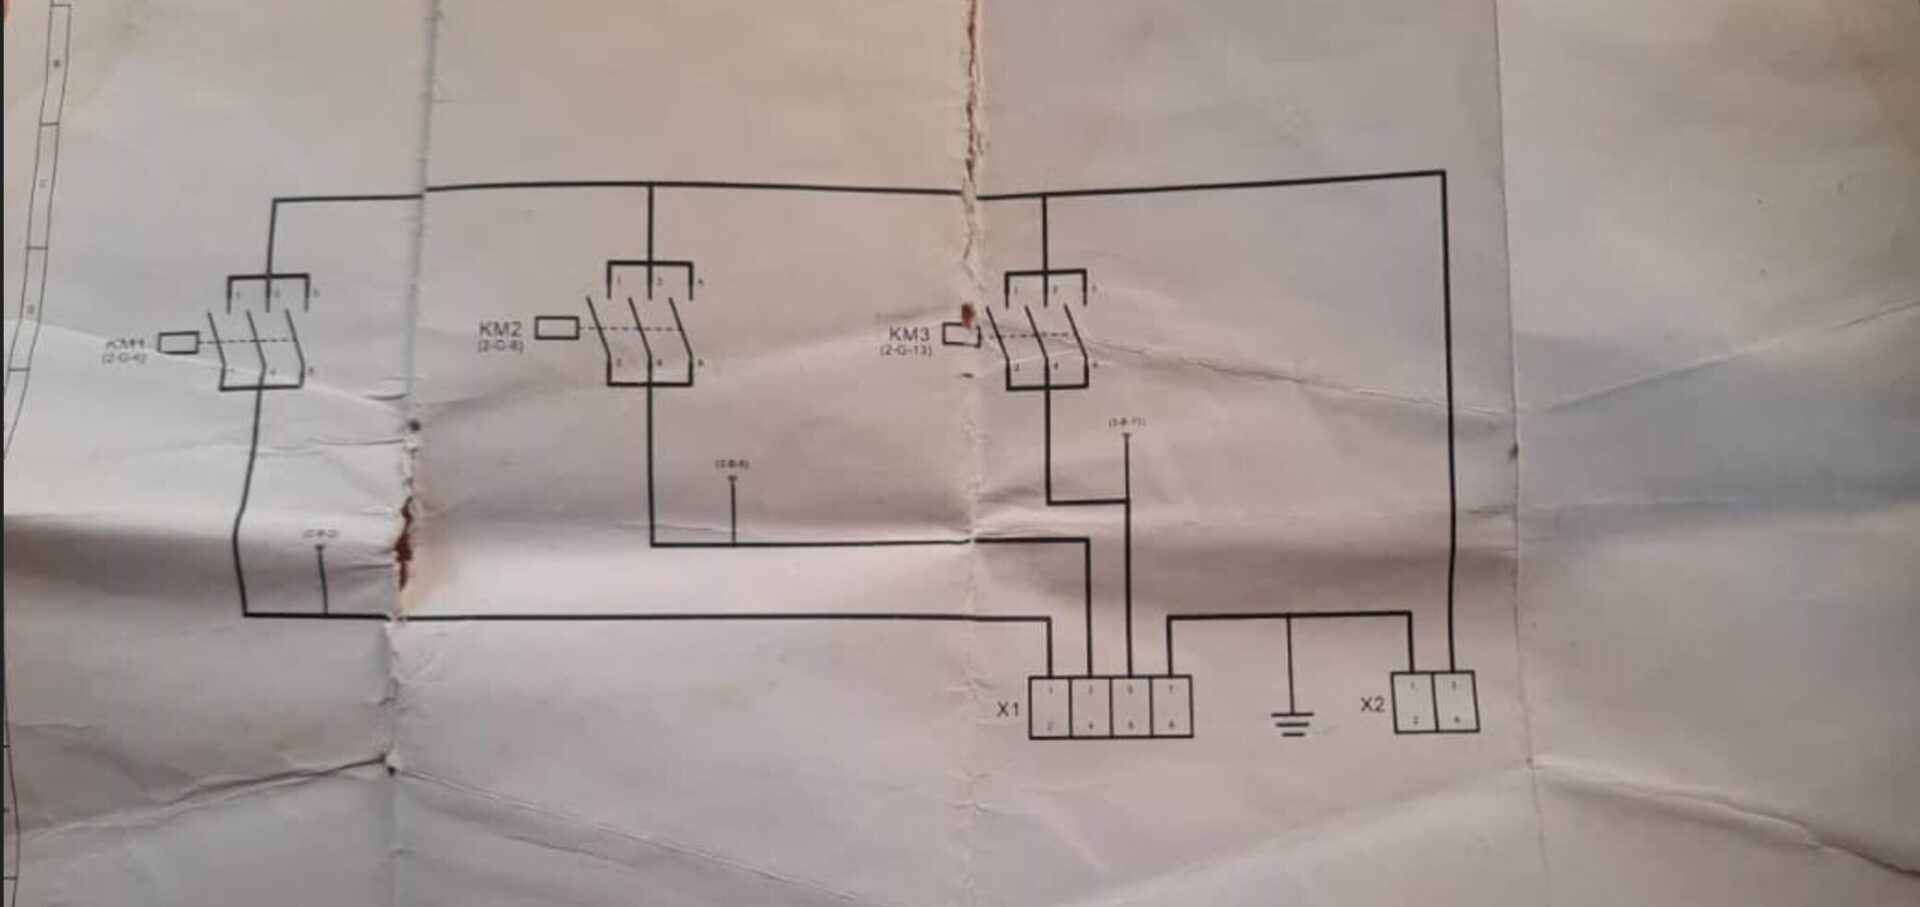
This is the power diagram connection. It is shows the to connect the power the side of the system. In the diagram, the power side has three phase input and one neutral, the each phase are connected to each contactor. The contactors have one output, and one neutral.
Wiring and Encasing The Automatic Phase Selector Panel
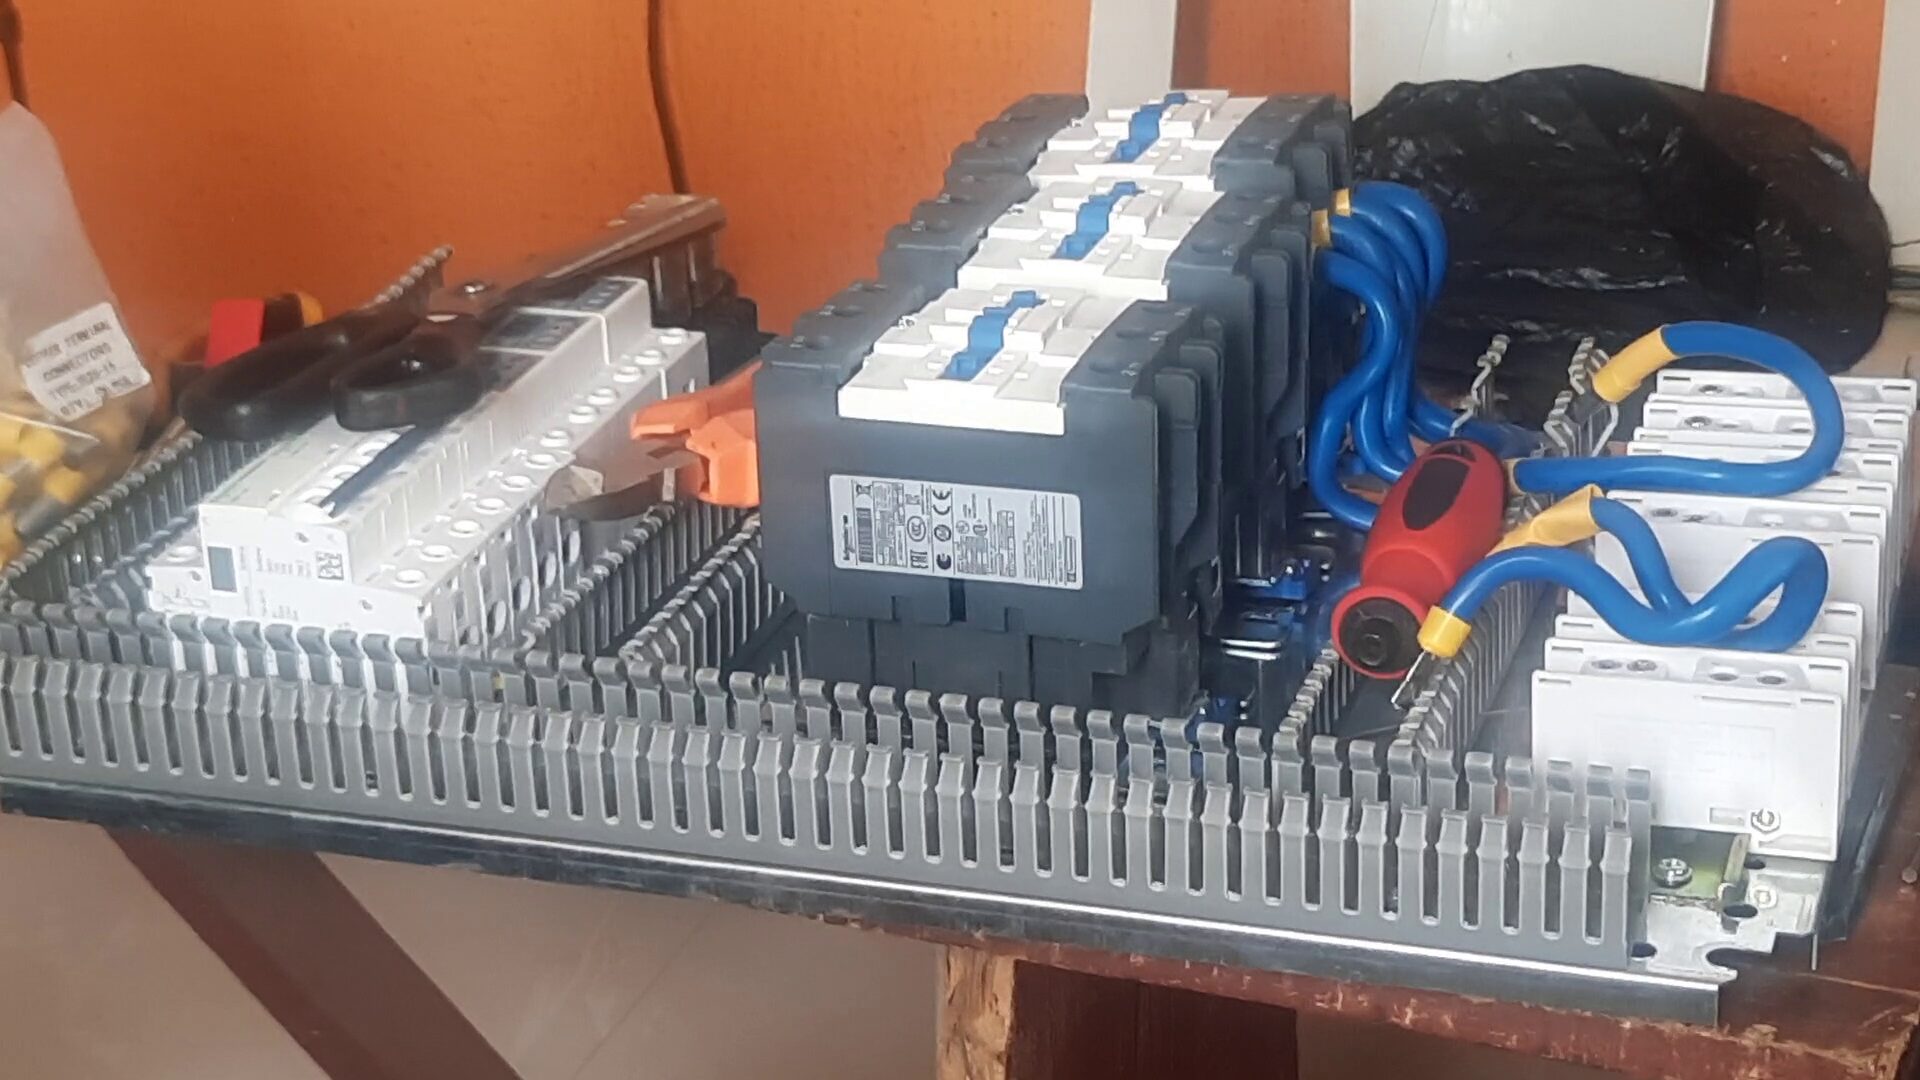
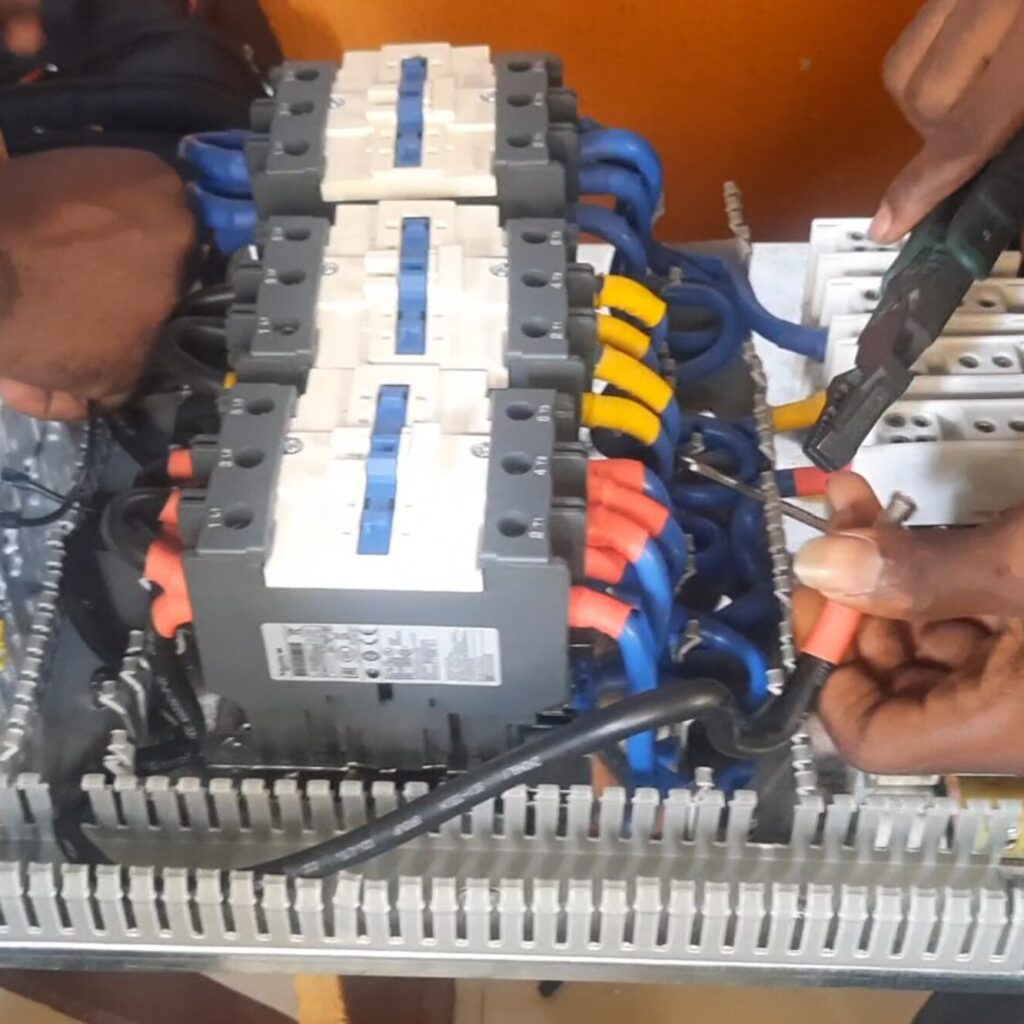
Wiring of these components and parts was an intricate task. The parts has to be mounted on a DIN rail first then the wires were measure accordingly before terminating them to the appropriate connectors. We looped each phase from MCB to the 3-phase contactor. We has to use auxiliary connectors for the inputs. The inputs made room for 3 phases while the output produced only one phase.
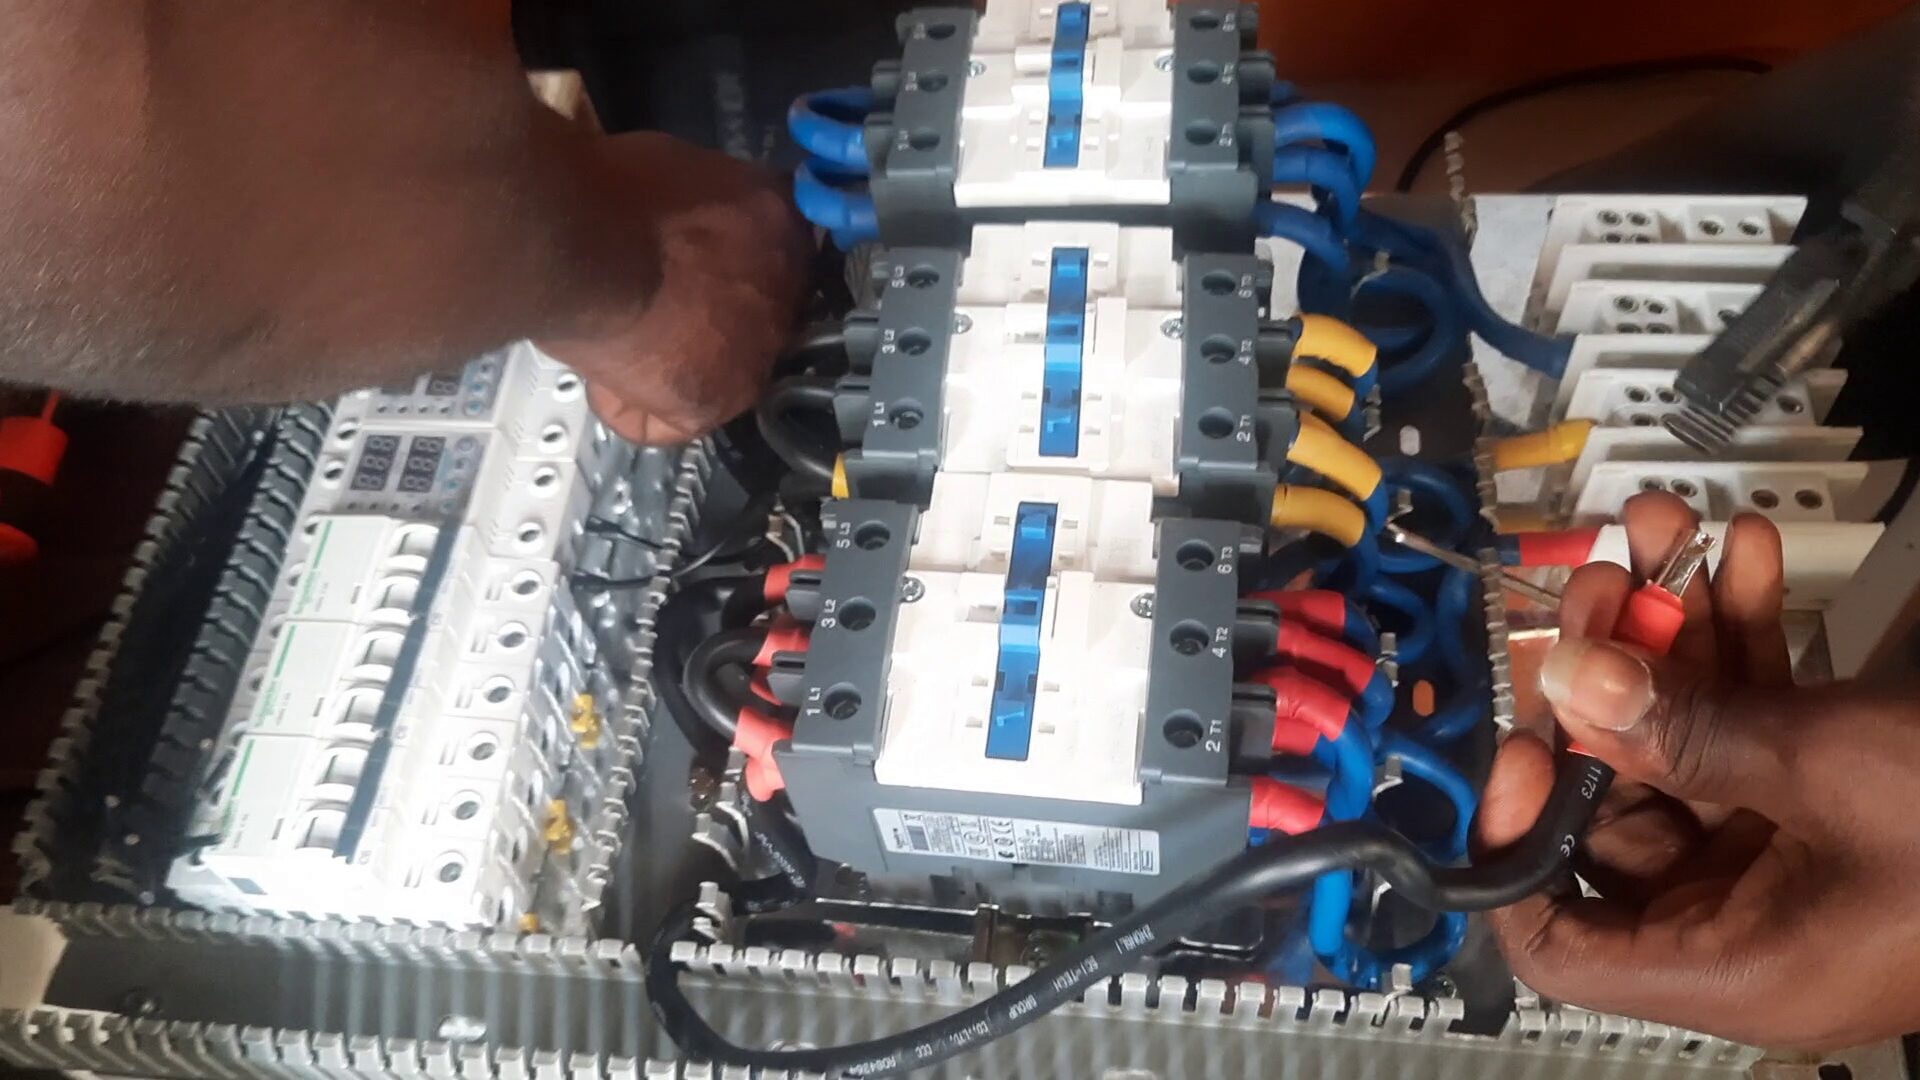
In order to create a part for the control wires, we used the above type of PVC electrical trunk. This will allow us to wire the design perfectly, leaving us rooms where to pass the wires and terminate them. Each wire had each own specification and the wires for the mains power were labelled with color shrink tubes to show which phase they represent.
For the control wiring, we used small wires that can be homogeneous in color. Two relays were used to power or energize the contactors on request. This was a nice touch to the design since we were trying to consume less power as possible.
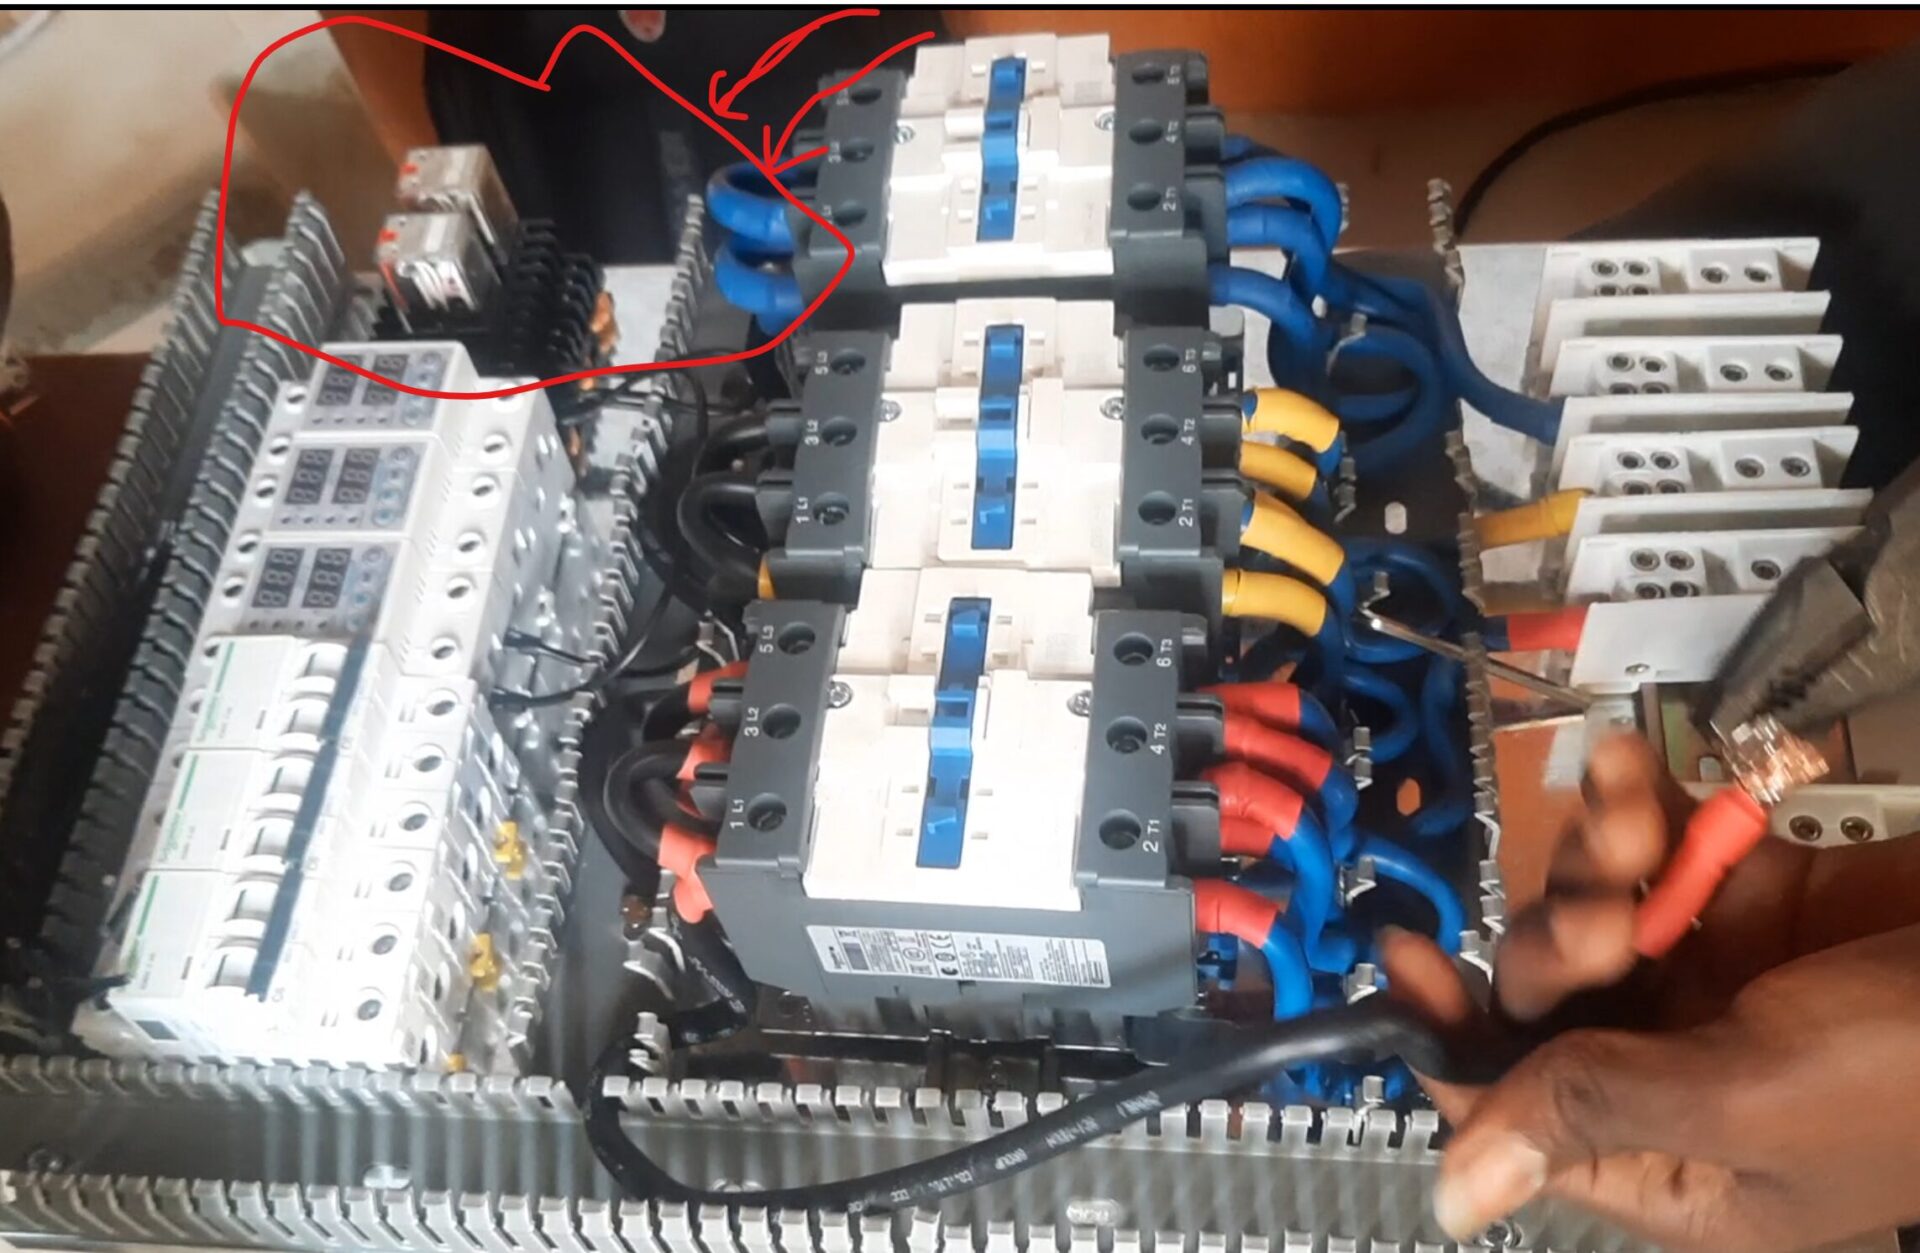
We used the adjustable voltage protection device to ensure that source mains were fit to be transmitted before switching on the contactors for each phase. This was vital to the design. See video for more.

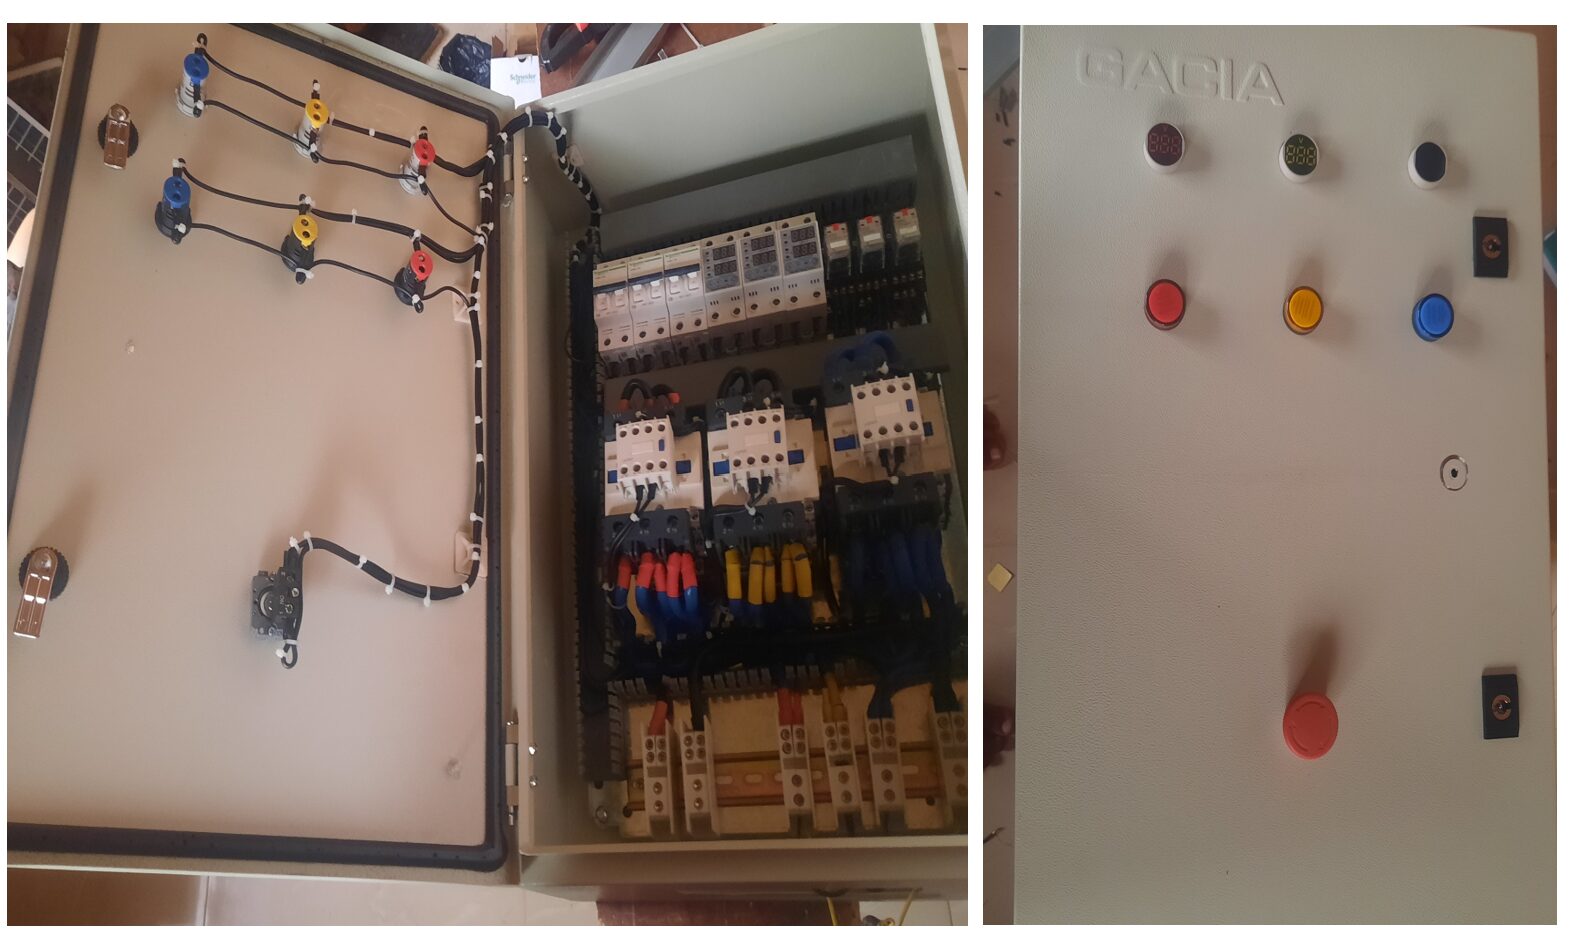
Next is the connections of the pilot lamps and voltmeter displays for each phase. Each phase has its own pilot lamp and digital voltmeter displays made on its line. The red phase, the yellow phase and the blue (or green) phase. There is also an emergency switch that was connected at the base panel that is works on the principle jam-and-stop method. This will cut off the supply in case of a fault detection.
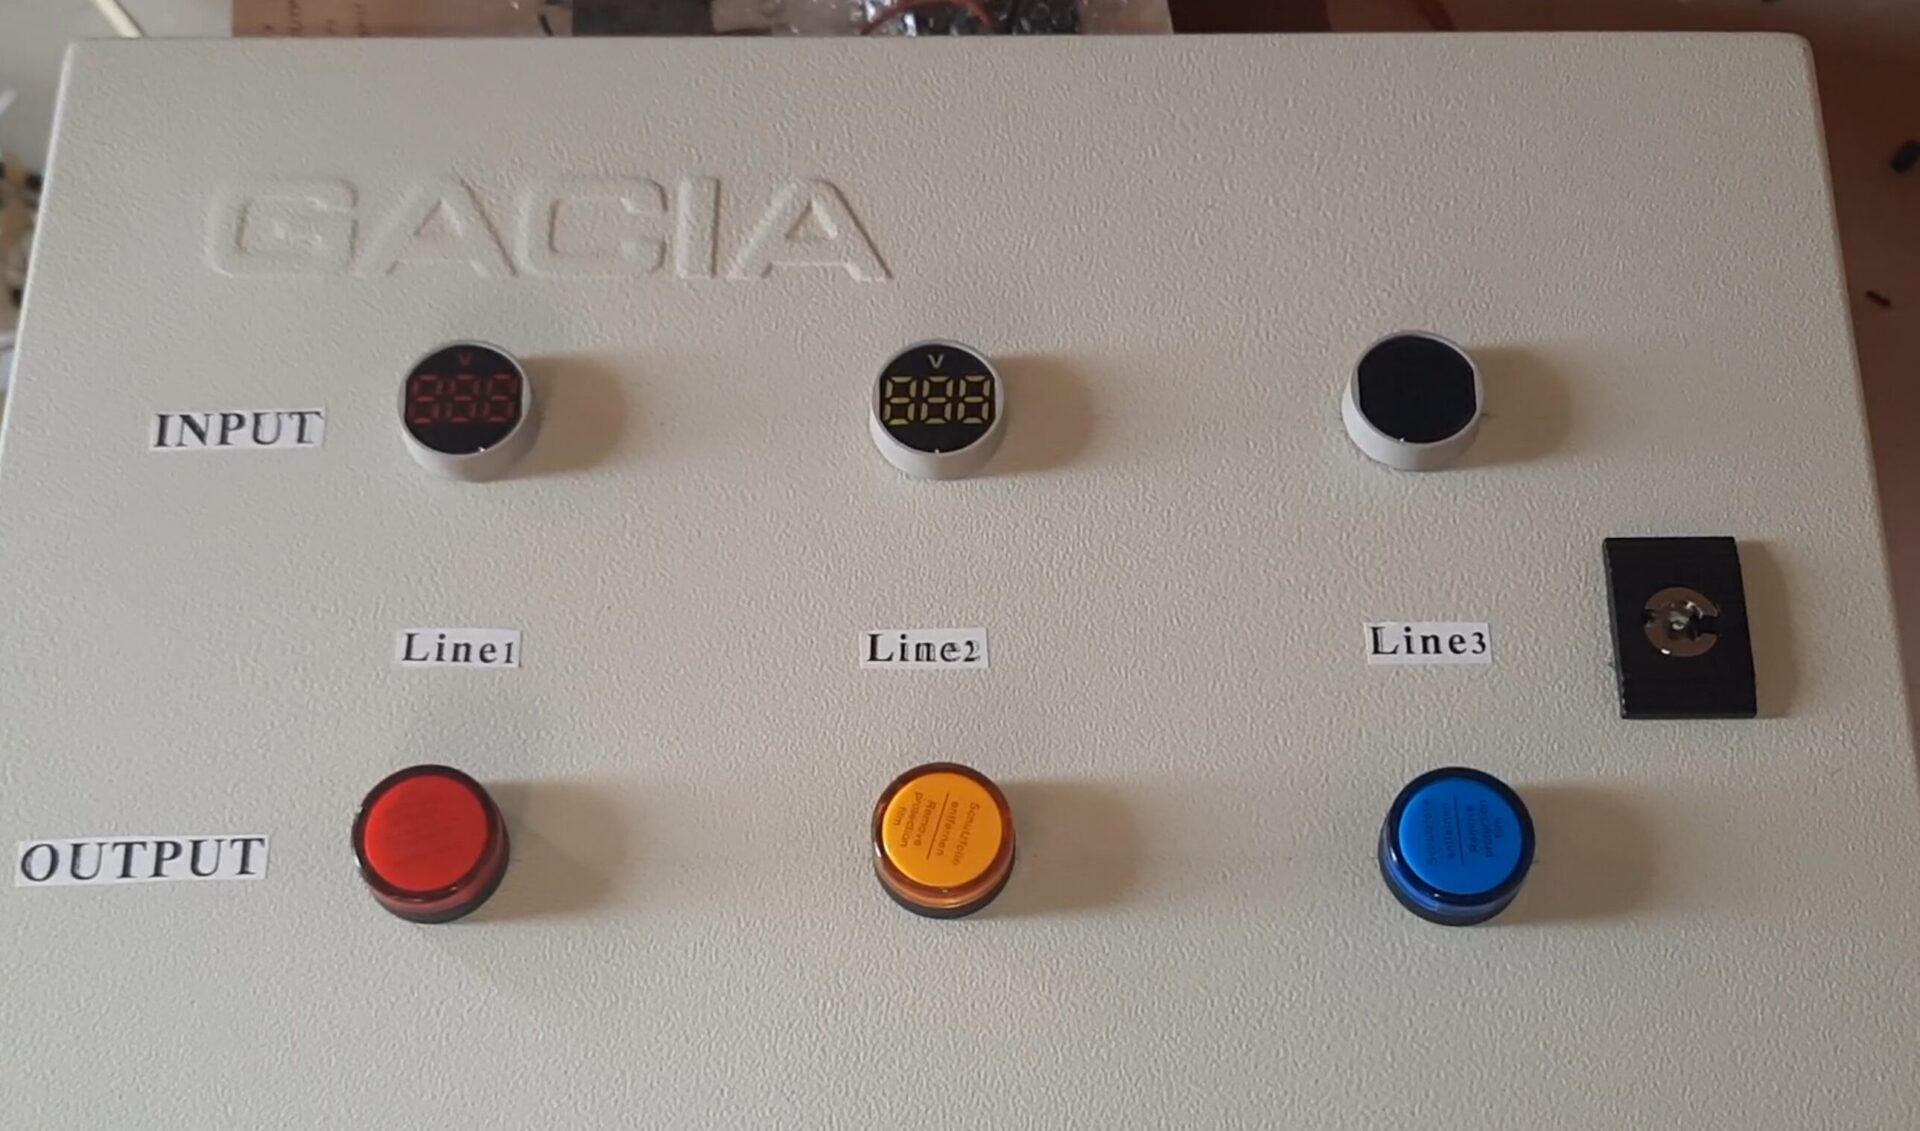
The front view of the panel showing the pilot lamps and voltmeter. We can see it phase or mains line. The digital voltmeter will display the voltage rating for each line or phase and it will show the phase that is powered.
Results
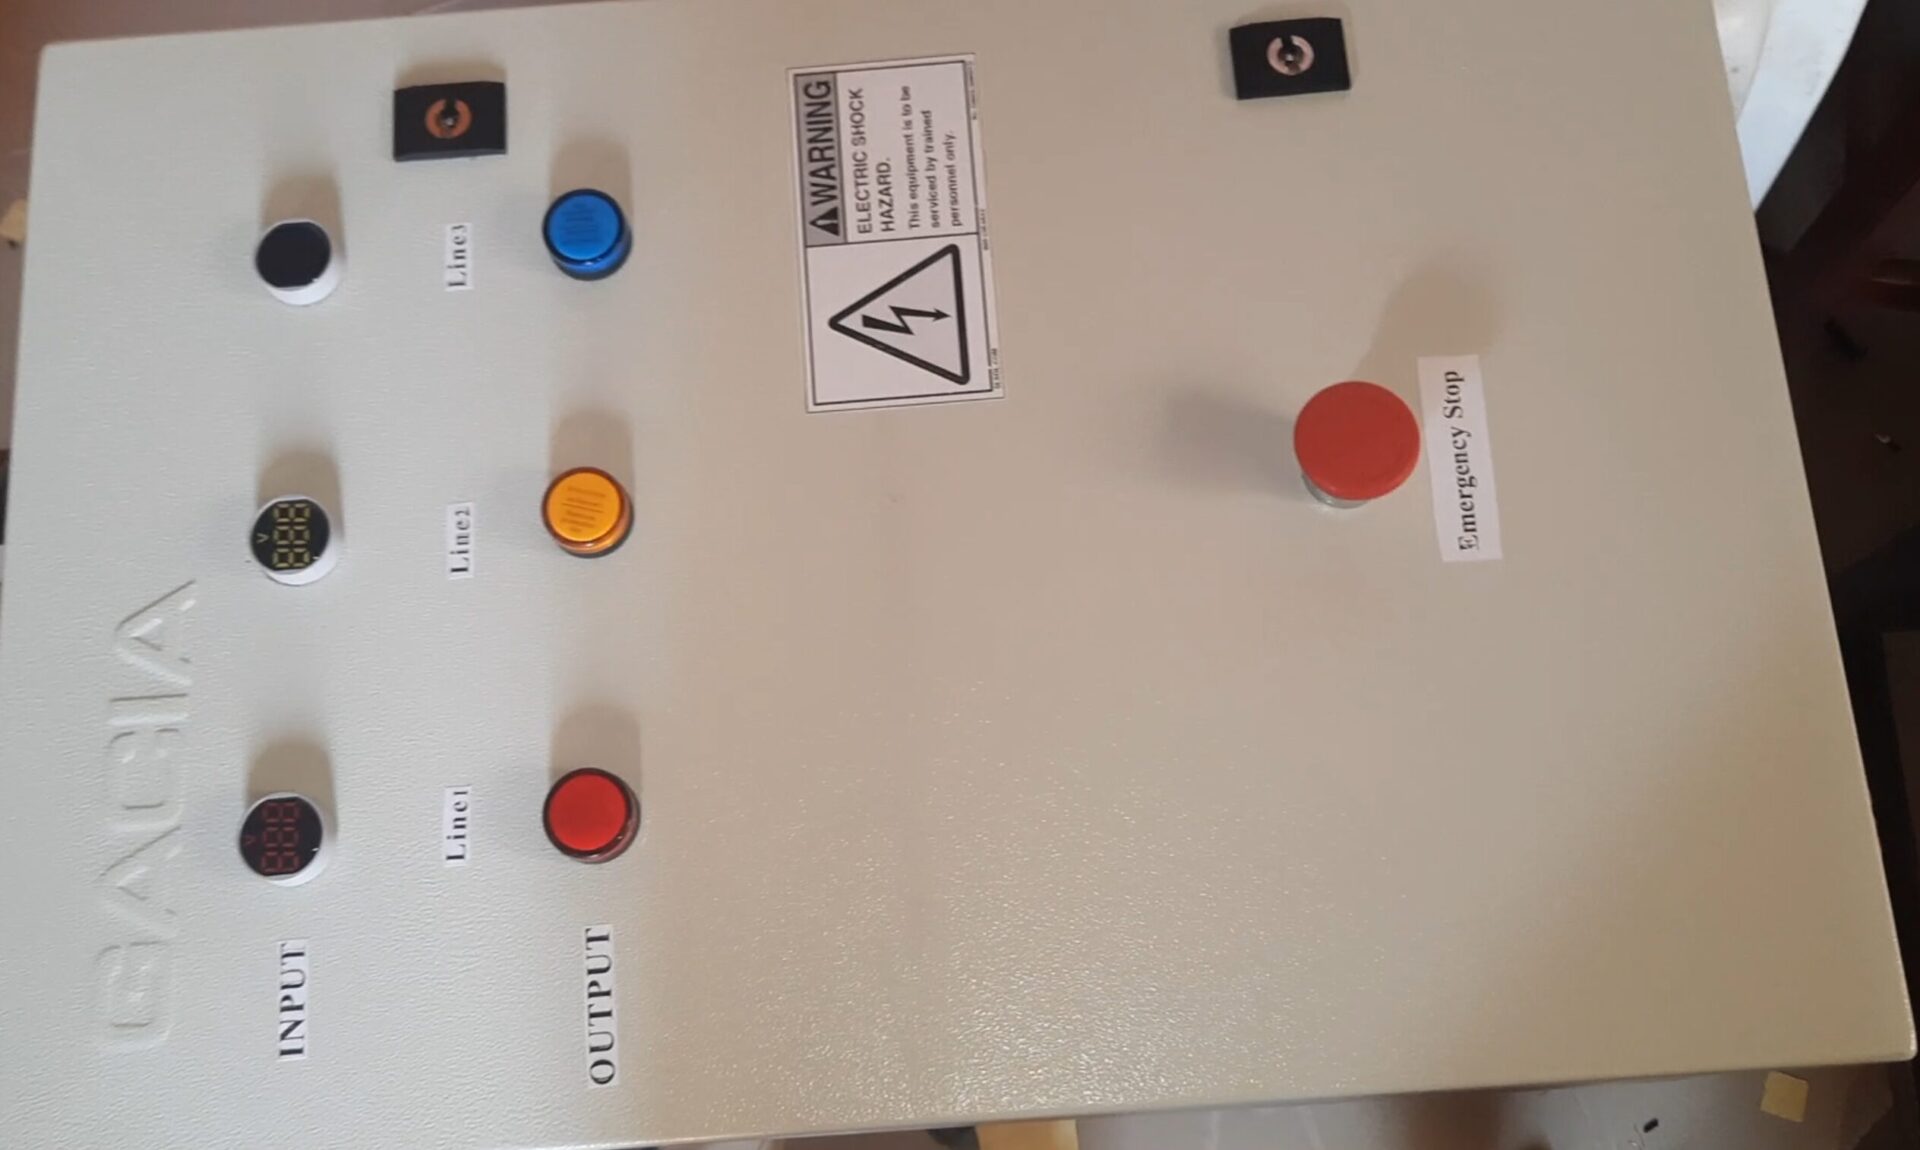
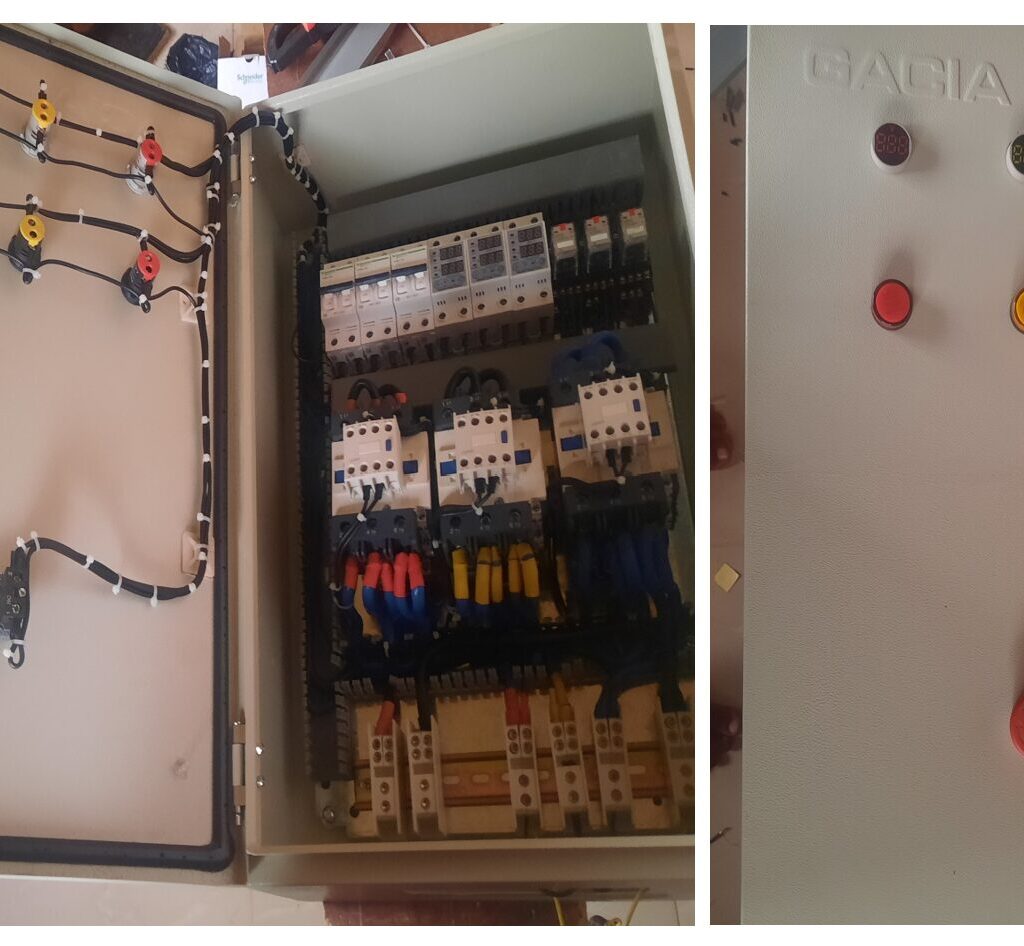
The completed design looks like this on the surface of the design. It is well labelled and contains all the answers to what each of the components displaying out on the surface panel stands for.
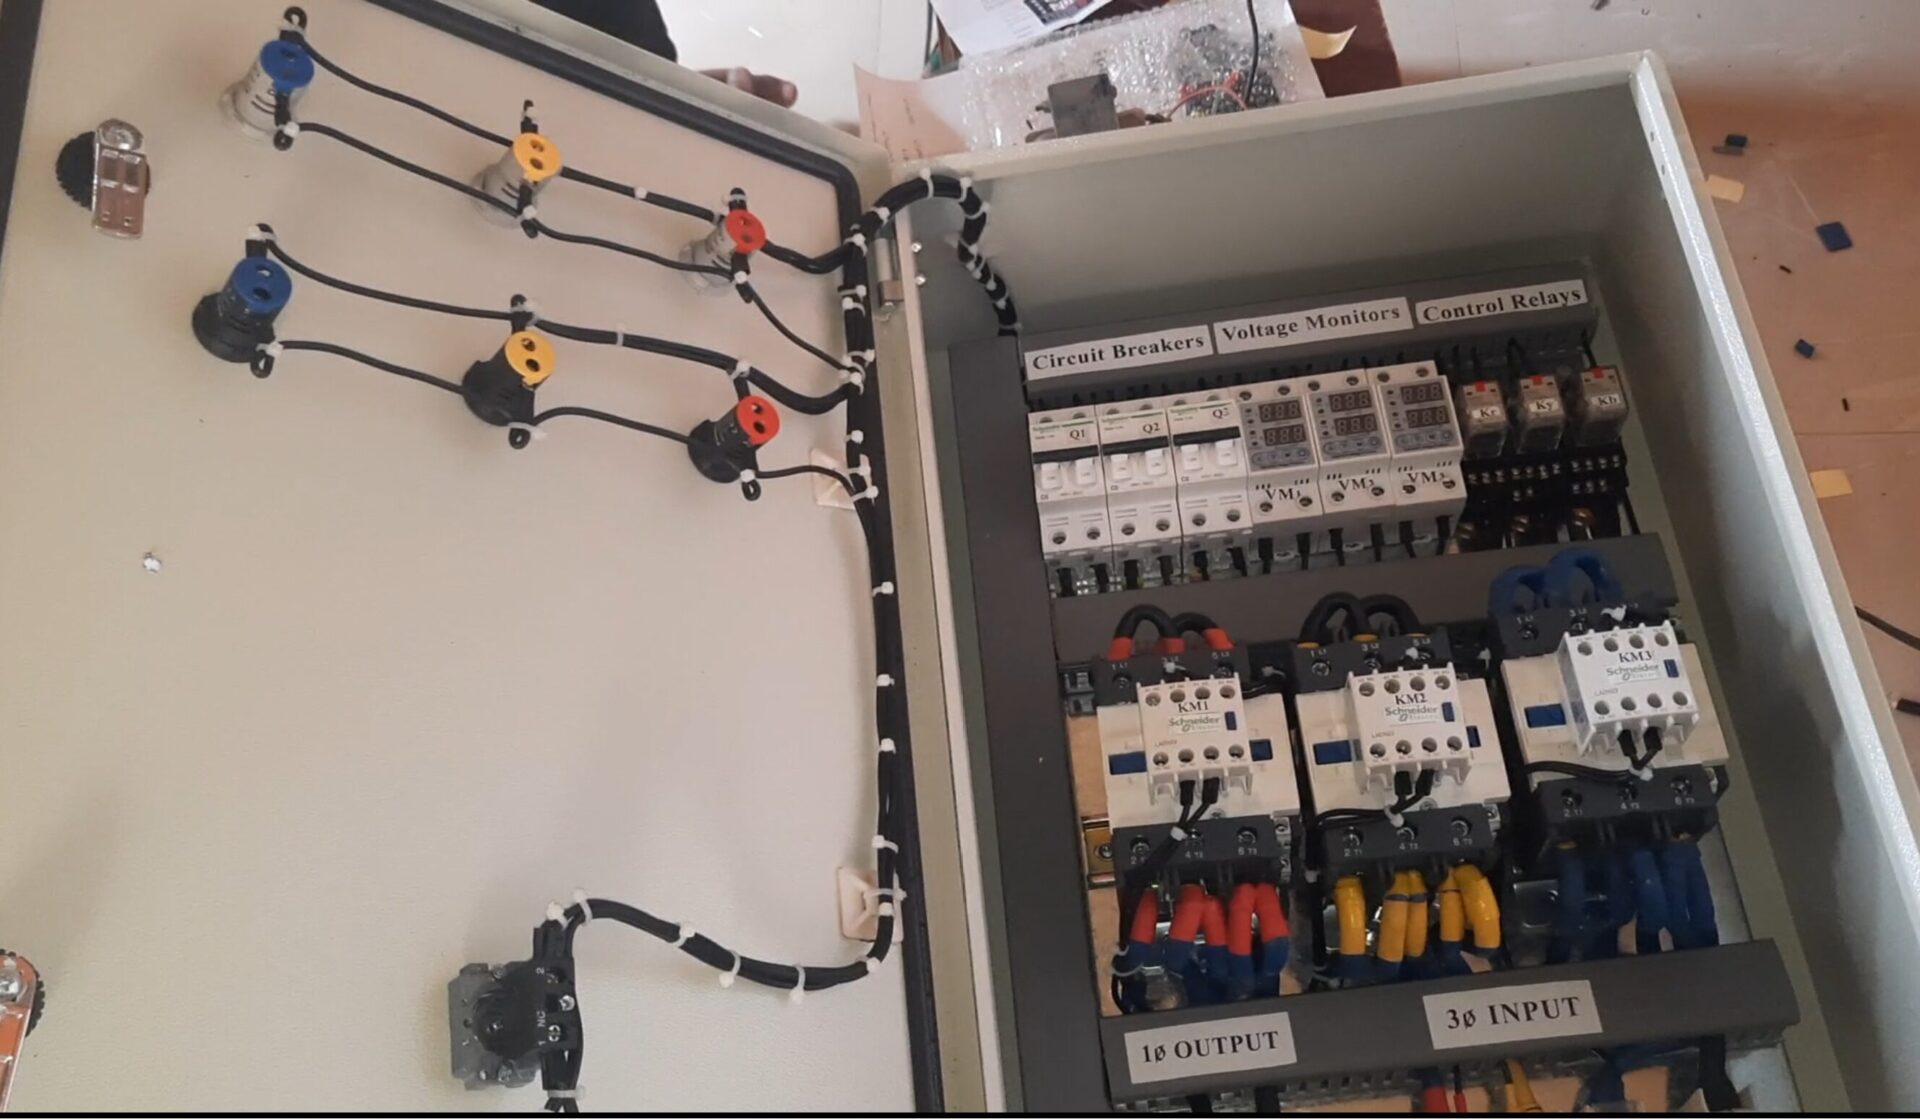
However, for the more technical people; this is what the insides look like. There has been proper cable management, and the inside of the design is looking very neat and pleasing to the eye.
The inside too is also properly labelled. This will allow future electricians to be able to know what each components stand for and be readily abreast with the wiring and design layout in order to diagnose future fault within the Auto Phase selector design.
Conclusion
We have gone through the design on how to build an automatic phase selector panel. This post has been most interesting to lay it out step-by-step, each components needed, their various specifications and how to wire and connected them to make each part work. Let us know if you were able to follow this guide and reconstruct the same design in the comment section.
Read More
- How To Build a 3-Phase Motor Control System
- How to Build a 3-phase Distribution Panel
- How to Design Solar Based Inverter – 0.5KVA Inverter Capacity
FAQs
1. What is an Automatic Phase Selector Panel (APSP)?
An APSP is a device that automatically selects the best available single-phase supply from multiple three-phase sources. This ensures consistent power supply for single-phase loads even when one or more phases of the three-phase supply are unavailable or have issues.
2. What are the benefits of using an APSP?
- Improved reliability: APSPs prevent power outages or equipment damage caused by phase failure or imbalance.
- Enhanced safety: They protect equipment from voltage fluctuations and ensure consistent operation.
- Increased productivity: By eliminating downtime due to power issues, APSPs can boost productivity and efficiency.
- Reduced maintenance: They require minimal maintenance compared to manual phase selection methods.
3. How does an APSP work?
APSPs monitor the voltage and frequency of each phase in the three-phase supply. They use internal algorithms to identify the best available phase based on pre-set parameters like voltage difference, phase sequence, and load requirements. Once the best phase is identified, the APSP automatically switches the single-phase output to that phase.
4. What are the different types of APSPs?
- Single-phase APSPs: These are the most common type and provide single-phase output for single-phase loads.
- Three-phase APSPs: These provide three-phase output for three-phase loads and can switch between different three-phase sources for redundancy.
- Manual/Automatic APSPs: These offer both automatic and manual phase selection options.
5. What factors should I consider when choosing an APSP?
- Load requirements: Choose an APSP with a capacity that matches your load requirements.
- Number of phases: Select either a single-phase or three-phase APSP based on your needs.
- Voltage and frequency range: Ensure the APSP operates within the voltage and frequency range of your power supply.
- Switching time: Choose an APSP with a fast switching time to minimize power interruptions.
- Budget: APSPs vary in price depending on features and capabilities.
- 3 phase automatic phase selector switch: This is another term for an APSP used in three-phase applications.
- Single phase automatic selector switch: This refers to an APSP for single-phase loads.
- Best automatic phase selector panel: The best choice depends on your specific needs and budget. Research and compare features before making a purchase.
- Automatic phase selector panel working principle: See FAQ #3 for a detailed explanation.
- Automatic phase changer for generators: APSPs can be used with generators to ensure consistent single-phase output even when the generator’s voltage fluctuates.
- Phase selection panel price: Prices vary depending on features and capacity. Do your research to find the best value for your budget.
- Automatic phase selector panel installation: Installation should be done by a qualified electrician. Consult the manufacturer’s instructions for proper installation procedures.
- Advantages of automatic phase selector panel: See FAQ #2 for a list of benefits.
- Automatic phase selector panel vs manual phase selector panel: APSPs offer automated switching and improved safety compared to manual selection.
- Automatic phase selector panel for solar power: APSPs can be used with solar power systems to ensure consistent power output even when the sun’s intensity changes