This project design, Anti-Loss And Item Location Device, implements a Bluetooth tracking tag-sized device that is attached user’s items as against losing them or misplacing them. The tracking system uses an android based platform app that is connected via Bluetooth to the smart tag tracker. The Bluetooth tracker was designed to have both an in-range notification and an out-range notification to signal the user about the proximity status of his/her belongings. It provides users a button on the Android screen that can be pressed, which makes the portable tag-sized tracker give out a notification beep that users can follow to ascertain the exact location of the item. The design was constructed to save power and ensure its durability by making use of a replaceable battery and relies on the phone to do all the ‘heavy lifting’ when it comes to data transmission in Bluetooth mode.
Anti-Loss And Item Location Device: The Components Needed
| Components | Quantity |
|---|---|
| 9V Battery | 1 |
| LM7805 5V regulator IC | 1 |
| Pushbutton | 1 |
| 10K, 1K resistors | 3 |
| LED | 2 |
| Atmega328P IC | 1 |
| 16MHz Crystal | 1 |
| NPN resistor | 1 |
| piezo buzzer | 1 |
| Bluetooth module HC-05 | 1 |
| Dc SPST switch | 1 |
Anti-Loss And Item Location Device: The Circuit Diagram
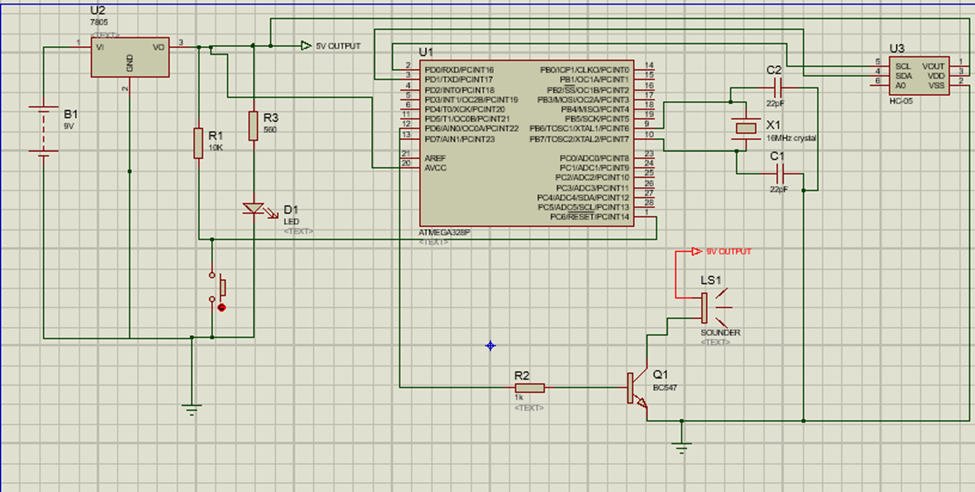
The circuit diagram shown above shows how the Atmega328P IC is connected to the Bluetooth module and other peripherals in the project to make up the design. We connected both the Bluetooth module and the Atmega328P IC to the 5V output from the voltage regulator LM7805.
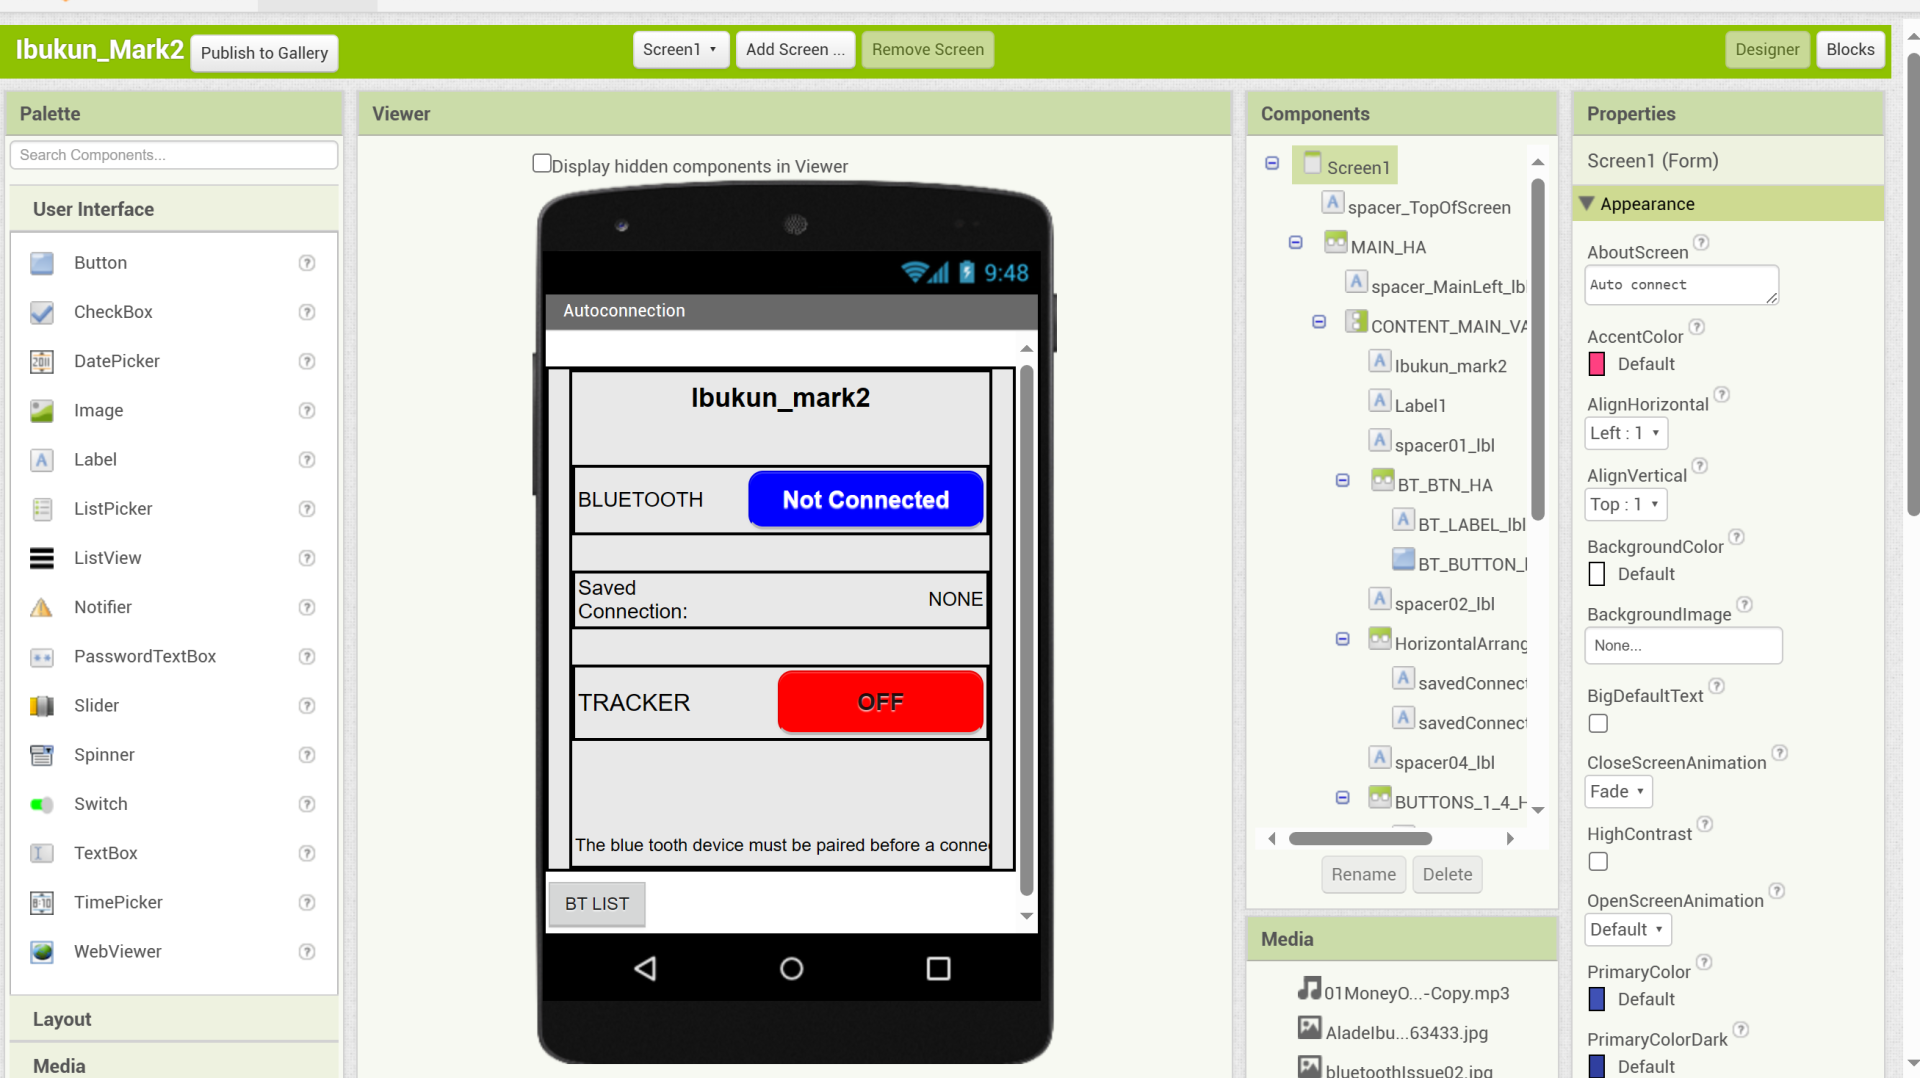
Setting Up And Designing the Android App On MIT AppInventor
The app was created using the MIT App Inventor. Below is a snippet of the block codes.
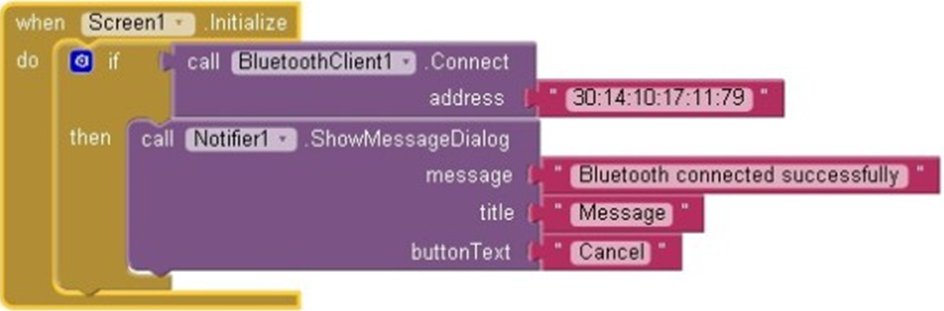
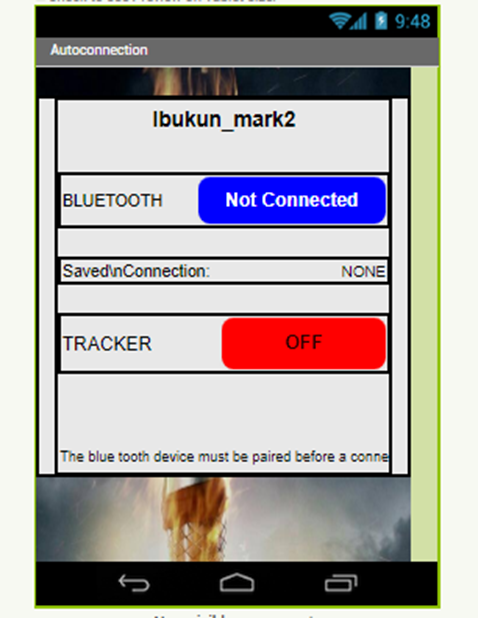
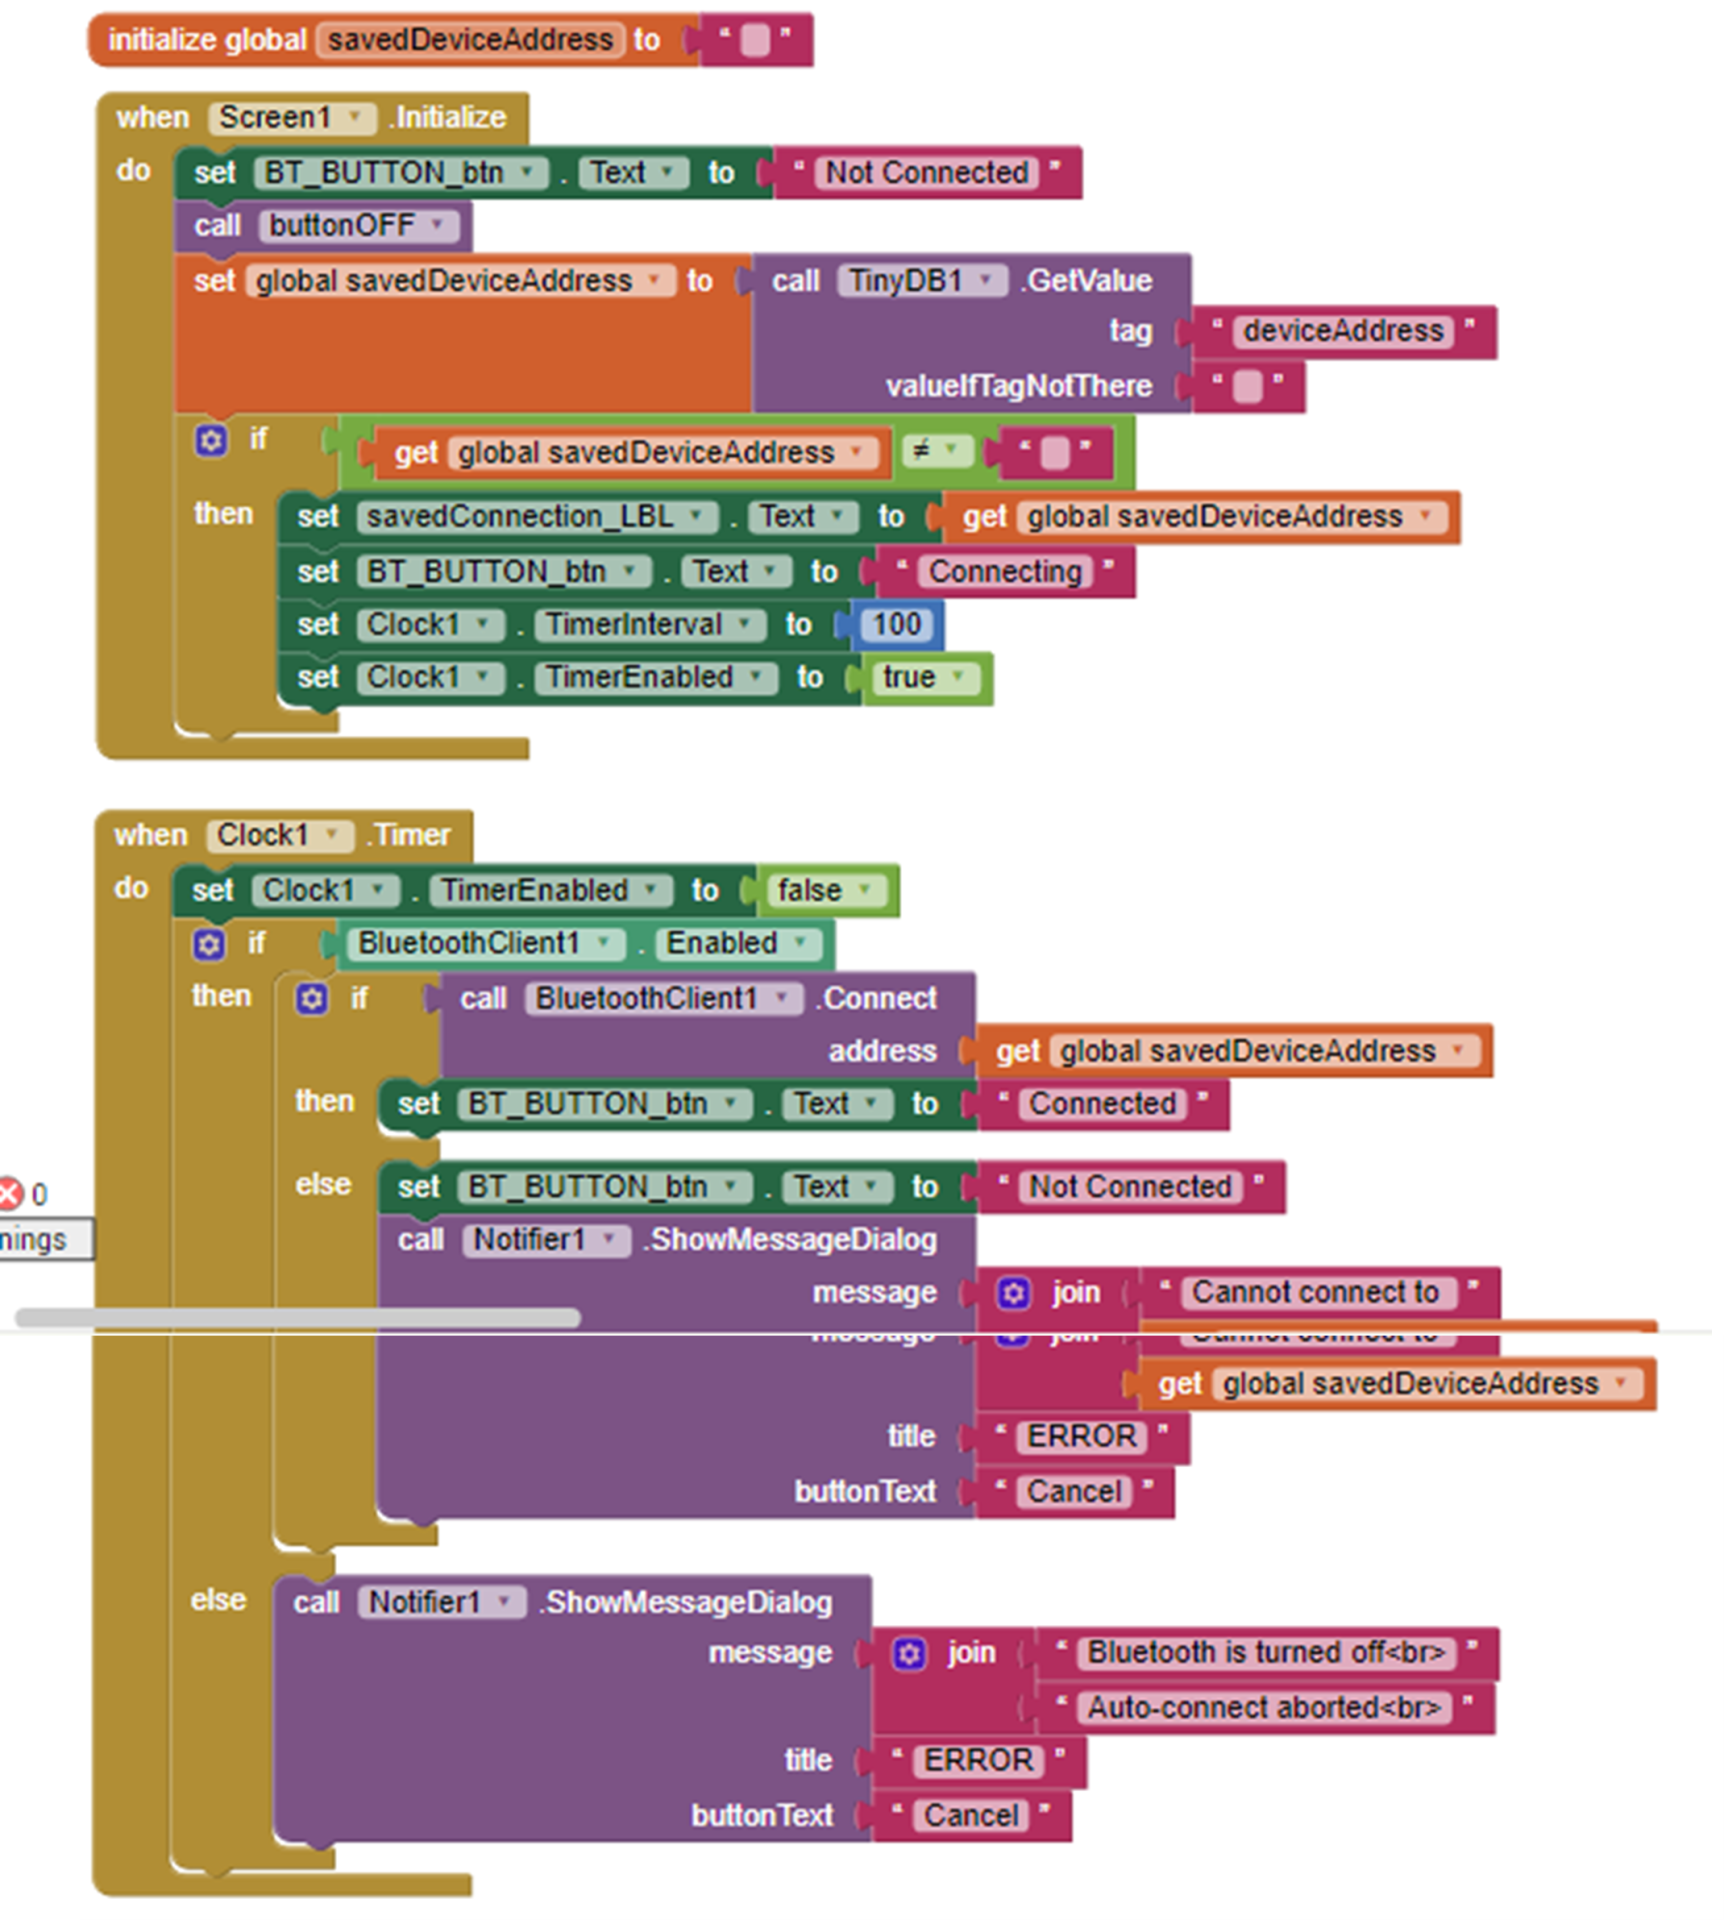
In the app called Ibukun_mark2, our goal was to make the app auto reconnect, that way we can always detect when the app disconnects. And prompt it to notify us and also program it to automatically reconnect when within connection range. The easiest way would be to input the HC-05 address in the screen1.initialize block such that if the Bluetoothclient1 calls that address on startup, it can connect on its own. Then add notifier to shows us successful connection.But this would only limit us to using only one Bluetooth module. This isn’very practical so we had to invent another method. We wanted an app that when we click the bluetooth (BT) button to bring up a list of paired devices. We select one of the paired devices, in my case the HC-05. And If the connection is successful the BT button changes to “Connected”; plays a tone. Leaving us the address of the connected BT device is displayed on screen. Plays another tone when disconnected and autoreconnects when within the paired Bluetooth device range. There are only a few screen elements to note:
- A button to activate the connection process.
- A label to show the saved address.
- The non-visible components required are:
- TinyDB.
- Clock1.
- And of course the Bluetooth client.
We started by initializing a global variable which we can call back at any time during our coding.
The complete .AIA file can be download here for free. You can make some changes on your own if you like.
Anti-Loss And Item Location Device: The Arduino Source Code
boolean debug = true;

#include <SoftwareSerial.h>
SoftwareSerial BTserial(0,1); // RX | TX
// Connect the HC-06 TX to the Arduino RX.
// Connect the HC-06 RX to the Arduino TX through a voltage divider.

// max length of command is 20 chrs
const byte numChars = 20;
char receivedChars[numChars];
boolean newData = false;

int piezoPin = 6;
byte ledPin = 12;
byte names[] = {'c', 'd', 'e', 'f', 'g', 'a', 'b', 'C'};
int tones[] = {1915, 1700, 1519, 1432, 1275, 1136, 1014, 956};
byte melody[] = "2d2a1f2c2d2a2d2c2f2d2a2c2d2a1f2c2d2a2a2g2p8p8p8p";
// count length: 1 2 3 4 5 6 7 8 9 0 1 2 3 4 5 6 7 8 9 0 1 2 3 4 5 6 7 8 9 0
//                                10                  20                  30
int count = 0;
int count2 = 0;
int count3 = 0;
int MAX_COUNT = 24;
int statePin = LOW;


void piezoTone() {
  analogWrite(piezoPin, 0);
  for (count = 0; count < MAX_COUNT; count++) {
    statePin = !statePin;
    digitalWrite(ledPin, statePin);
    for (count3 = 0; count3 <= (melody[count*2] - 48) * 30; count3++) {
      for (count2=0;count2<8;count2++) {
        if (names[count2] == melody[count*2 + 1]) {
          analogWrite(piezoPin,500);
          delayMicroseconds(tones[count2]);
          analogWrite(piezoPin, 0);
          delayMicroseconds(tones[count2]);
        }
        if (melody[count*2 + 1] == 'p') {
          // make a pause of a certain size
          analogWrite(piezoPin, 0);
          delayMicroseconds(500);
        }
      }
    }
  }
}

void setup()
{
     pinMode(ledPin, OUTPUT);
      pinMode(piezoPin, OUTPUT);
     Serial.begin(9600);
     Serial.println("<Arduino is ready>");

     // The default baud rate for the HC-06s I have is 9600. Other modules may have a different speed. 38400 is common.
     BTserial.begin(9600);
}

void loop()
{
     if (BTserial.available() > 0)     {  recvWithStartEndMarkers(); }
     if (newData) { parseData(); }
}


void parseData()
{
        newData = false;
        if (debug) {  Serial.println( receivedChars ); }
        if (receivedChars[0] == 'O'  && receivedChars[1] == 'N' )  {
          piezoTone();
          }
        if (receivedChars[0] == 'O'  && receivedChars[1] == 'F' )  {
          digitalWrite(ledPin,LOW);   }
}


void recvWithStartEndMarkers()
{

     // function recvWithStartEndMarkers by Robin2 of the Arduino forums
     // See  http://forum.arduino.cc/index.php?topic=288234.0

     static boolean recvInProgress = false;
     static byte ndx = 0;
     char startMarker = '<';
     char endMarker = '>';
     char rc;

     if (BTserial.available() > 0)
     {
          rc = BTserial.read();
          if (recvInProgress == true)
          {
               if (rc != endMarker)
               {
                    receivedChars[ndx] = rc;
                    ndx++;
                    if (ndx >= numChars) { ndx = numChars - 1; }
               }
               else
               {
                     receivedChars[ndx] = '\0'; // terminate the string
                     recvInProgress = false;
                     ndx = 0;
                     newData = true;
               }
          }

          else if (rc == startMarker) { recvInProgress = true; }
     }
}
Conclusion
The project design did very well when used and it worked for us. Let us know if you used this blog post as a guide to build your own project in the comment section below.

