When it comes to tinkering with electronics, servo motors are a game changer. They’re like the wrists of a robot, allowing precise control of angular movement. Imagine turning a knob and seeing a motor follow your every twist — that’s what we’re about to dive into. In this project, we’ll learn how to rotate a servo motor using a 10k potentiometer and, to spice things up, integrate IoT functionality using the Blynk platform. Let’s get started with servo motor control using Blynk IoT platform.
Why Choose Servo Motors?
Servo motors are the go-to for precise rotational movements. Unlike regular DC motors that spin continuously, servos operate within a defined angle range, typically 0 to 180 degrees. They’re widely used in robotics, RC cars, and automated systems. What’s not to love about their versatility?
Read Also: Building a Self-Sustaining Smart Streetlight With Arduino
What is a Potentiometer?

A potentiometer (or pot for short) is a variable resistor that lets you adjust resistance by turning a knob. It’s like the volume dial on old-school radios. Here, the potentiometer serves as the control interface to adjust the servo’s position. Simple, right?
Read Also: Face and Fingerprint Recognition Biometric Surveillance Project
Adding IoT with Blynk: The Magic Touch

By adding IoT functionality, we can control the servo motor remotely using the Blynk platform. Think of it as upgrading your remote control to a smartphone app. The Blynk slider widget will act as a virtual potentiometer for our project. Fancy, huh?
Components You’ll Need
Before jumping into the setup, make sure you have these:
- Arduino Uno (or any compatible board)
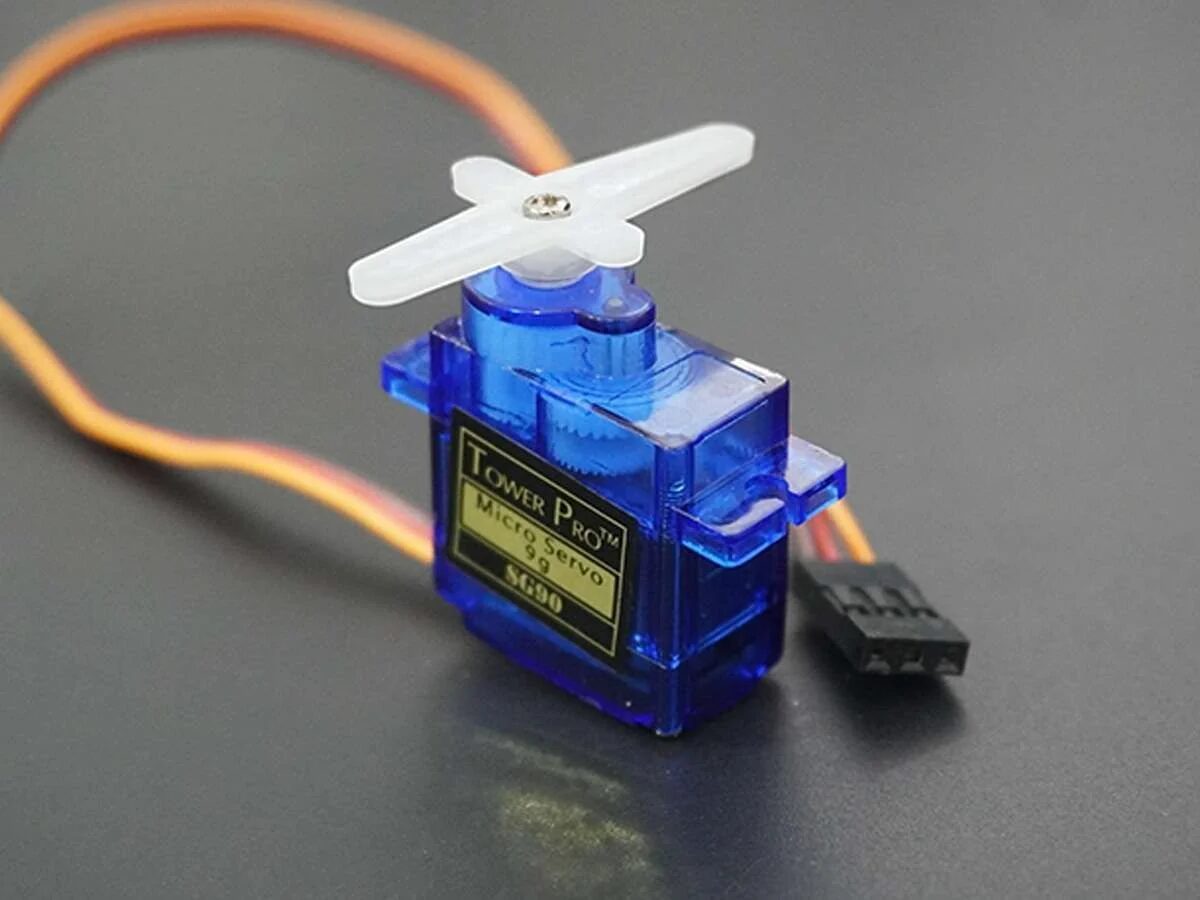
- SG90 Servo Motor
- 10k Potentiometer
- Breadboard and Jumper Wires
- Wi-Fi Module (ESP8266 or similar, if not using an IoT-compatible Arduino)
- Blynk App (available for Android and iOS)
- USB Cable
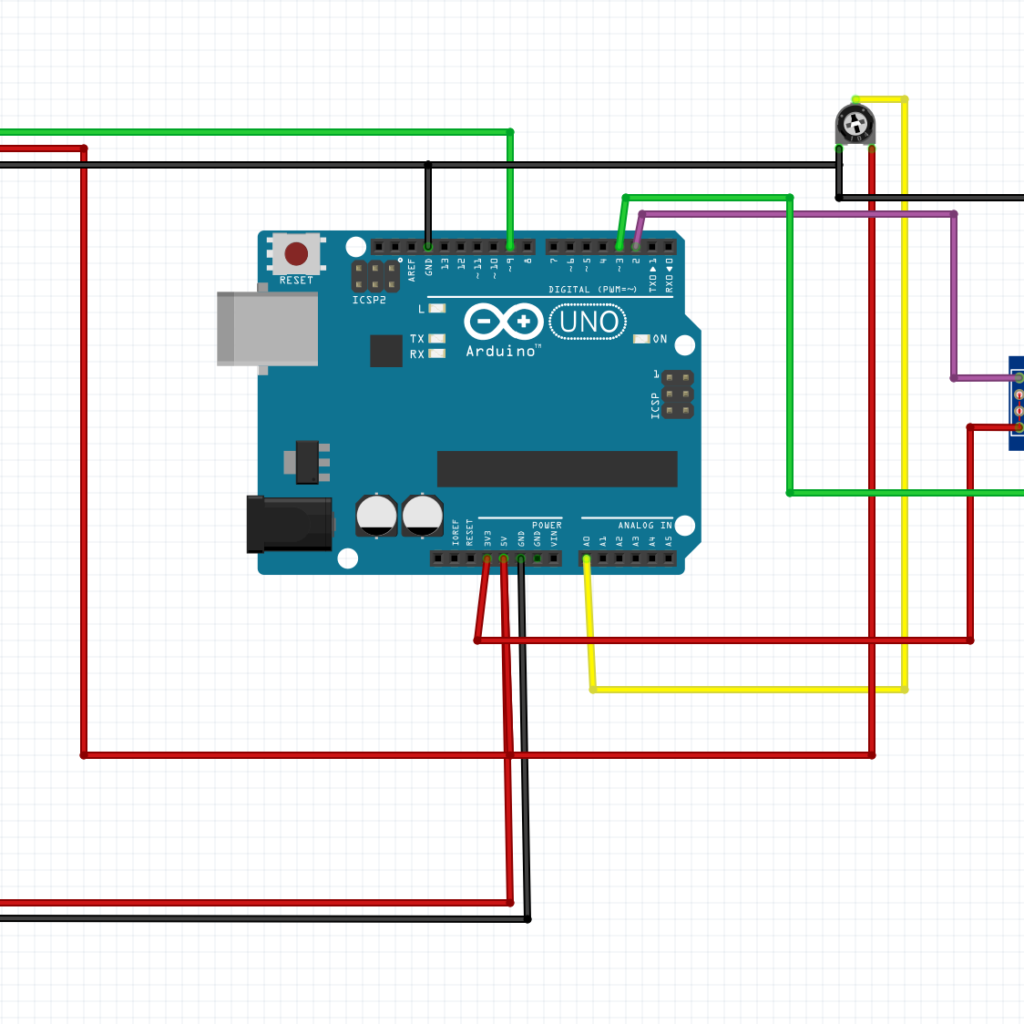
Schematic Diagram

This is a detailed diagram here showing the Arduino, potentiometer, servo motor, and connections. The IoT board here is the ESP8266-01 module. We used software serial connection for the Arduino Uno whereas the ESP-01 was hardware serial connection.
Read Also: Sleep Hygiene 101: Creating a Restful Environment for Better Rest
Servo Motor Control Using Blynk App: Wiring the Setup
Follow these steps to wire everything up:

- Servo Motor:
- Connect the red wire to 5V on the Arduino.
- Connect the brown wire to GND.
- Connect the orange wire to digital pin 9.
- Potentiometer:
- Connect one outer pin to 5V.
- Connect the other outer pin to GND.
- Connect the middle pin (wiper) to A0.
- IoT Module (Optional):
- Connect as per your module’s specifications, ensuring power, TX/RX, and GND are appropriately wired.
Coding the Project
Time to write some code! Fire up the Arduino IDE.
Basic Code for Servo and Potentiometer
#include <Servo.h>

Servo myServo; // Create a servo object
int potPin = A0; // Pin connected to potentiometer
int potValue = 0; // Variable to store potentiometer value
int angle = 0; // Variable to store servo angle

void setup() {
  myServo.attach(9); // Attach servo to pin 9
  Serial.begin(9600);
}

void loop() {
  potValue = analogRead(potPin); // Read potentiometer value
  angle = map(potValue, 0, 1023, 0, 180); // Map value to servo range
  myServo.write(angle); // Rotate servo to angle
  delay(15); // Small delay for smooth movement
}
Adding IoT Functionality with Blynk
To use Blynk, install the Blynk library from the Arduino IDE Library Manager. Then, update your code as follows:
#define BLYNK_TEMPLATE_ID "YourTemplateID"
#define BLYNK_DEVICE_NAME "YourDeviceName"
#define BLYNK_AUTH_TOKEN "YourAuthToken"

#include <Servo.h>
#include <BlynkSimpleEsp8266.h>

char auth[] = BLYNK_AUTH_TOKEN; // Blynk auth token
char ssid[] = "YourWiFiSSID"; // Wi-Fi name
char pass[] = "YourWiFiPassword"; // Wi-Fi password

Servo myServo;
BLYNK_WRITE(V1) {
  int sliderValue = param.asInt(); // Get slider value from app
  myServo.write(sliderValue); // Move servo
}

void setup() {
  Blynk.begin(auth, ssid, pass);
  myServo.attach(9);
}

void loop() {
  Blynk.run();
}
How It Works

- Local Control with Potentiometer:
- Turn the potentiometer to control the servo’s position.
- The analog value (0-1023) is mapped to the servo’s range (0-180 degrees).
- Remote Control via Blynk:
- Open the Blynk app and add a slider widget.
- Link the slider to Virtual Pin V1.
- Adjust the slider to rotate the servo from your smartphone.
Debugging Tips
- Ensure your servo’s power source can handle its current requirements.
- Double-check your Wi-Fi credentials in the code.
- Use
Serial.print()statements to troubleshoot sensor readings and Wi-Fi connections.
Advantages of Combining Potentiometer and IoT
- Dual Control: Local and remote operation offer flexibility.
- Precision: Potentiometer provides manual fine-tuning.
- Convenience: IoT allows control from anywhere.
Challenges You Might Face
- Power Issues: Servo motors can draw significant current. Use an external power source if needed.
- Wi-Fi Connectivity: Ensure your network is stable and supports the IoT module.
- Delay in Response: Adding IoT may introduce slight lag due to network latency.
Applications of Servo Motor Control
- Robotic Arms: Precise control for picking and placing objects.
- Smart Blinds: Adjust window blinds remotely.
- Camera Gimbals: Stabilize cameras for smooth video recording.
Fun Add-Ons
- LED Indicator: Add an LED to show the servo’s position visually.
- OLED Display: Display the angle in real-time on a small screen.
- Voice Control: Integrate with Alexa or Google Assistant for voice commands.
Conclusion
And there you have it! You’ve just learned how to control a servo motor using a 10k potentiometer and enhance it with IoT functionality via the Blynk app. This project not only teaches you the basics of servo control but also opens the door to endless possibilities in home automation and robotics. Now it’s your turn to take this foundation and build something extraordinary!
FAQs
1. Can I use a different servo motor? Yes, as long as it’s compatible with Arduino. Ensure you check the voltage and current requirements.
2. What’s the range of the potentiometer? A 10k potentiometer typically ranges from 0 to 10,000 ohms, giving precise control over resistance.
3. How can I power the servo motor if it draws too much current? Use an external power source like a battery pack or a dedicated power supply unit.
4. Can I add multiple servos? Absolutely! Just assign each servo to a separate digital pin and modify the code accordingly.
5. Is the Blynk app free? Blynk offers free and paid versions. The free version is sufficient for basic projects like this one.