In today’s post, we will be doing a simulation of of motion based home automation using PIR sensor, Arduino and Proteus circuit wizard. The passive infrared (P.I.R) sensor will be used to simulate the presence and absence of motion and this in turn will be used to control the state of an A.C light bulb, by turning on or off the relay connected to the AC bulb. And we note the state of each condition when displayed on the LCD, also printed on the serial console. Let us get into home automation simulation using Arduino, Proteus and PIR sensor.
Proteus Design and Circuit Simulator Version
The version of Proteus design and circuit simulator is Proteus version 8.13. you can find the can be downloaded from the Github link here and the libraries used for this tutorial. The Proteus version allowed us to quickly simulate this circuitry without paying for the Proteus app itself. Once download, you can unzip the folder and install the app itself.

Copy and Paste Proteus Libraries Into Proteus Library Folder
After the successful installation of the app, the Proteus folder can be accessed to put the libraries that came with these file. For most installations this is found at the address C:\Program Files (x86)\Labcenter Electronics\Proteus 8 Professional\DATA\LIBRARY. For Windows’ users that is.
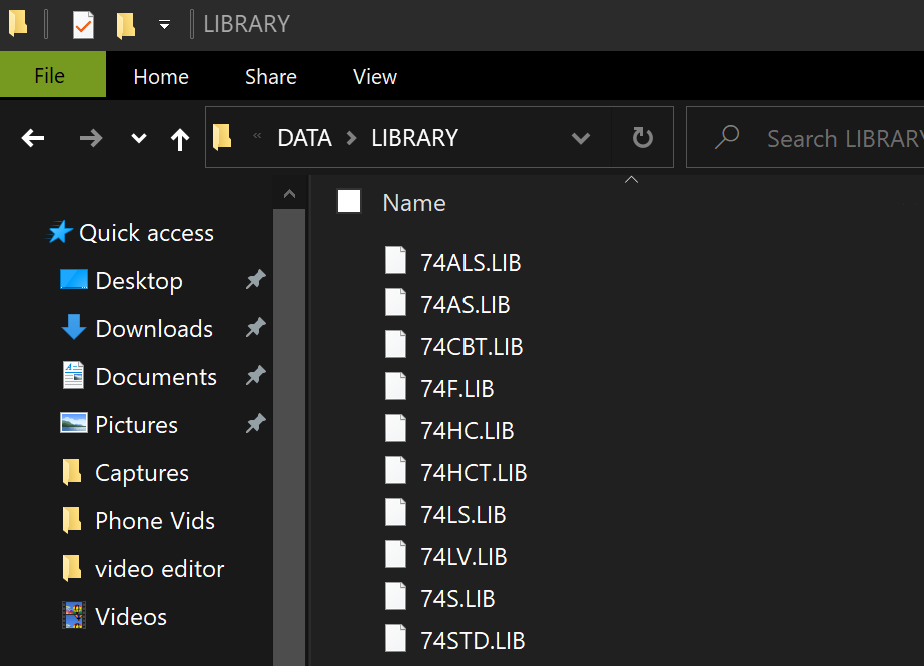
When you are here, you can go back to where your library folders are and unzip all the libraries you need for this tutorial. Copy and paste them inside this location shown above. Once the this is done, close the folder and return to your Proteus app. Right click to run it as an admin.
Running the Proteus in admin mode will give you permissions and access to control all aspects on the design and circuit simulation IDE.
When the circuit IDE open, we will have the option to either be asked to create a new project. This is shown below.

This place will show you the option of either opening an existing project, creating a new one or open an existing project. There is also the option of creating a new flowchart or open sample of it.
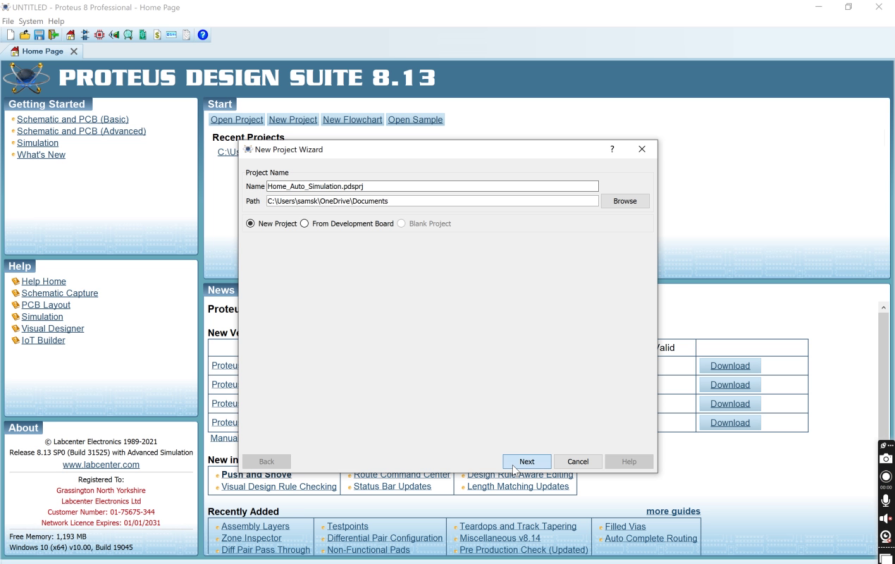
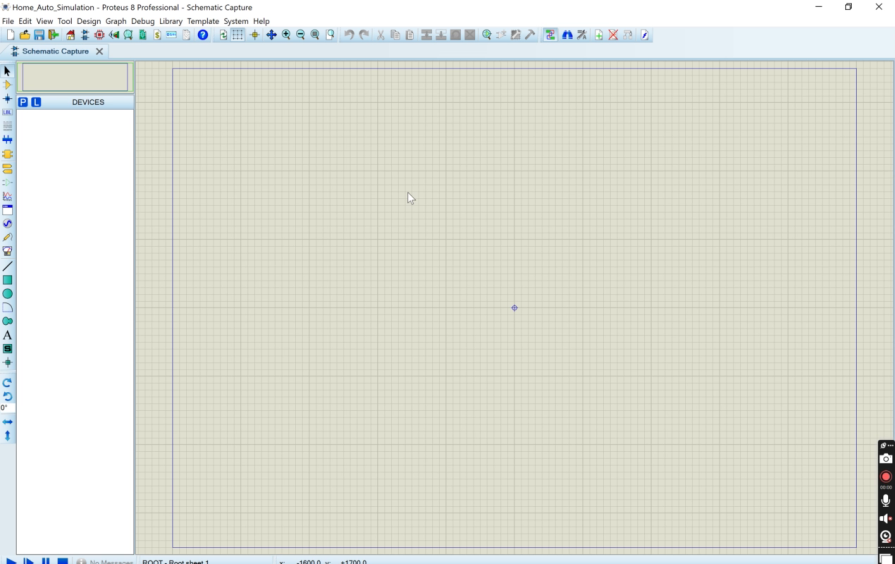
Enter or choose the name you want for your project, for this tutorial, we tagged it “Home Automation Simulation“. Click next after that and keep clicking next until the simulation schematic capture background opens.
Home Automation Simulation using Arduino Proteus: Selecting the Components
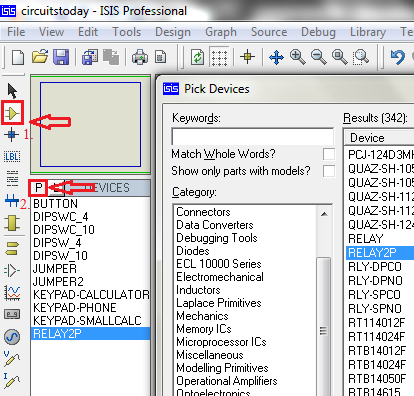
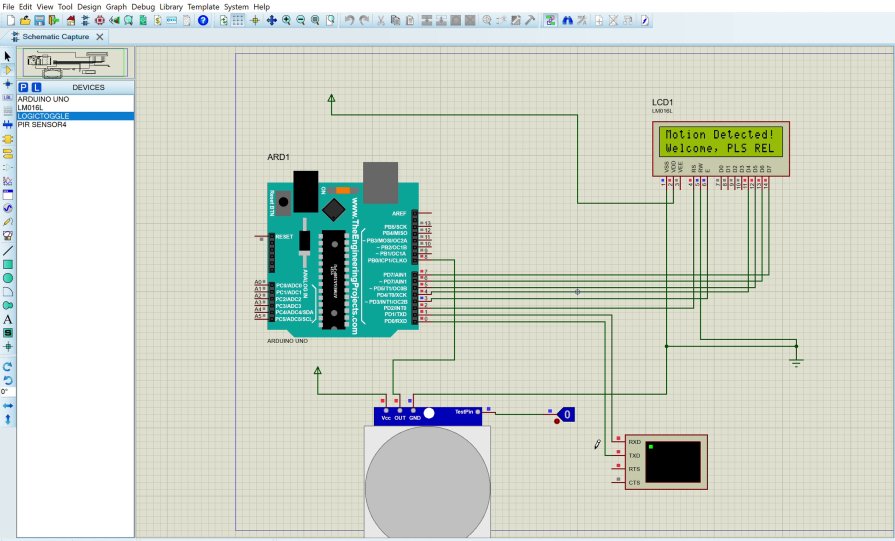
We selected this component selection symbol as shown above in 1, then picked the components themselves that we needed. We are using the Arduino Uno, the PIR sensor, the 1602 LCD, etc.
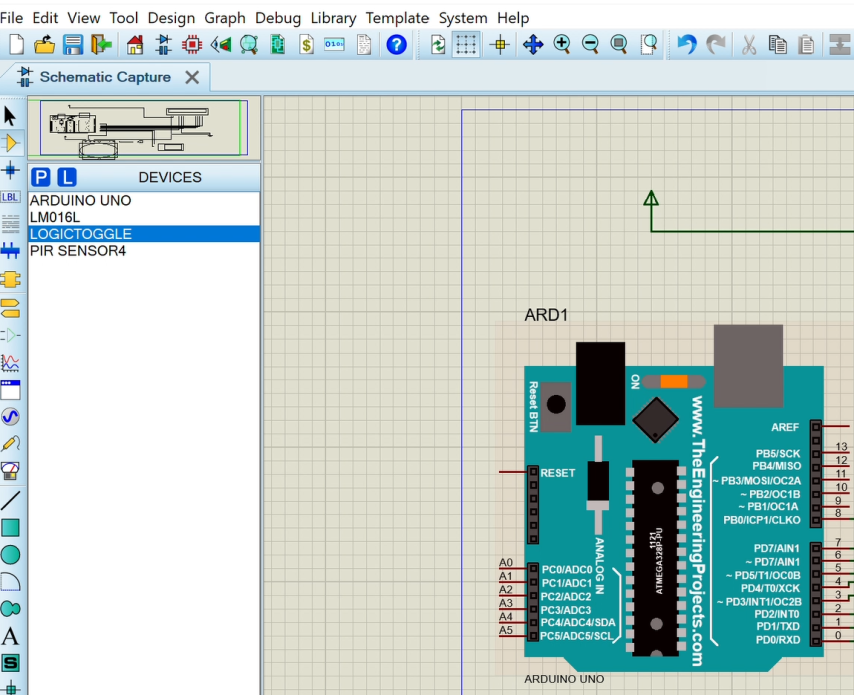
Position these components as they should be. And next this is to connect them. You can watch the YouTube video to get acquainted on how best to go about it.
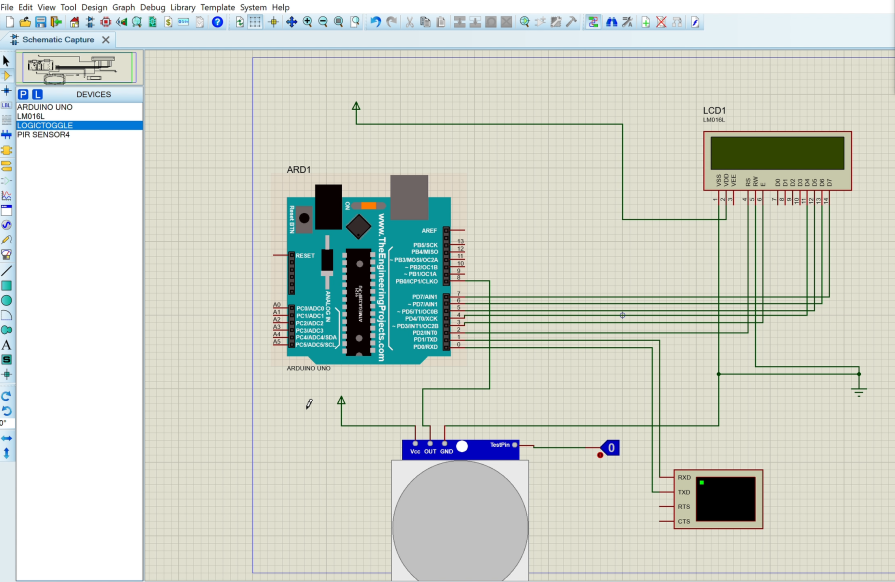
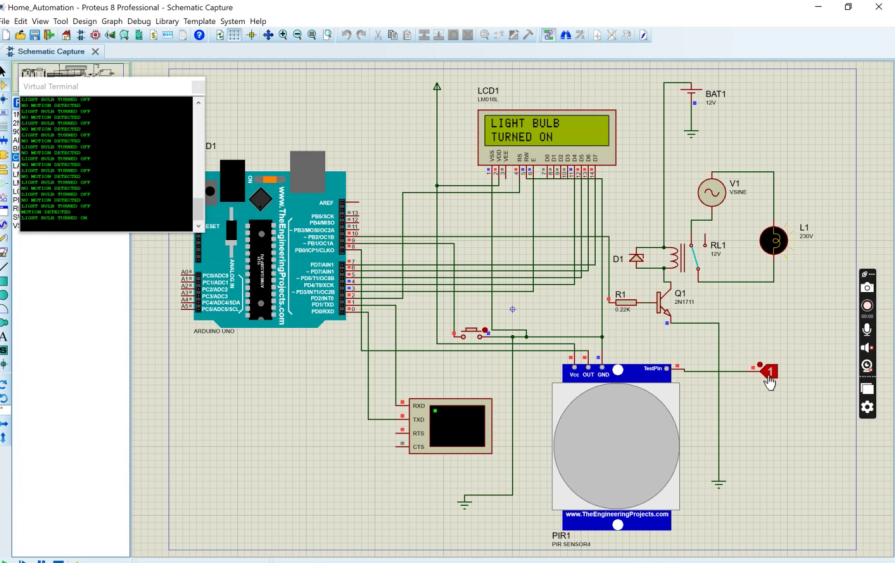
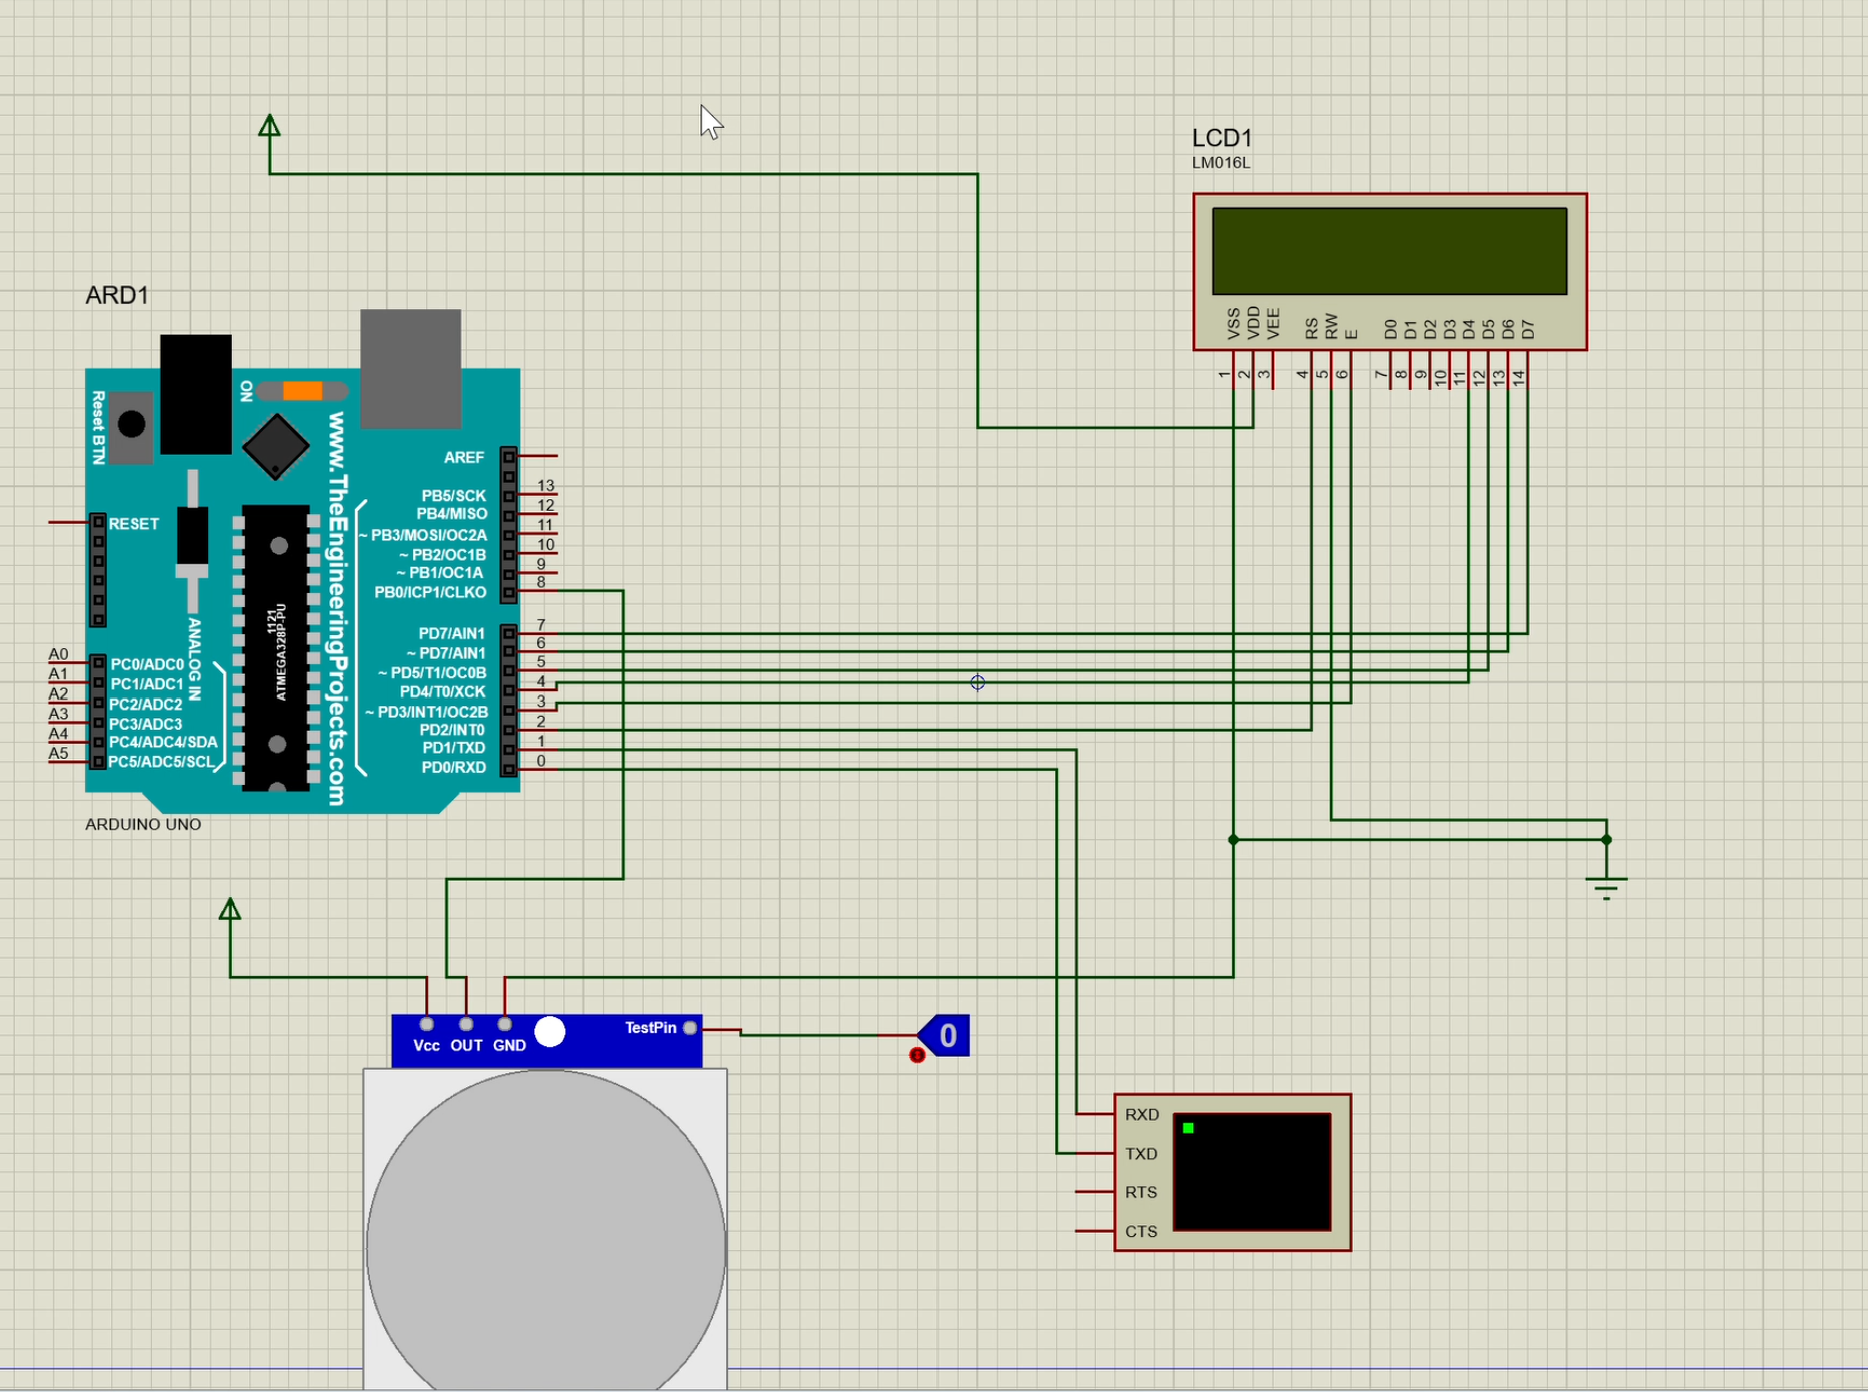
The final outlook would resemble the image above. You can add the virtual terminal as a way to see the serial prints of the Arduino Uno. This attached serial print for the home automation simulation using Arduino Proteus also as the admin backend side where he or she can see what is going on. The LCD connection here is done in the 4-bits mode using only 4 wires instead of the the 8 wires mode. The Vdd is connected to power and you can choose to put a +5V to it or not. It will work in the simulation. All ground pins of the components must be connected to the ground.
Programming The Code (Arduino Sketch)

Open up the Arduino IDE, look for the code that named simulation_1, downloaded from the Github page. Copy this code and paste it into the Arduino IDE. Please save this file.
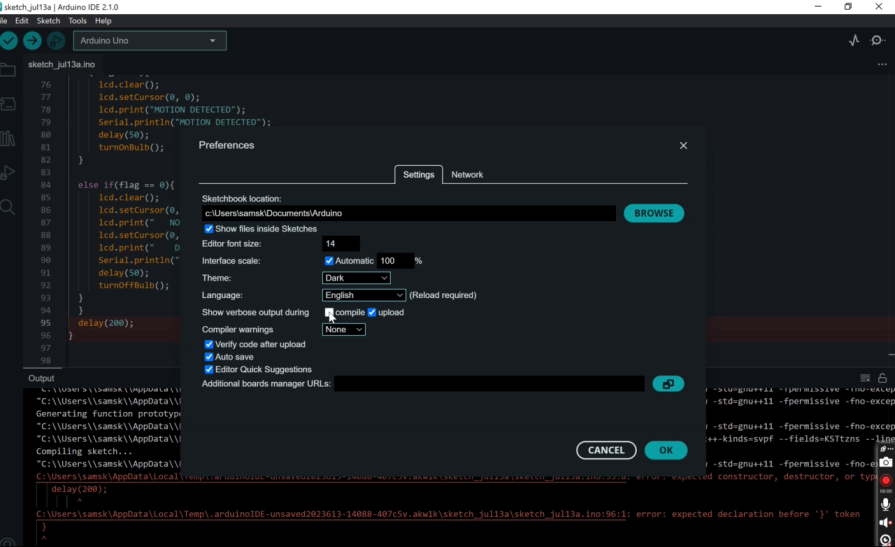
Before running this code, click on File, select Preference, make sure the Compile checkbox is checked or enabled. After that, click okay and proceed to verifying the Arduino sketch.
Arduino Code Explanation
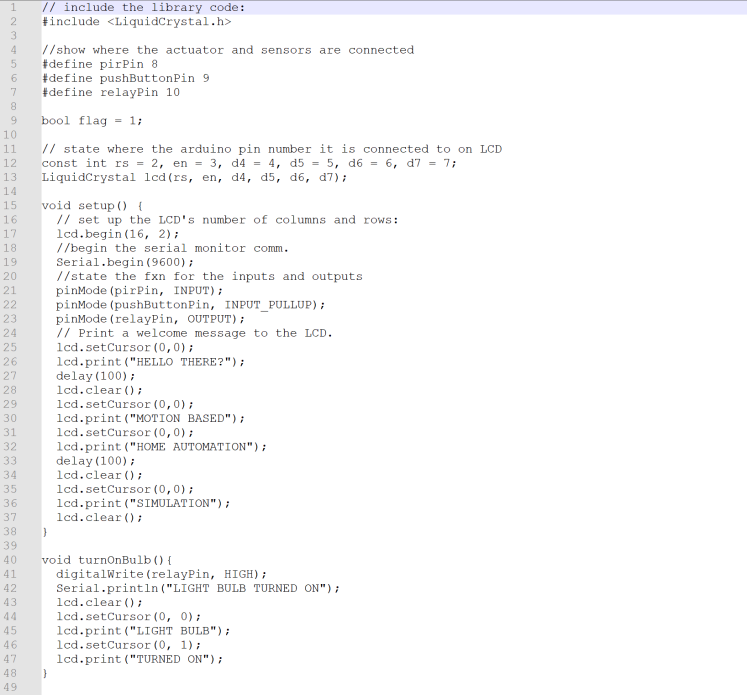
The sketch already has a comment lines explaining the code line. However, in summary, we displayed a welcome message in the setup() function. We created a custom function called turnOnBulb() which was used to turn on the light bulb and display on the LCD that the light has been turned on. Also, another turnOffBulb() function which was used to turn off the bulb and display this state on the LCD.
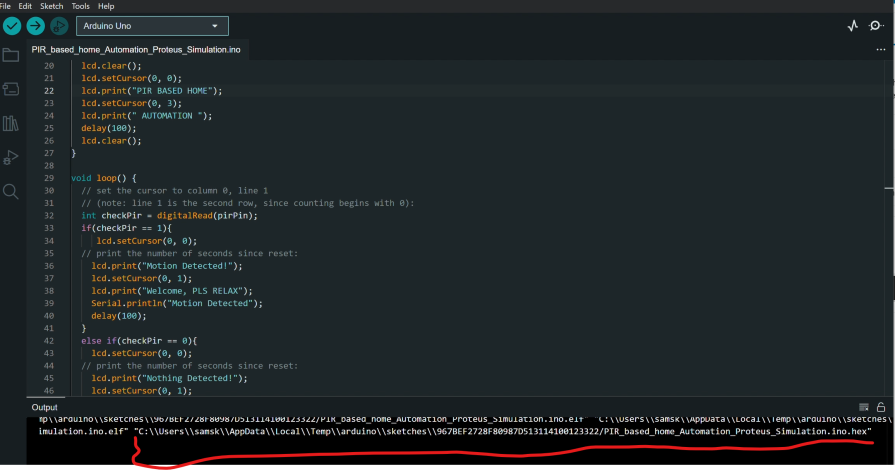
Copy the HEX code address after successfully compiling the source code. This is found in the output console. Now take the HEX code address into the Proteus IDE and paste into into the Arduino Uno.
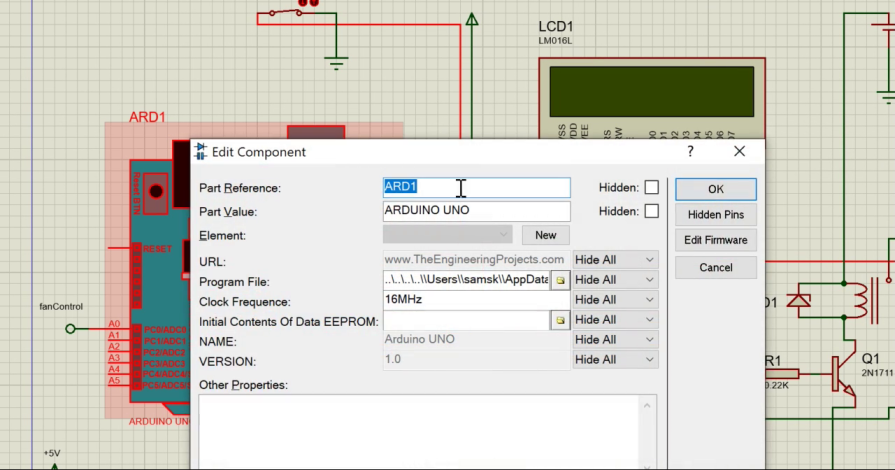
When we double-click on the Arduino Uno, we can paste the HEX code in the program file address. After that, click OK. And the edit component box will disappear. Now, run your simulation.
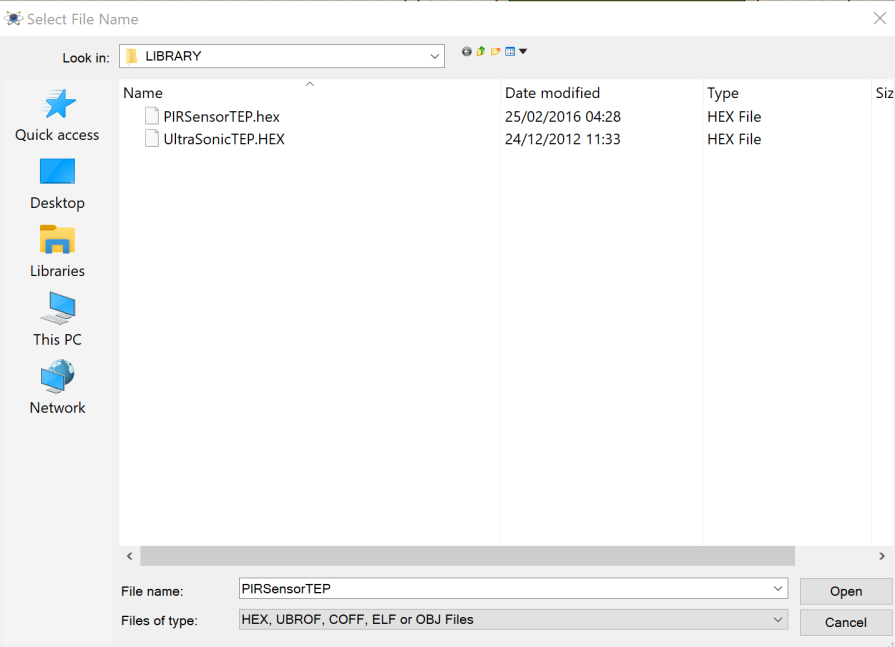
Getting Unable to Open HEX File Error
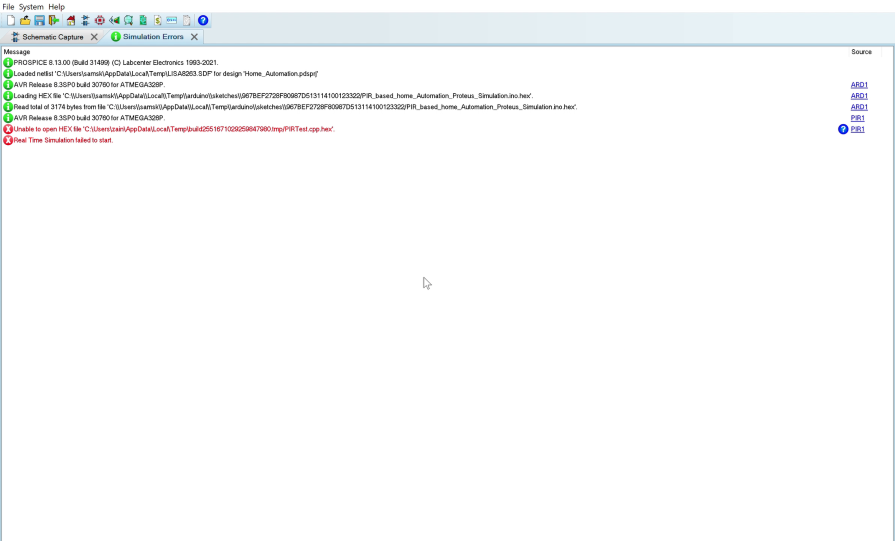
This type of error won’t allow the simulation to run. Because the PIR sensor has have access to its HEX file. To solve this, double-click on the on the PIR sensor, within the Program File address, double click on the file sign and navigate to the Proteus library.
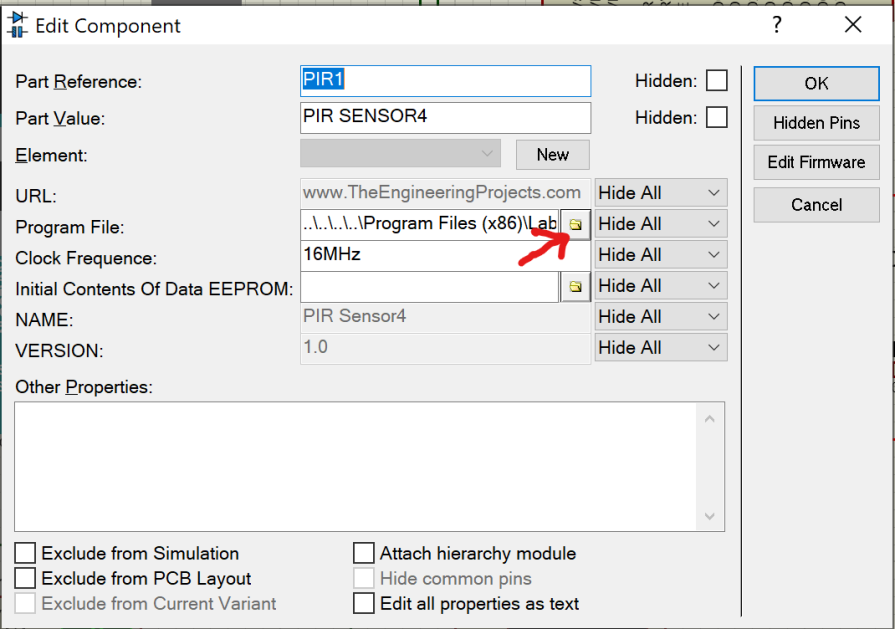
You will find the PIR sensor HEX file the address in the library. Then select it, by double-clicking on it. The rest is just history afterwards. The program should be able to run effectively now.
Conclusion
When motion is sensed, our display show show something and the light bulb should come on otherwise, the lightbulb will be turned off and the LCD will display a message at each interval what is happening.