We have previously been successful of adding the images to our HTML website; we have also learned how to add an external link and internal links that can connect the other pages of the website and make it easier to navigate the entire website. In this edition, we will be explaining tables in HTML. Although we have touched on this in the previous HTML codes, let us dive deeper.

Supposedly, we want to include a work experience section, as shown above, or a sequential gallery of works of literature you have amassed. This, you can call books and teaching.
  <h3>Work Experience</h3>
  <table>
    <tr>
      <td>2017-2018: National Youth Service Corp</td>
      <td>2019-Current: Smartech Embedded Systems Programmer</td>
    </tr>
    <tr>
    </tr>
  </table>
HTML tables come in play when we want our paragraphs to be indented at the same level. As in the above picture of Work Experience, the whole table is done using one table row <tr>…</tr> and two table data cells <td>…</td>. It would be nice to note that the table row, <tr>…</tr> only creates a row of a table in HTML. whereas the <td>…</td> makes up the data or forms a column as we proceed down to populate the table.
<table>
  <tr>
    <td>Product Name</td>
    <td>Price</td>
    <td>Quantity</td>
  </tr>
  <tr>
    <td>T-Shirt</td>
    <td>$19.99</td>
    <td>5</td>
  </tr>
</table>
The code above represents a simple table in HTML, The <tr>…</tr> lays the foundation by creating a row for the table cells to populate. In there, the data cells creates 3 information columns namely, the “product name”, “price” and “quantity”. And once another row is created, the data for this labels are filled with their respective values.
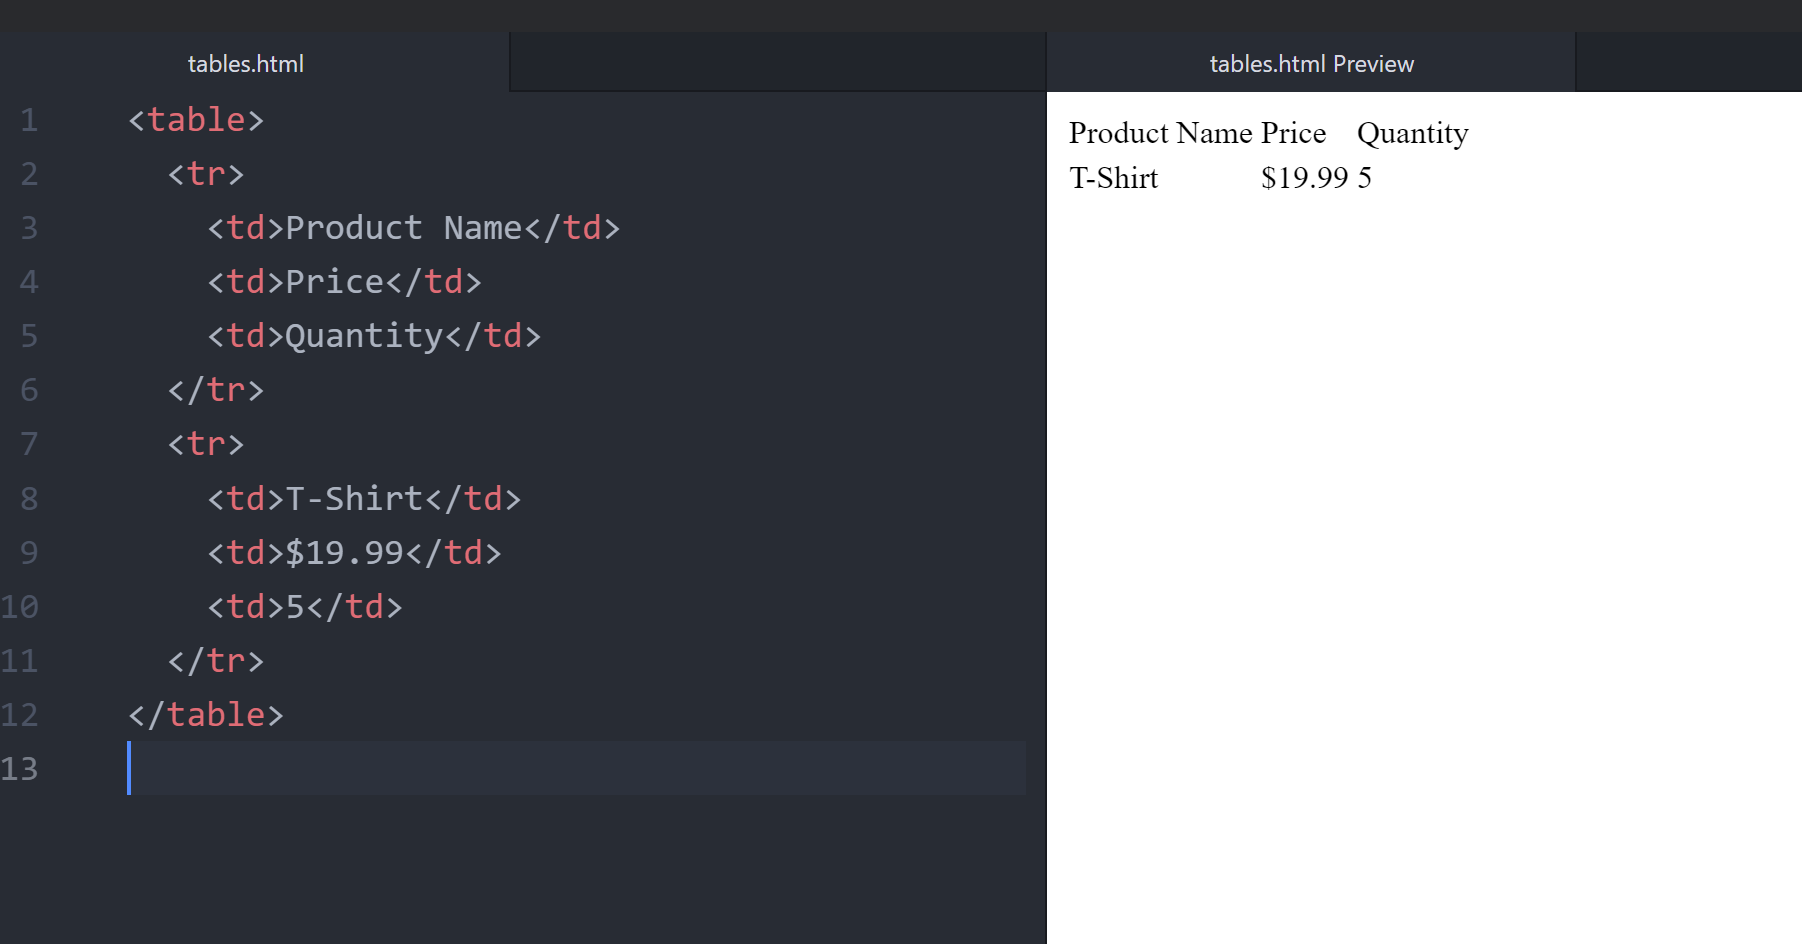
In this example, the first row (<tr>) defines the table headers – “Product Name,” “Price,” and “Quantity.” The subsequent row (<tr>) contains the actual product details for a T-Shirt.
Think of an HTML table as a grid – a structured way to organize and present your data in a clear, visually appealing format. Rows and columns create a framework that tames the data deluge, making it easy for users to find what they’re looking for.
The Building Blocks of an HTML Table: Understanding the Code
While tables might seem like a visual element, their magic lies in the underlying HTML code. Here’s a breakdown of the key components:
- The
<table>Tag: This tag marks the beginning of your table. It’s like drawing the initial box around your grid. - Table Rows (
<tr>): Each row within the table is defined by the<tr>tag. Imagine these as the horizontal lines that segment your grid. - Table Cells (
<td>): Individual data points within the table reside in table cells, created by the<td>tag. Think of them as the individual boxes within your grid where you place your information.
Exploring Different Table Components
The core table structure offers a foundation, but HTML provides additional elements for customization:
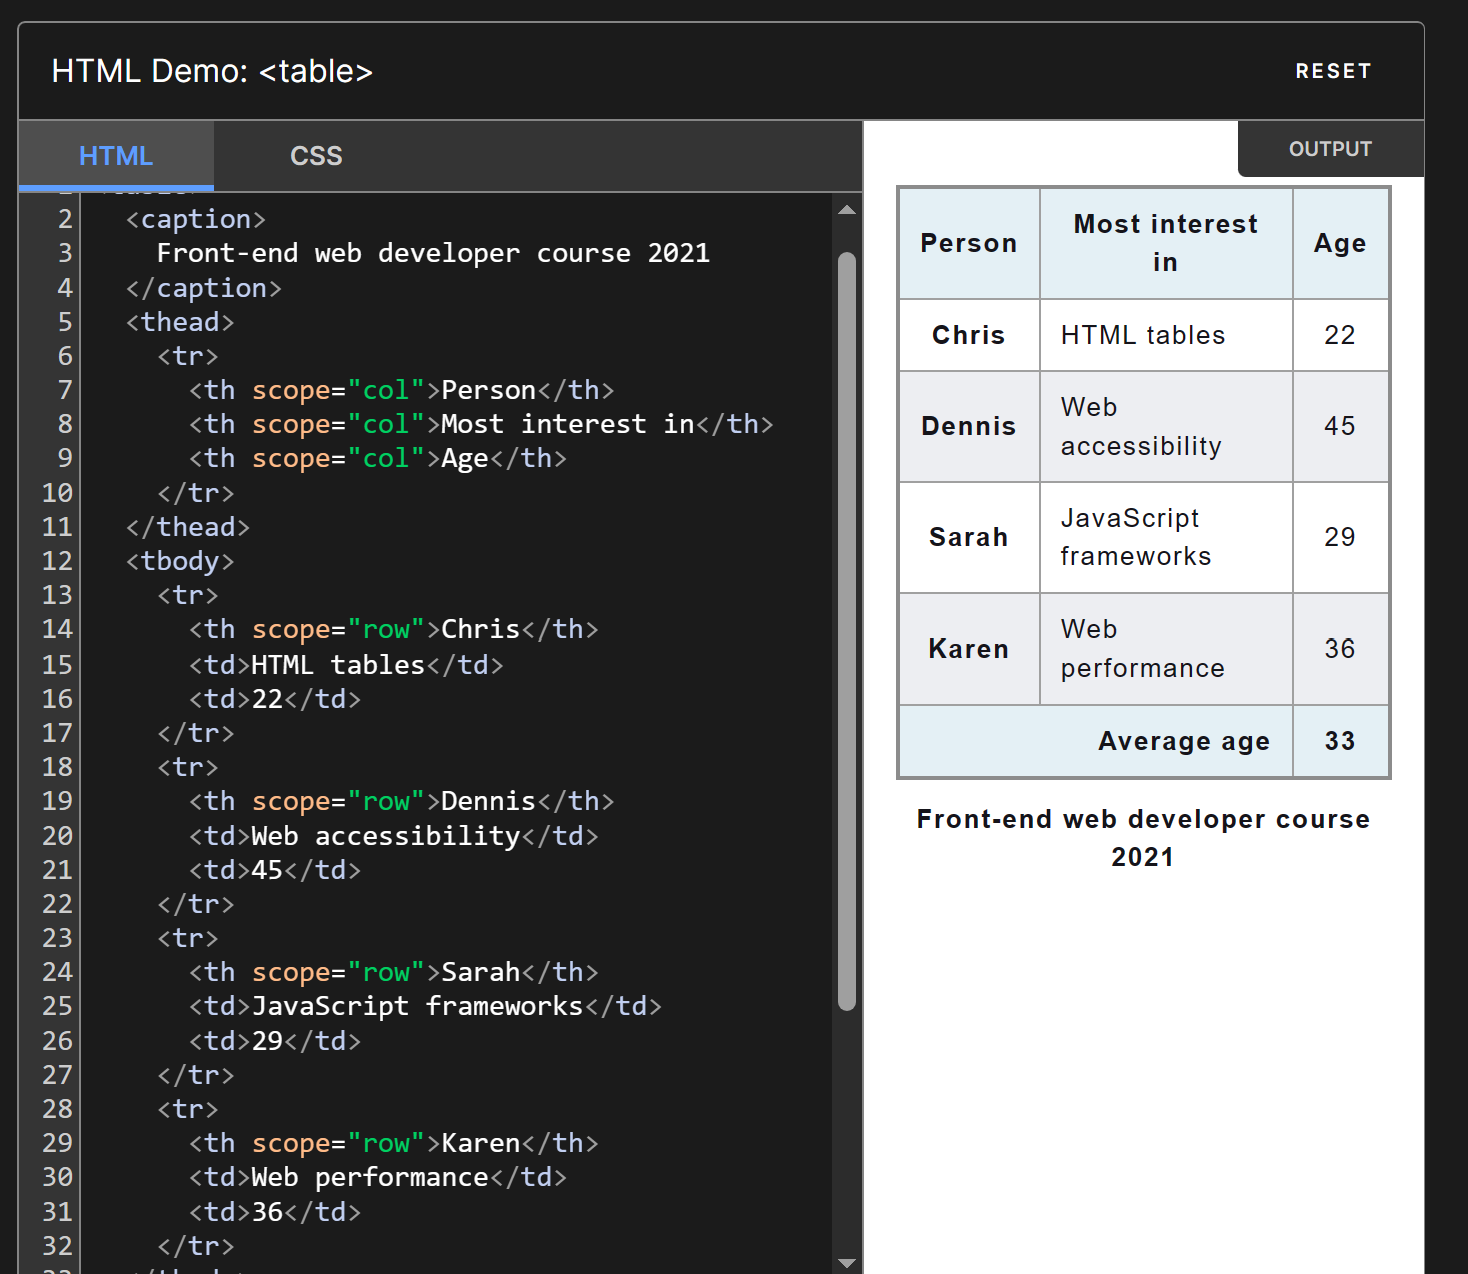
- Table Headers (<th>): Use the tag to define header cells, typically displayed in bold or visually distinct from regular data cells.
- Table Captions (<caption>): Enhance accessibility by adding a caption (<caption>) that summarizes the table’s content. Screen readers can announce this caption for visually impaired users.
- Cell Attributes (colspan & rowspan): For complex layouts, you can use the colspan and rowspan attributes to span cells across multiple columns or rows, creating a more flexible structure.
Formatting Your Tables
While HTML defines the structure, CSS (Cascading Style Sheets) allows you to style your tables for better visual presentation. Here are some tips:
- Clear and Readable Fonts: Choose easy-to-read fonts and appropriate font sizes to ensure accessibility for all users.
- Borders and Colors: Strategic use of borders and colors can improve readability and separate sections within the table. However, avoid excessive visual clutter.
- Cell Padding and Margin: Adjust cell padding and margins to create breathing room between text and borders, preventing a cramped appearance.
When to Use (and Not Use) HTML Tables: Choosing the Right Tool for the Job

While HTML tables are powerful for data presentation, they’re not a one-size-fits-all solution. Here’s when tables shine and when alternative approaches might be better:
- Ideal for Tabular Data: If your data naturally falls into rows and columns, like product listings, price comparisons, or calendar schedules, tables are the perfect choice.
- Not for Complex Layouts: Tables are not meant for complex website layouts. Use CSS frameworks like Bootstrap or Flexbox for intricate page structuring.
- Accessibility Considerations: Overly complex tables can be challenging for screen readers to navigate. Consider alternative methods for presenting complex data.
- Responsive Design: Ensuring Your Tables Adapt to Any Screen
In today’s mobile-first world, websites need to adapt to different screen sizes. Here’s how to make your HTML tables responsive:
- Media Queries: Use CSS media queries to adjust table layout, font sizes, and cell padding based on screen width, ensuring optimal viewing on all devices.
- Horizontal Scrolling: Avoid horizontal scrolling on smaller screens. Consider alternative data presentation methods if your table contains a large number of columns.
Read Also…
- HTML Links and Anchor Tags
- Internal Links In HTML
- Nutrient Rich Foods for Enhancing Cognitive Function
- Unaware Alcohol, Linked to Breast Cancer In Women – WHO
Optimizing Tables for SEO
While search engines primarily focus on text content, well-structured tables can indirectly improve SEO.
- Semantic HTML: Use semantic HTML tags like
<th>for headers and<caption>for captions to provide context for search engine crawlers, aiding in understanding your table’s content. - Descriptive Table Headers: Choose clear and concise header text that accurately reflects the data within each column. This helps search engines understand the table’s purpose and potentially use it for relevant search queries.
Conclusion
HTML tables offer a powerful way to structure and present data on your website. By understanding the code, exploring different components, and following best practices, you can create tables that are not only functional but also visually appealing and accessible to all users. Remember, tables are a valuable tool in your web design arsenal, and with a little planning and creativity, you can leverage their strengths to enhance your website’s user experience and achieve your content presentation goals.
FAQs
1. Are there any limitations on the number of rows and columns in an HTML table?
Technically, no. However, for optimal user experience and accessibility, it’s best to keep the number of rows and columns manageable. Aim for a layout that users can easily comprehend without getting overwhelmed by information overload.
2. Can I use HTML tables for website layouts?
While it’s tempting, using HTML tables for complex website layouts is generally discouraged. They can create inflexible and non-responsive designs. Consider CSS frameworks like Bootstrap or Flexbox for intricate layouts that adapt to different screen sizes.
3. What are some alternatives to HTML tables for presenting data?
For simpler data sets, unordered lists (<ul>) or definition lists (<dl>) might be suitable. Consider CSS grid layouts or flexbox for complex layouts with multiple data points.
4. How can I test my HTML tables for accessibility?
Web developer tools in most browsers offer accessibility audits that highlight potential issues. Additionally, online accessibility checkers can analyze your tables and suggest improvements.
5. Is there a way to automatically generate HTML tables from data sources?
Absolutely! Several tools and libraries allow you to import data from spreadsheets or databases and generate HTML tables dynamically. This can save you time and effort, especially when dealing with large datasets.