

You can apply HTML table layouts in designing your HTML website. Yes, again, this is not the best approach, but since we are still at the intermediate level of HTML in web design, we might as well create our resume web page just using HTML and a little bit of CSS.
<!DOCTYPE html>
<html lang="en" dir="ltr">

<head>
  <meta charset="utf-8">
  <title>John James Website</title>
</head>

<body>
  <table>
    <tr>
      <td><img src="james_john.png" alt="James Profile Picture"  width="300"
  height="300" ></td>
      <td>
        <h1>James John</h1>
        <p>Founder of James Inc and Learner at Smartech A.T. Limited</p>
        <p>I am a web developer and Python programmer</p>
      </td>
    </tr>
  </table>

</body>

</html>
As shown above, the formation is done using HTML table, we used the features of the HTML table to make the texts in <h1>, and <p> wrap around the image. We can proceed to adding the anchor tags and links where we want above.
Read Also…
- Internal Links In HTML
- Introduction to HTML Tables
- IoT Pump Control Irrigation System Using ESP32 Arduino
- 7 Adventure Games That Will Captivate Your Soul
Using Cellspacing to Indent the <td> Elements
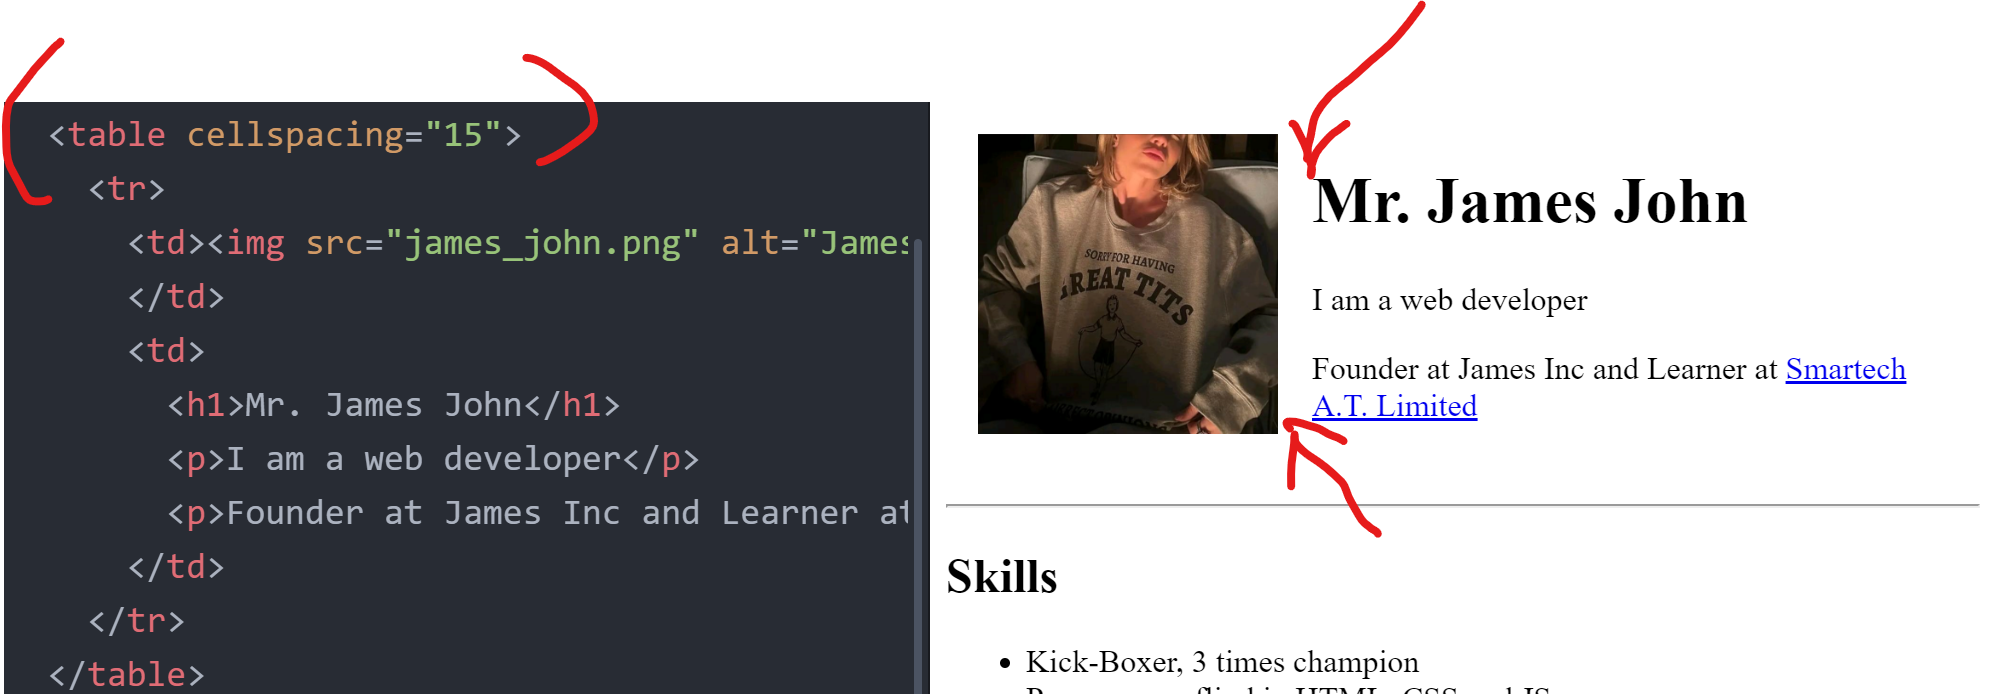
We can use the cellspacing CSS property in the <td> element to effect an identation or spacing between an image and the <H1> element. This is shown in image above. Unlike the image in figure 1 above, we have applied some space of 15 pixels in the table.
Nested Table Layouts
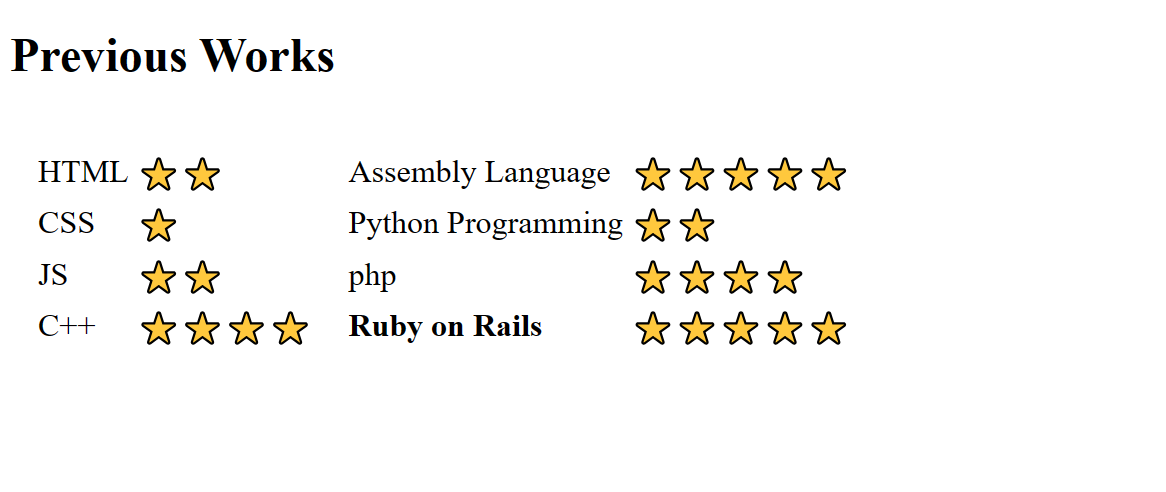
Suppose we want to show our previous works and we want to rate our performance on them using star ratings, as shown in the image above. We can apply the nested table approach.
<!DOCTYPE html>
<html lang="en" dir="ltr">

<head>
  <meta charset="utf-8">
  <title>John James Website</title>
</head>

<body>
  <table cellspacing="15">
    <tr>
      <td><img src="james_john.png" alt="James Profile picture" width="150" , height="150">
      </td>
      <td>
        <h1>Mr. James John</h1>
        <p>I am a web developer</p>
        <p>Founder at James Inc and Learner at <a href="www.smartechmolabs.com">Smartech A.T. Limited</a></p>
      </td>
    </tr>
  </table>
  <hr>
  <h2>Skills</h2>
  <ul>
    <li>Kick-Boxer, 3 times champion</li>
    <li>Programmer fliud in HTML, CSS and JS</li>
  </ul>
  <hr>
  <h2>Educational Background</h2>
  <p>You can find my full Academic achievements <a href="education.html">Here</a> </p>
  <hr>
  <h2>Previous Works</h2>
  <table cellspacing="10">
    <tr>
      <td>
        <table>
          <tr>
            <td>HTML</td>
            <td>⭐⭐</td>
          </tr>
          <tr>
            <td>CSS</td>
            <td>⭐</td>
          </tr>
          <tr>
            <td>JS</td>
            <td>⭐⭐</td>
          </tr>
          <tr>
            <td>C++</td>
            <td>⭐⭐⭐⭐</td>
          </tr>
        </table>
      </td>
      <td>
        <table>
          <tr>
            <td>Assembly Language</td>
            <td>⭐⭐⭐⭐⭐</td>
          </tr>
          <tr>
            <td>Python Programming</td>
            <td>⭐⭐</td>
          </tr>
          <tr>
            <td>php</td>
            <td>⭐⭐⭐⭐</td>
          </tr>
          <tr>
            <td><b>Ruby on Rails</b></td>
            <td>⭐⭐⭐⭐⭐</td>
          </tr>
        </table>
      </td>
    </tr>
  </table>
</body>

</html>
The whole code will give us the format of a nested table that would give us the appeal we are looking for.
A Beginner’s Guide to HTML Forms
Imagine a website as a one-way street – information flows from you, the creator, to the visitor. But what if you want to create a two-way conversation, allowing users to interact and provide input? This is where HTML forms come in – the building blocks for gathering valuable user information on your website.

Think of an HTML form as a digital questionnaire. It can be as simple as a search bar or as complex as a multi-page registration form. By understanding the code behind forms, you can unlock a world of user interaction and make your website more dynamic and engaging.
The Bare Bones of HTML Form
The foundation of any HTML form is the <form> tag. It acts like a container, holding all the elements that make up your form, like text fields, radio buttons, and submit buttons. This is to say that, on its own, the HTML form tag <form>…</form> doesn’t do anything until you begin to add its element. Here’s a basic example:
<form>
  <label for="name">Enter your name:</label>
  <input type="text" id="name" name="name">
  <button type="submit">Submit</button>
</form>
The HTML code above will produce the image below. It will show the table given below.
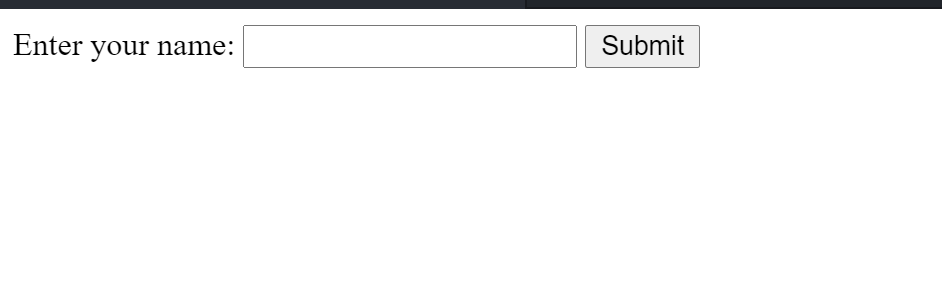
In this code, the <form> tag creates the form container. Inside, we have a <label> element that describes the purpose of the input field. The <input type="text" ...> element creates a text field where users can type their name. Finally, the <button type="submit"> element is the submit button, which triggers form submission when clicked.
A Look at Common Form Elements
The beauty of HTML forms lies in their versatility. Here’s a quick rundown of some common form elements you can use:
- Text Inputs (
<input type="text">): Allow users to enter single-line text data. - Password Inputs (
<input type="password">): Similar to text inputs, but characters are masked for security (think login forms). - Email Inputs (
<input type="email">): Designed specifically for email addresses, often triggering keyboard validation for the correct format. - Radio Buttons (
<input type="radio">): Present users with a set of options where only one can be selected at a time. - Checkboxes (
<input type="checkbox">): Allow users to select multiple options from a set. - Text Areas (
<textarea>): Create a larger multi-line text input field for detailed responses or feedback. - Select Menus (
<select>): Provide users with a dropdown menu containing pre-defined options to choose from.
Conclusion
HTML forms are a powerful tool for building interactive websites that collect user input. By understanding the core concepts, exploring different form elements, and following best practices, you can create forms that are not only functional but also user-friendly and accessible. Remember, well-designed forms play a crucial role in user experience and data collection on your website. So, the next time you need to gather user information, consider the power of HTML forms – a versatile tool to bridge the gap between static websites and dynamic user interactions
FAQs
1. Can I use HTML forms to create contact forms for my website?
Absolutely! By combining various form elements like text inputs, email inputs, and a submit button, you can create a user-friendly contact form allowing visitors to send you messages directly through your website.
2. What are some online tools and resources that can help me create HTML forms?
Several online code editors and website builders offer visual tools to drag-and-drop form elements, simplifying the process for beginners. Additionally, online tutorials and documentation provide in-depth explanations and code examples for creating custom HTML forms.
3. How can I ensure the security of user data submitted through my forms?
Security is paramount. When dealing with sensitive information like credit card details, it’s crucial to implement secure server-side scripts (e.g., using HTTPS protocol) to handle form submissions and encrypt user data.
4. Are there any alternatives to HTML forms for user input?
For simpler data collection needs, you might consider using email signup forms or chatbots. However, HTML forms offer a more customizable and versatile approach for various user input scenarios.
5. How can I test my HTML forms to ensure they function correctly?
Test your forms thoroughly on different browsers and devices. You can also use browser developer tools to check for errors or validation issues and refine your form for optimal functionality.