This tutorial is about design and construction of a GPS and SMS based fall detection and prevention project for the elderly. The project uses at knowing when an elderly person has fallen and would inform the doctor or physician of his or her exact location by effectively detecting the fall, by placing a call and sending an SMS to them. It also tells the physician or doctor if an elderly is prone to have a fall. We will be going through how it is done step by step, so stick around and ensure you read until the end.
Fall Detection and Prevention
Components Required
The following materials can be gotten from our online shop here or any online store
- Gyroscope
- Arduino Pro-mini baord
- GPS Module
- GSM Module
- Li-ion 3.3V 5500mAh Battery
- LiPO charging Module
With the above mentioned components, we can proceed to understanding the schematic diagram.
The Schematic Diagram
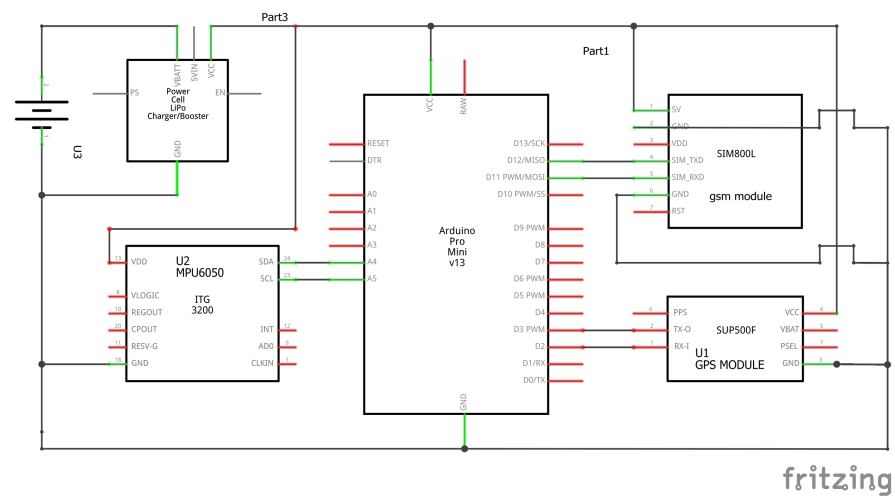
Explanation to The Schematic Diagram
The schematic diagram of the fall detection and prevention project above shows that the GSM module is connected Arduino Pro-mini board using serial communication and the GPS module is also connected to the board. The gyroscope MPU6060 is connected using I2C protocol and the LiPo battery charger module powers the whole system.
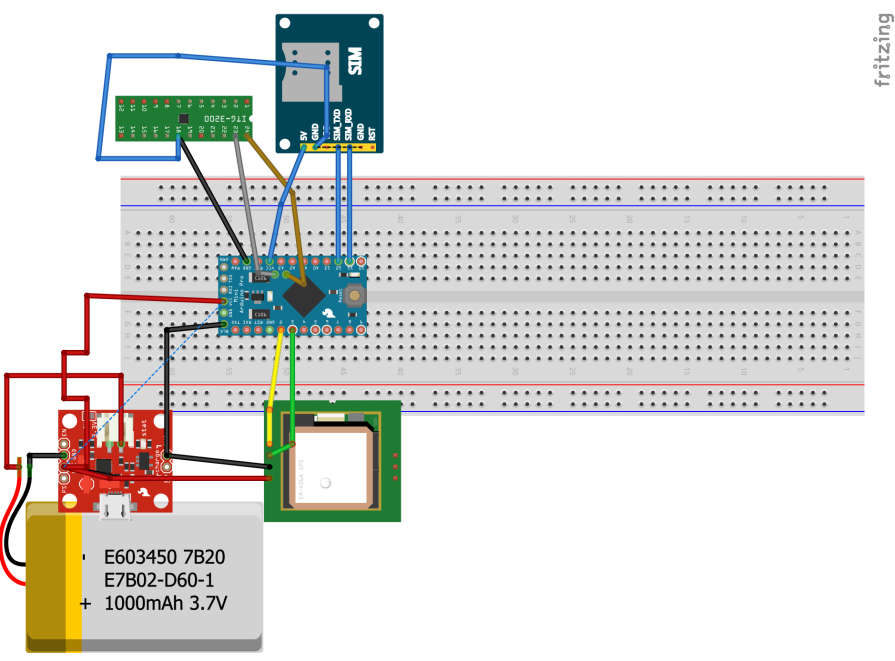
The breadboard view of the fall detection and prevention project is shown above. This could be better understood since it is the pictorial form of it.
The Arduino Sketch
#define TINY_GSM_MODEM_SIM800
// Increase RX buffer if needed
//#define TINY_GSM_RX_BUFFER 512
#include <TinyGPS++.h>
#include <TinyGsmClient.h>
#include <ArduinoHttpClient.h>
#include <GSMSimCall.h>
 #include <Wire.h>
// The TinyGPS++ object
TinyGPSPlus gps;// Uncomment this if you want to see all AT commands
//#define DUMP_AT_COMMANDS

// Set serial for debug console (to the Serial Monitor, default speed 115200)
#define SerialMon Serial
#define RESET_PIN 13
// Use Hardware Serial on Mega, Leonardo, Micro
//#define SerialAT Serial1

// or Software Serial on Uno, Nano
#include <SoftwareSerial.h>
SoftwareSerial SerialAT(11, 12); // RX, TX
GSMSimCall call(SerialAT, RESET_PIN);
// The serial connection to the GPS device
SoftwareSerial ss(2, 3);

// Your GPRS credentials
// Leave empty, if missing user or pass
const char apn[]  = "internet";
const char user[] = "";
const char pass[] = "";

// Server details
String ress = "/trigger/Fall/with/key/bBoafo8uqrZq72TzdrU0ye?&value1=";
const char server[] = "maker.ifttt.com";
char* resource;
const int  port = 80;

String Location = "";
const char number1[] = {"0**********"};
const char number2[] = {"0**********"};
String link = "click here to locate Mr. ANC: https://www.google.com/maps/place/";
int length = 11;
String caller;
const int MPU_addr = 0x68; // I2C address of the MPU-6050
 int16_t AcX, AcY, AcZ, Tmp, GyX, GyY, GyZ;
 float ax = 0, ay = 0, az = 0, gx = 0, gy = 0, gz = 0;
 boolean fall = false; //stores if a fall has occurred
 boolean trigger1 = false; //stores if first trigger (lower threshold) has occurred
 boolean trigger2 = false; //stores if second trigger (upper threshold) has occurred
 boolean trigger3 = false; //stores if third trigger (orientation change) has occurred
 byte trigger1count = 0; //stores the counts past since trigger 1 was set true
 byte trigger2count = 0; //stores the counts past since trigger 2 was set true
 byte trigger3count = 0; //stores the counts past since trigger 3 was set true
 int angleChange = 0;

#ifdef DUMP_AT_COMMANDS
  #include <StreamDebugger.h>
  StreamDebugger debugger(SerialAT, SerialMon);
  TinyGsm modem(debugger);
#else
  TinyGsm modem(SerialAT);
#endif

TinyGsmClient client(modem);
HttpClient http(client, server, port);

void setup() {
  // Set console baud rate
  SerialMon.begin(9600);
  delay(10);
  ss.begin(9600);
  // Set GSM module baud rate
  SerialAT.begin(9600);
  delay(500);

  // Restart takes quite some time
  // To skip it, call init() instead of restart()
  SerialMon.println(F("Initializing modem..."));
  modem.restart();

  String modemInfo = modem.getModemInfo();
  SerialMon.print(F("Modem: "));
  SerialMon.println(modemInfo);
  SerialMon.print(F("Waiting for network..."));
  if (!modem.waitForNetwork()) {
    SerialMon.println(" fail");
    delay(10000);
    return;
  }
  SerialMon.println(" OK");
  Wire.beginTransmission(MPU_addr);
   Wire.write(0x6B);  // PWR_MGMT_1 register
   Wire.write(0);     // set to zero (wakes up the MPU-6050)
   Wire.endTransmission(true);
}

void loop() {
  Serial.println("LOOP");
//  update_Location();
  Serial.println(Location);

    sendEmail();
  //sendSMS();
  //sendEmail();
  //sendSMS(caller, link+Location);
  delay(5000);
}
This source code can still be downloaded from the Github page free. Just downlaod and unzip it if it appears in a .zip file.
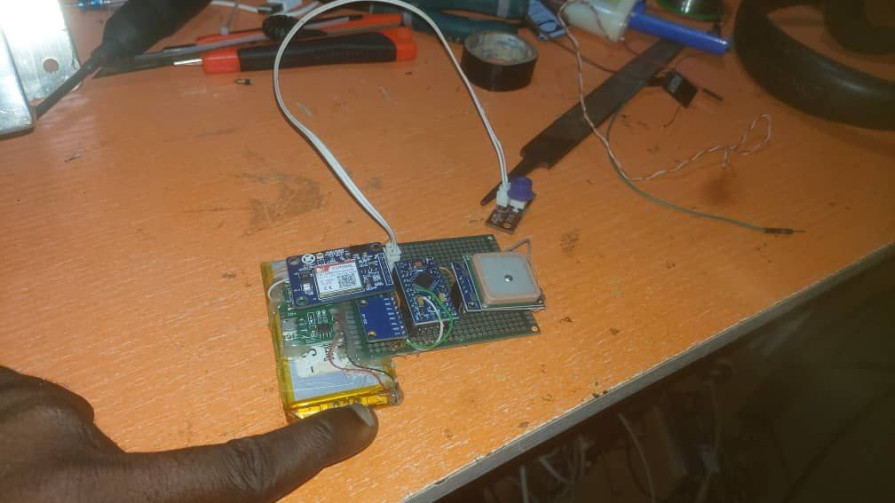
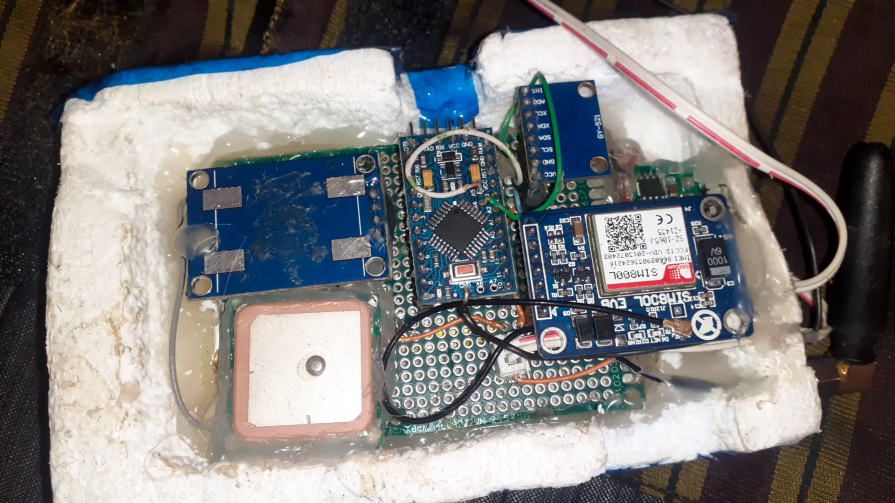
Fall Detection: The Soldering and Construction
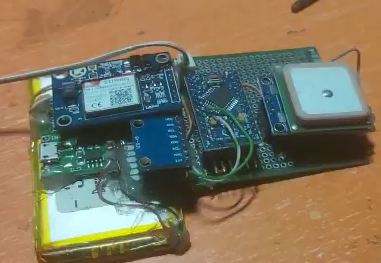
The construction of the project was done as shown above. It began with soldering of the parts involved together using the veroboard and using female headerpins to connect them. The LiPo charging module was placed in an orientation where there can be an opening for charging the battery. Whereas the gyroscope was made to be sensitive of change in orientations and axial movements.
Casing and Making the Project Wearable
The whole project is placed inside white form and then it was glued with the parts as shown above. The enclosure is made to slide in and easily slide out.
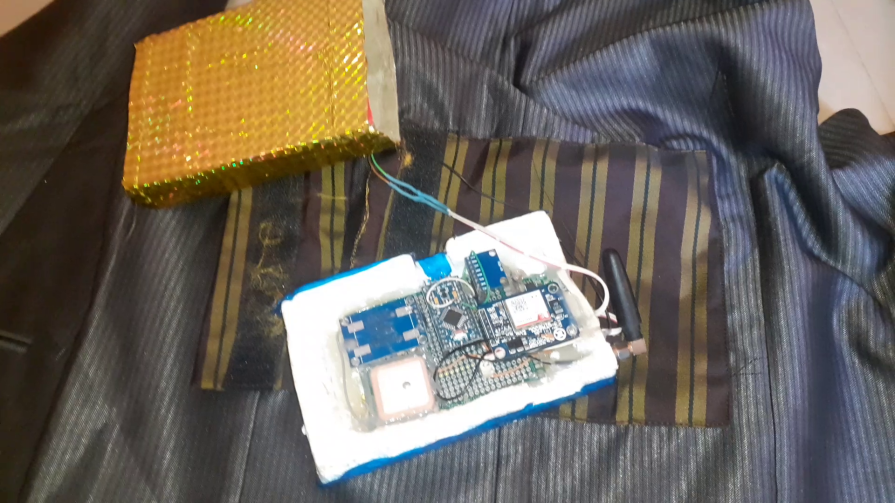
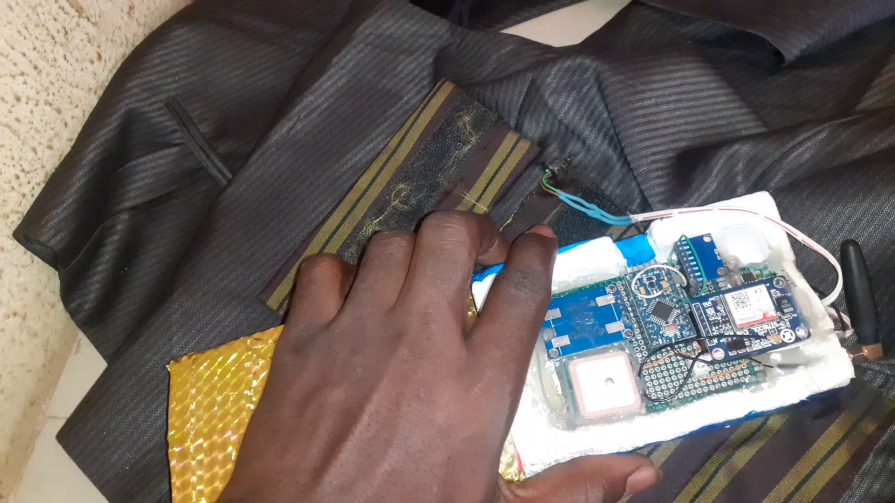
The whole thing was sown onto a jacket, the jacket came with a pouch that could house the fall detection project. Thereby making it wearable.
Conclusion
The fall detection and prevention project was designed for the elderly. It helps their caretakers and physician track their whereabout and also it notifies them if they have had any fall incidents. We have demonstrated how to achieve this and have included all the necessary tools needed. Let us know in the comment section if you were able to recreate this project on your own.

