
Keeping your electronics cool is crucial, especially when working on projects that generate heat. Ever wondered how to automatically adjust a fan’s speed based on temperature? Well, I’m here to guide you through building a simple yet effective temperature-controlled fan speed system using an Arduino, an LM35 temperature sensor, and an NPN transistor. A fan speed controller, think of it like a thermostat for your electronics!
Why Control Fan Speed?

Why not just run the fan at full speed all the time? Great question! Running a fan at full speed constantly can be noisy and waste power. By controlling the fan speed based on temperature, we can achieve efficient cooling only when needed. It’s like having a smart cooling system that adapts to the environment.
Read Also: IoT Based Automatic Changeover With Auto Gen Start/Stop
The Components: What You’ll Need

Let’s gather our tools for this project. We’ll need:
- Arduino Uno: The brains of our operation.
- LM35 Temperature Sensor: Our temperature “eye.”
- NPN Transistor (TIP120): The muscle that controls the fan.
- 12V DC Fan: Our cooling hero.
- Resistors (e.g., 220 ohms, 1k ohms): To regulate current flow.
- Connecting Wires: To connect everything together.
- Breadboard (Optional): For easy prototyping.
- Power Supply (12V): To power the fan.
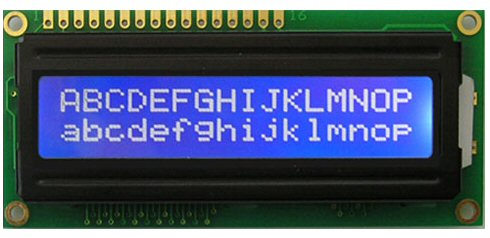
- 1602 LCD module
Understanding the LM35 Temperature Sensor
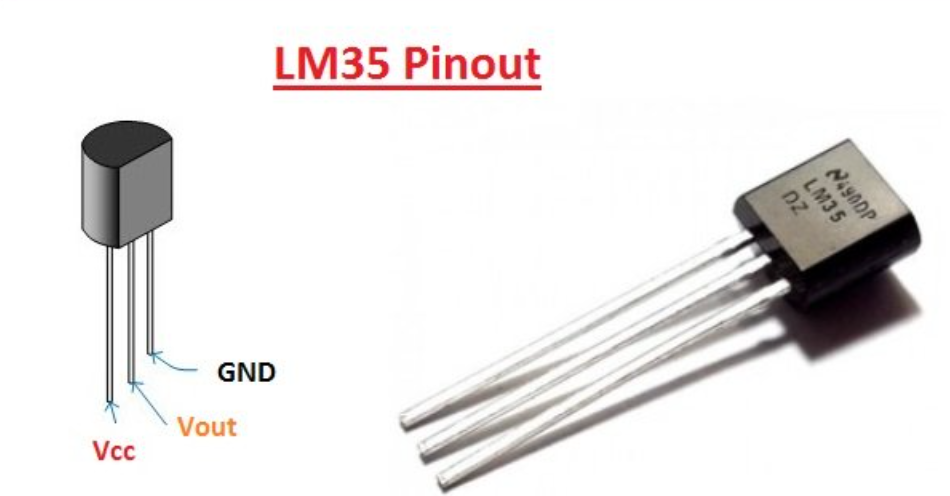
The LM35 is a nifty little device that outputs a voltage proportional to the temperature. For every degree Celsius, the output voltage changes by 10 millivolts. It’s like a tiny thermometer that speaks the language of electronics.
The NPN Transistor: Our Electronic Switch
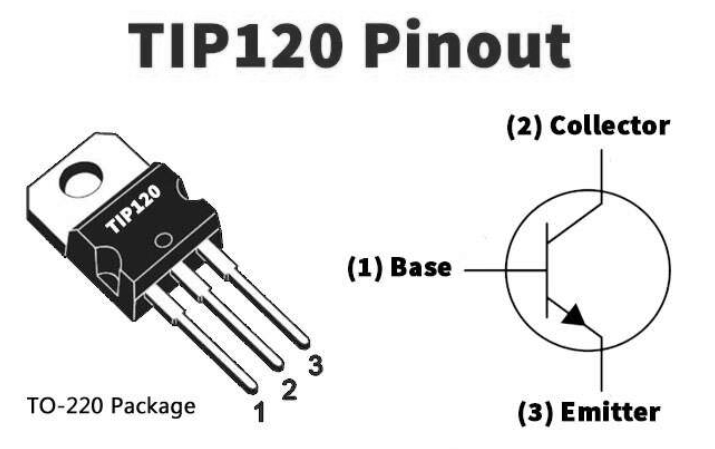
The NPN transistor acts as a switch, controlling the flow of current to the fan. The Arduino will send a signal to the transistor’s base pin, which will then allow a larger current to flow from the collector to the emitter, powering the fan.
Using AI for Predicting Supply Chain Disruptions in Manufacturing
The Circuit: Connecting the Dots

We’ll connect the LM35’s output to an analog input pin on the Arduino. The transistor’s base pin will be connected to a digital output pin on the Arduino, through a resistor. The fan’s positive terminal will be connected to the 12V power supply, and the negative terminal to the transistor’s collector. The transistor’s emitter is connected to ground.
Arduino Code: The Magic Words
Now, let’s write the code that will make everything work together. The Arduino will read the temperature from the LM35, convert it to degrees Celsius, and then adjust the fan speed using Pulse Width Modulation (PWM).
// Define pins
const int lm35Pin = A0;
const int fanPin = 9;

void setup() {
  Serial.begin(9600);
  pinMode(fanPin, OUTPUT);
}

void loop() {
  // Read temperature from LM35
  int sensorValue = analogRead(lm35Pin);
  float voltage = sensorValue * (5.0 / 1023.0); // Convert to voltage
  float temperatureC = (voltage - 0.5) * 100; // Convert to Celsius

  // Control fan speed based on temperature
  int fanSpeed = map(temperatureC, 20, 40, 0, 255); // Map temperature to fan speed (0-255)
  fanSpeed = constrain(fanSpeed, 0, 255); // Ensure fanSpeed is within 0-255 range

  analogWrite(fanPin, fanSpeed);

  Serial.print("Temperature: ");
  Serial.print(temperatureC);
  Serial.print(" °C, Fan Speed: ");
  Serial.println(fanSpeed);

  delay(100);
}
Explaining the Code: Step by Step
- Pin Definitions: We define the pins connected to the LM35 and the fan.
- Setup: We initialize serial communication for debugging and set the fan pin as an output.
- Loop: The main part of the code that runs repeatedly.
- Reading Temperature: We read the analog value from the LM35 and convert it to Celsius.
- Controlling Fan Speed: We use the
map()function to convert the temperature range (20°C to 40°C in this example) to a fan speed range (0 to 255, the range foranalogWrite()). We useconstrain()to keep the fan speed within the valid range. - Writing to Fan: We use
analogWrite()to send a PWM signal to the fan, controlling its speed. - Serial Output: We print the temperature and fan speed to the serial monitor for monitoring.
- Delay: We introduce a small delay for stability.
Testing and Calibration: Fine-Tuning Your System
Upload the code to your Arduino and open the serial monitor. You should see the temperature and fan speed readings. Adjust the temperature range in the map() function to fine-tune the fan’s behavior according to your needs.
Applications: Where Can You Use This?
This temperature-controlled fan system can be used in various applications, such as:
- Computer Cooling: Keep your PC components cool.
- Electronics Enclosures: Prevent overheating in your projects.
- 3D Printer Enclosures: Regulate the temperature inside the enclosure.
- DIY Projects: Any project that requires temperature-sensitive cooling.
Troubleshooting: What If It Doesn’t Work?
If you encounter problems, double-check your wiring, ensure the LM35 is correctly connected, and verify the code is uploaded properly. Use the serial monitor to debug and identify any issues.
Expanding the Project: Taking It Further
You can expand this project by adding an LCD display to show the temperature, implementing a more sophisticated control algorithm, or even adding multiple fans.
Safety Precautions: Be Careful!
Always be careful when working with electronics. Double-check your wiring before powering on the circuit, and avoid touching any exposed wires when the circuit is powered.
Conclusion: Cool and Controlled
Congratulations! You’ve built a temperature-controlled fan speed system. This project is a great introduction to using sensors, microcontrollers, and transistors to create smart and efficient systems. Now you can keep your electronics cool and your projects running smoothly!
Frequently Asked Questions (FAQs)
- Can I use a different fan? Yes, you can use other 12V DC fans. Just make sure the transistor can handle the fan’s current.
- What if I don’t have an LM35? You can use other temperature sensors, but you may need to adjust the code accordingly.
- How do I adjust the temperature range? Change the values in the
map()function to set the desired temperature range. - Why is my fan not spinning? Check your wiring, power supply, and code. Also, make sure the transistor is working correctly.
- Can I control multiple fans? Yes, you can control multiple fans by using more transistors and Arduino pins. You might also need a more powerful power supply.

