Introduction
Smart Irrigation System have ever made you ever walked into your backyard and realized your plants look like they’ve survived a desert storm? We’ve all been there. Life gets busy, and watering the garden just slips through the cracks. But what if your garden could water itself? Yep, welcome to the world of DIY smart irrigation systems powered by IoT (Internet of Things). It’s not just tech wizardry it’s a practical, water-saving, plant-loving solution.
Why Automate Your Garden Watering?
It Saves Water (and Money)
Smart irrigation systems only water when necessary. That means less water waste and a smaller utility bill.
Plants Stay Healthier
Too much or too little water can mess with your plants’ mojo. Smart systems give them just the right amount.
Convenience is King
Whether you’re on vacation or just forgetful, automated watering keeps things running smoothly.
What Is a Smart Irrigation System?
A smart irrigation system uses sensors, timers, and controllers to deliver water efficiently. With IoT in the mix, it becomes even smarter monitoring conditions in real time and making decisions without human intervention.
Components You’ll Need for Your DIY Setup
1. Microcontroller (e.g., Arduino or ESP32)
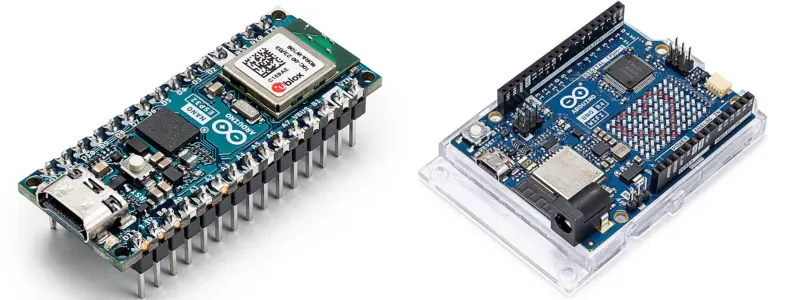
This is your garden’s brain. It controls the whole system based on the data it receives.
No Bra: Benefits, Challenges, and Why More Women Are Ditching Bras
2. Soil Moisture Sensors
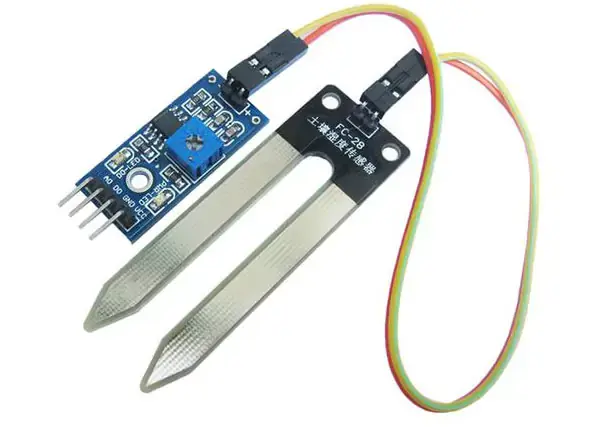
These little gadgets check how thirsty your soil is.
Connecting with Your Higher Self: Techniques for Tapping into Your Inner Wisdom and Guidance
3. Water Pump or Solenoid Valve
This component controls the flow of water when triggered.
4. Relay Module
Needed to switch your pump or valve on and off via your microcontroller.
5. Wi-Fi Module (if not built-in)
Allows your system to connect to the internet and your smartphone.
6. Power Source
Battery pack, solar panel, or wall adapter pick what works best for you.
7. Tubing and Drip Irrigation Kit
To actually get the water to your plants.
Smart Poultry Farming: Monitoring Environmental Conditions with IoT
Step-by-Step: Building Your Smart Irrigation System
Step 1: Gather Your Components
Buy your parts online or at a local electronics store. Double-check compatibility, especially with the microcontroller.
Step 2: Connect the Soil Moisture Sensor
Plug it into the analog input of your microcontroller. Test to see if it correctly detects dry and wet soil.
Step 3: Set Up the Relay and Valve
Wire the relay to your microcontroller and connect it to your pump or valve. Make sure the power ratings match.
Step 4: Write and Upload the Code
Use Arduino IDE or a similar platform. You’ll write logic like:
If soil is dry, turn on the pump for X minutes.
Step 5: Add Wi-Fi Connectivity
Use Blynk, Node-RED, or similar platforms to connect your system to your phone for remote control and monitoring.
Step 6: Install Everything in the Garden
Mount the sensors near plant roots. Position tubing for even water distribution. Encase electronics in waterproof boxes.
Step 7: Test and Tweak
Watch it in action! Adjust timing, moisture thresholds, and flow rates as needed.
Advanced Features to Add Later
Weather Integration
Link your system to weather APIs to skip watering when it’s about to rain.
App Notifications
Get a ping when your garden is watered or if something goes wrong.
Solar Charging
Go eco-friendly by powering your system with the sun.
Common Pitfalls (and How to Avoid Them)
Using Cheap Sensors
They degrade fast. Invest in better quality for accuracy and durability.
Overwatering Due to Code Errors
Double-check your code logic. One wrong line can turn your garden into a swamp.
Poor Sensor Placement
Place sensors where the roots are, not just the surface, for better readings.
Is It Really Worth It?
Absolutely. Not only is it satisfying to see your garden take care of itself, but it also teaches you hands-on skills in electronics and programming. Plus, your plants will love you for it.
Conclusion
Turning your garden into a smart oasis doesn’t require a PhD in robotics. With a few tools, some DIY spirit, and a little bit of code, you can build a smart irrigation system that saves time, conserves water, and keeps your garden lush year-round. So, why not give your plants the VIP treatment they deserve?
FAQs
1. Can I use this system for indoor plants too?
Yes, just scale it down. Use smaller pumps and sensors suited for indoor use.
2. What’s the best soil moisture sensor for DIY projects?
Capacitive soil moisture sensors are more durable and accurate than resistive ones.
3. Do I need coding experience to build this?
Basic knowledge helps, but you can find plenty of open-source code and tutorials online to guide you.
4. How much does it cost to build a DIY smart irrigation system?
Typically between $30–$80 depending on the quality of components and size of your garden.
5. Can it work without Wi-Fi?
Yes. You can program it to operate on a timer or based on sensor input alone, but you’ll lose remote access features.