Introduction
Solar power is an increasingly popular and environmentally friendly way to generate electricity for your home. Installing a solar power system can help you reduce your carbon footprint and save money on your energy bills. In this DIY solar power system installation guide, we will provide you with step-by-step instructions on how to install a solar power system on your own.
Can I Install a Solar System Myself?
Yes, you can install a solar system yourself, but it requires a good understanding of electrical systems, proper planning, and adherence to local building codes and regulations. DIY solar installations have become more accessible with the availability of complete solar kits and detailed online tutorials. However, it’s essential to consider the complexity of the installation, which involves mounting solar panels, wiring the system, installing an inverter, and connecting to your home’s electrical system. Safety is a critical concern, as working with electricity and on rooftops can be hazardous. Additionally, professional installations often come with warranties and guarantees on workmanship, which DIY projects may lack. Therefore, while it is possible to install a solar system yourself, careful consideration of your skills, safety, and the potential benefits of professional installation is crucial.
What is Needed for DIY Solar System?
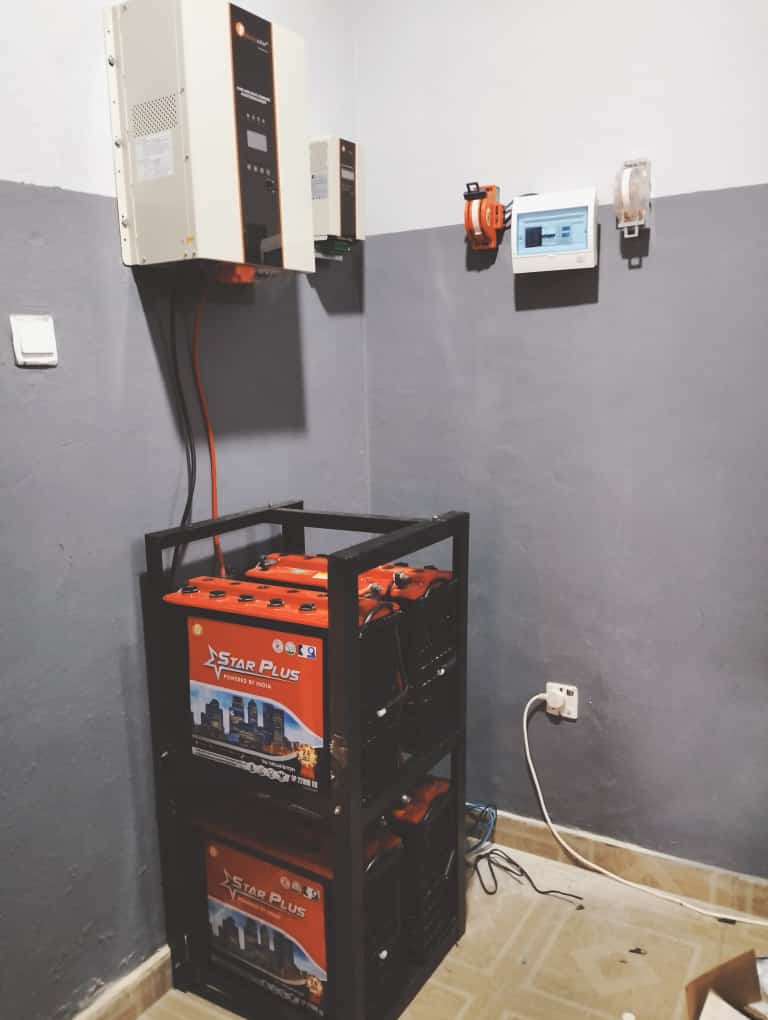
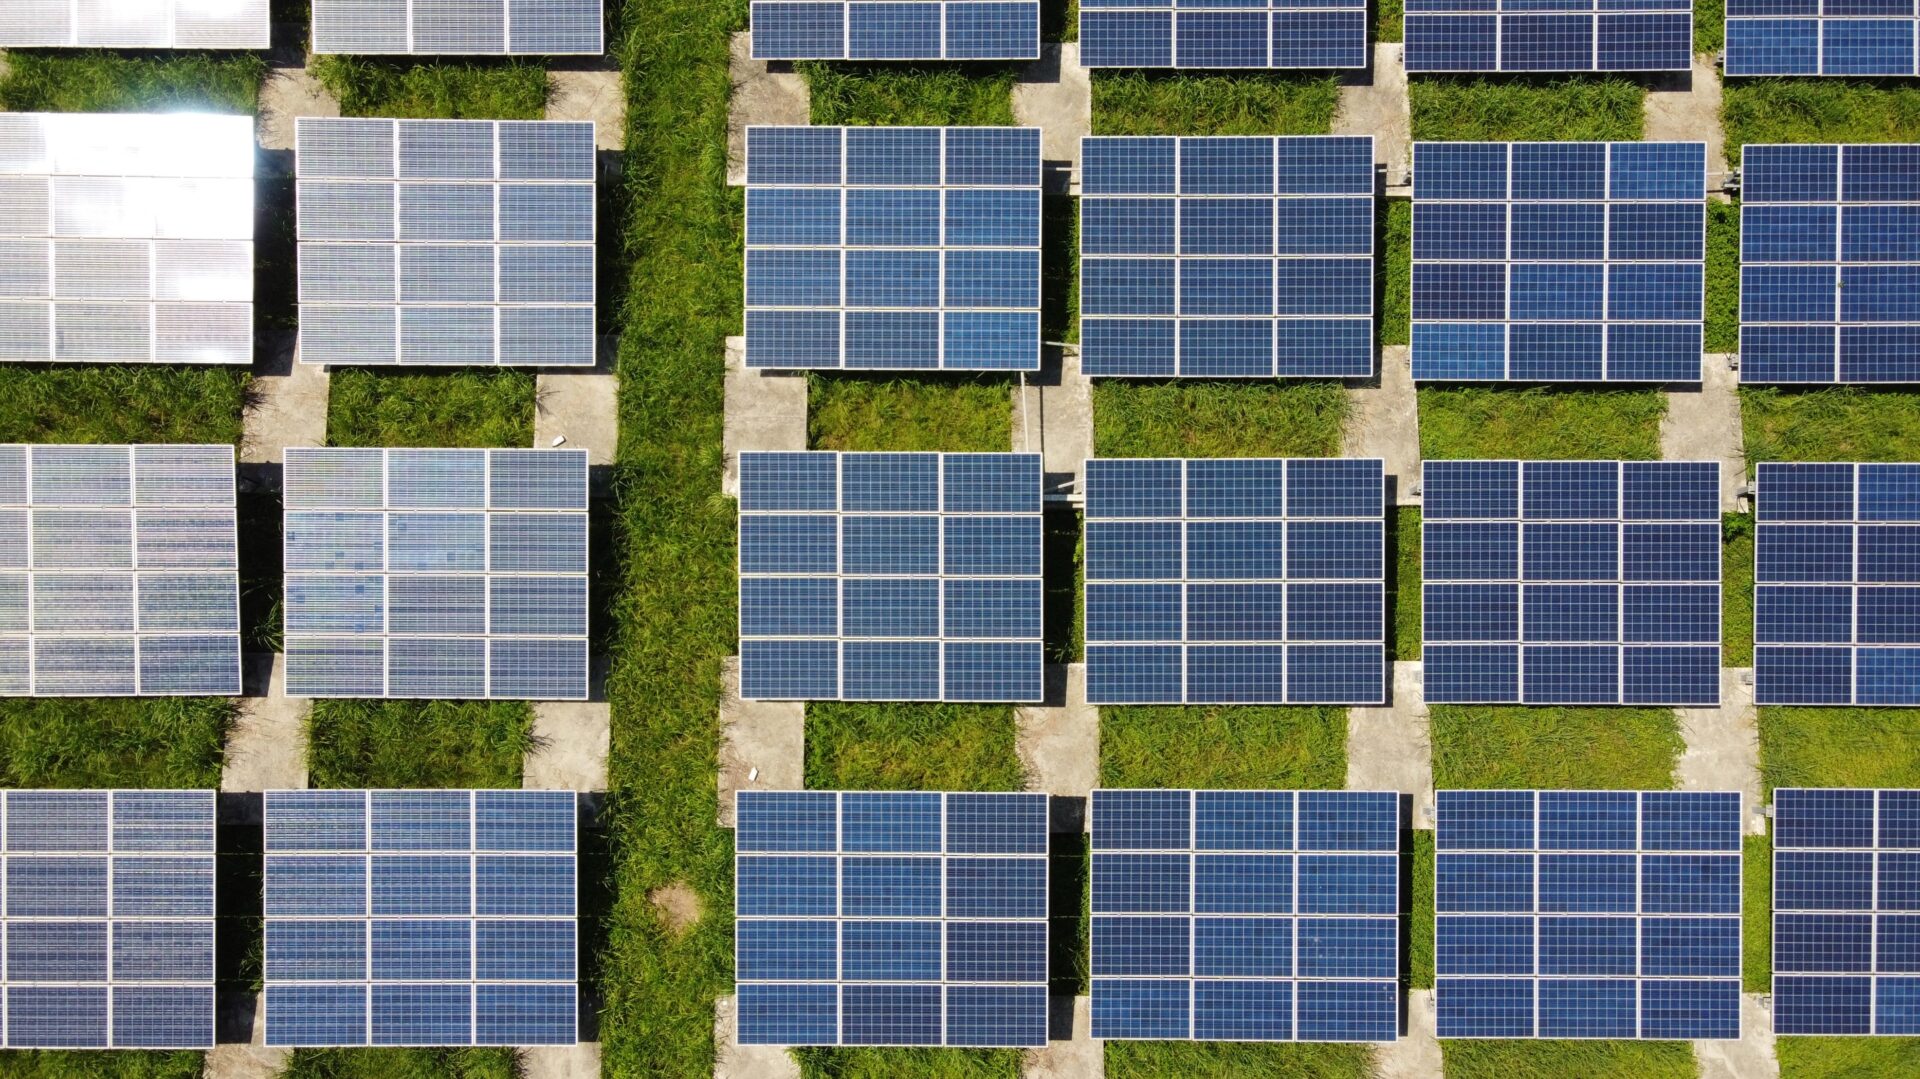
A DIY solar system requires several key components to function effectively. First, you need solar panels to capture sunlight and convert it into electrical energy. You’ll also need an inverter to convert the DC electricity produced by the panels into AC electricity used by household appliances. Mounting hardware is essential for securely attaching the solar panels to your roof or a ground-based structure. Electrical wiring and connectors are necessary to link the panels and inverter. A charge controller might be needed if you’re using a battery storage system to manage the charging and discharging of the batteries. Additionally, safety equipment such as circuit breakers, fuses, and grounding wires are crucial to protect the system and prevent electrical hazards. Finally, tools for installation, such as drills, wrenches, and a multimeter, are needed to complete the setup. Proper planning and understanding of each component are vital for a successful DIY solar project.
How Do You Size a DIY Solar System?
Sizing a DIY solar system involves calculating your energy consumption and determining the number of solar panels required to meet your needs. Start by reviewing your electricity bills to find out your average monthly and annual energy usage in kilowatt-hours (kWh). Next, consider the peak sunlight hours in your location, which is the average number of hours per day when the sunlight is strong enough to generate electricity. Divide your total annual energy consumption by the number of peak sunlight hours per year to estimate the required system size in kilowatts (kW). For example, if you consume 10,000 kWh annually and receive 1,500 peak sunlight hours per year, you would need approximately a 6.67 kW system. Once you have this figure, you can determine the number of panels needed by dividing the system size by the wattage of the panels you plan to use. Always account for system efficiency losses and future energy needs when sizing your system.
How to Install a Solar System Step-by-Step
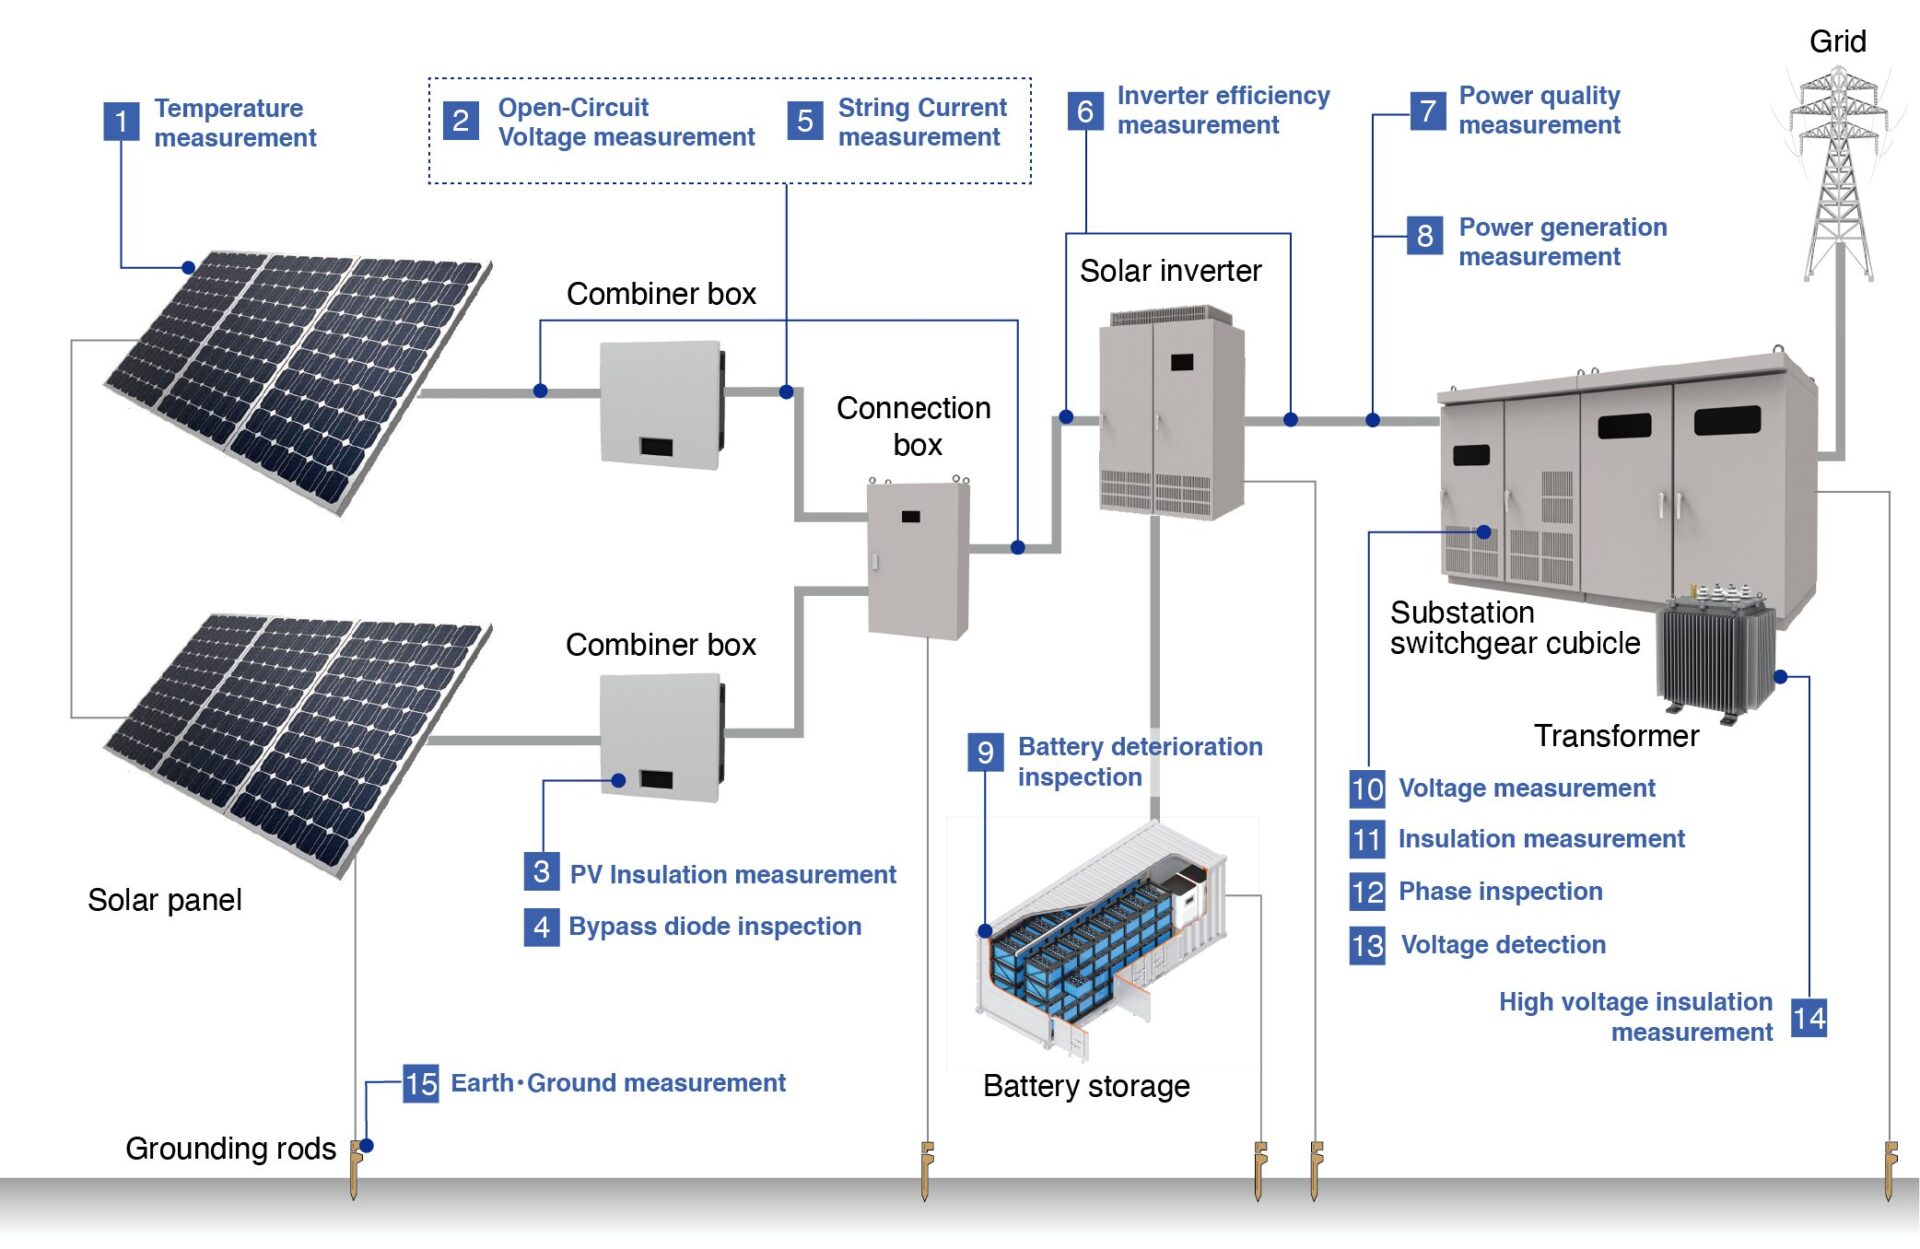
Installing a solar system involves several critical steps to ensure efficiency and safety. First, conduct a site assessment to determine the best location for your solar panels, considering factors such as sun exposure, roof condition, and shading. Next, design the system based on your energy needs, selecting appropriate components like solar panels, inverters, mounting hardware, and electrical wiring. Once you have all the components, install the mounting system on your roof or ground location, ensuring it is secure and properly aligned. Attach the solar panels to the mounts, and then wire them together, connecting them to the inverter. The inverter converts the DC electricity produced by the panels into AC electricity for your home. Finally, connect the inverter to your home’s electrical system and, if applicable, to the grid. After installation, test the system to ensure it operates correctly and safely. Following these steps meticulously can help you achieve a successful DIY solar installation.
Step 1: Assess Your Energy Needs
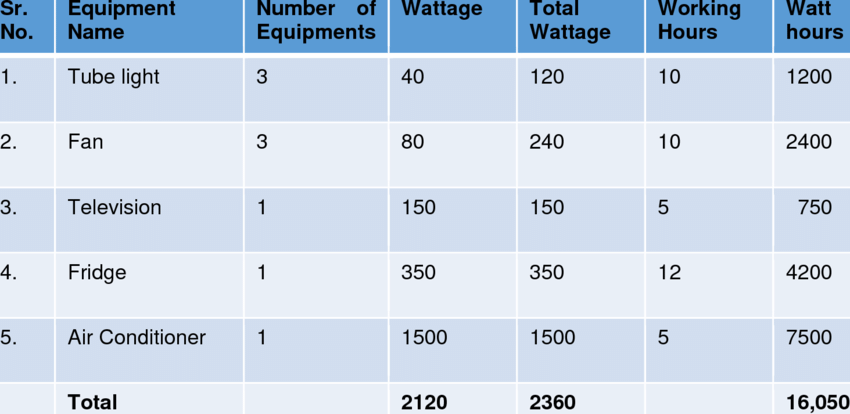
Before you start installing a solar power system, it’s important to assess your energy needs. Determine how much electricity you use on a daily basis and what appliances or devices you want to power with solar energy. This will help you determine the size and capacity of the solar power system you need.
Step 2: Choose the Right Location
Next, you’ll need to choose the right location for your solar panels. Look for a spot on your property that receives ample sunlight throughout the day. Ideally, the solar panels should be placed on a south-facing roof or in an area with minimal shading.
Step 3: Install the Solar Panels
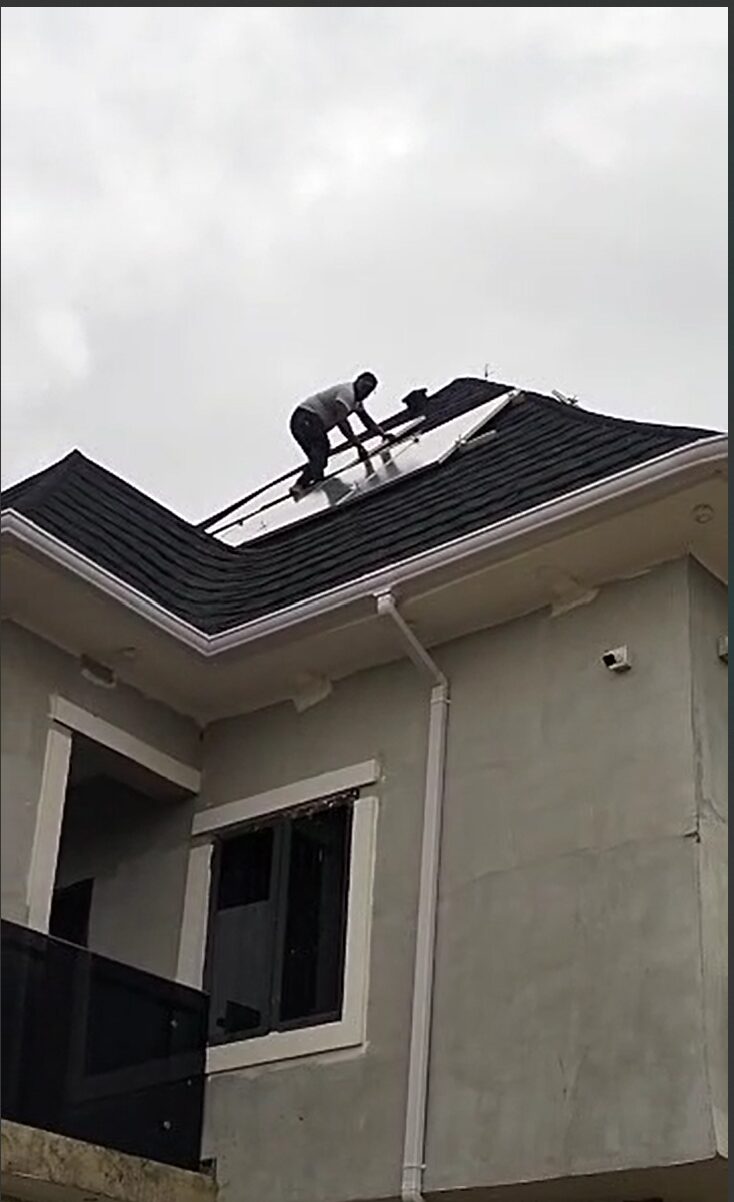
Once you have chosen the location, it’s time to install the solar panels. Start by mounting the solar panels on the roof or the ground using the appropriate mounting hardware. Make sure to follow the manufacturer’s instructions carefully and ensure that the panels are securely attached.
Step 4: Connect the Solar Panel
After installing the solar panels, you’ll need to connect them together. This can be done by wiring the panels in series or parallel, depending on the configuration of your solar power system. Consult the wiring diagram provided by the manufacturer to ensure proper connections.
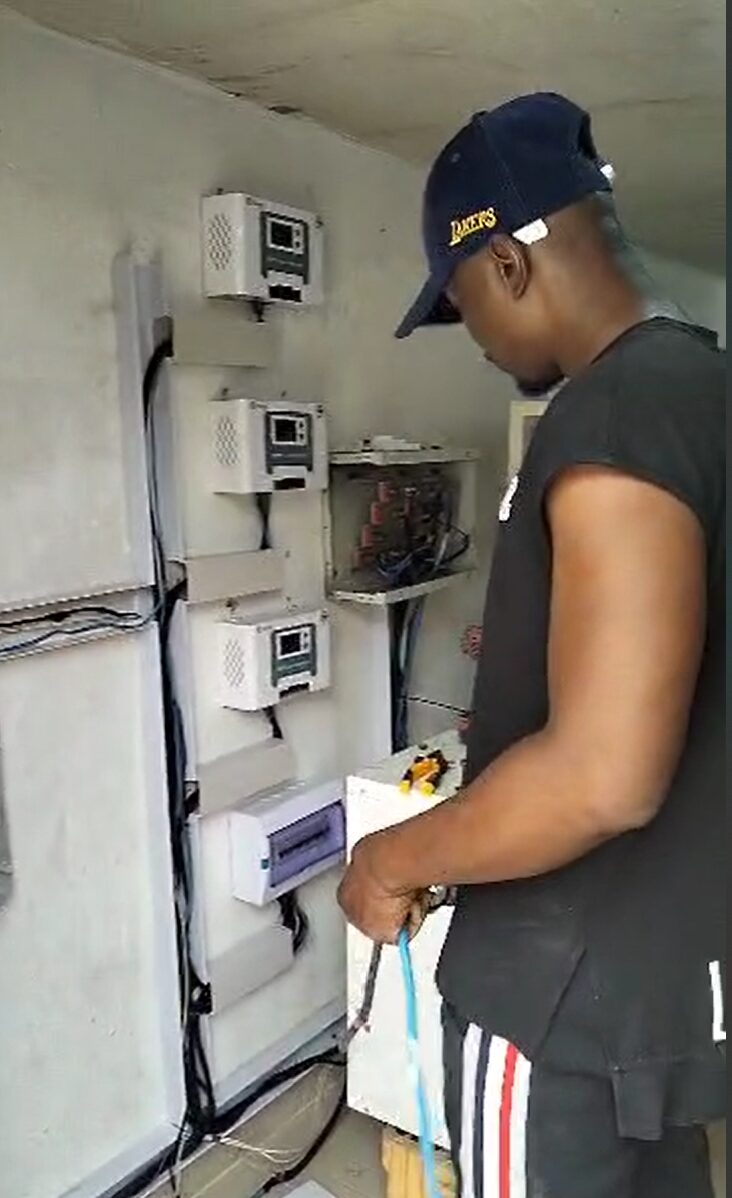
Step 5: Install the Inverter

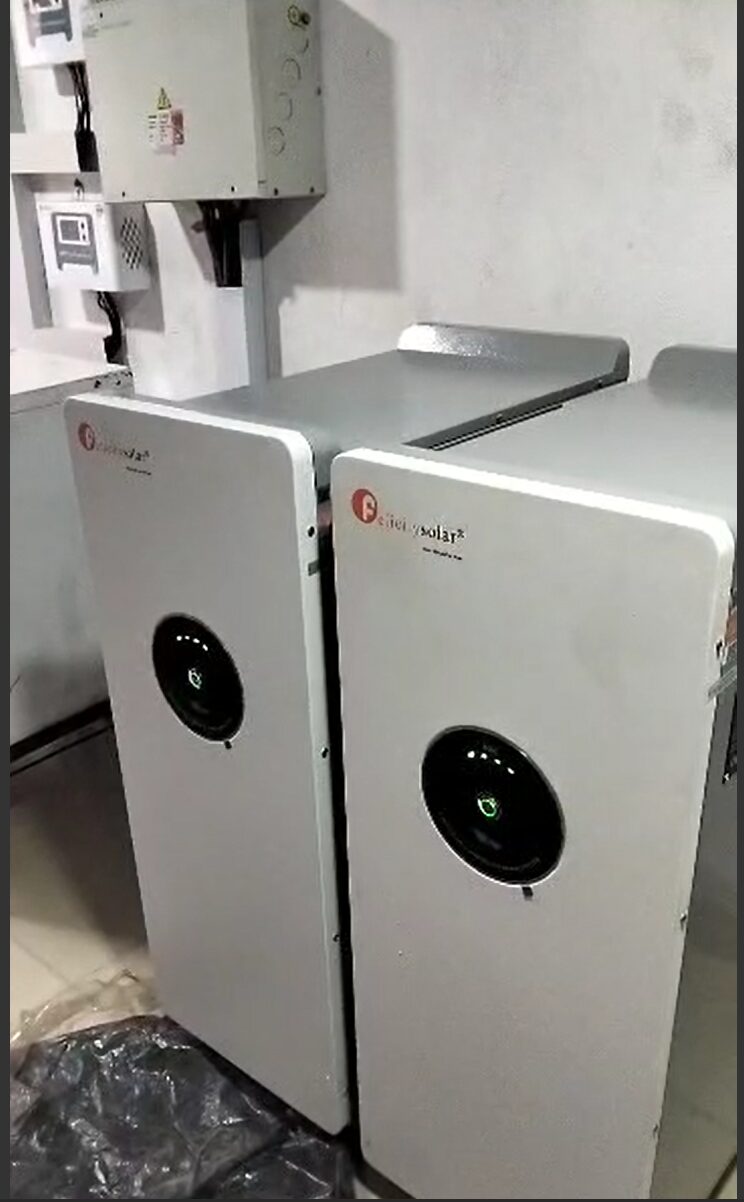
The inverter is an essential component of a solar power system as it converts the direct current (DC) generated by the solar panels into alternating current (AC) that can be used to power your home. Install the inverter in a well-ventilated area and follow the manufacturer’s instructions for wiring and connection.
For some of our installations, we use the Felicity inverter devices. They are durable and also cost efficient. You recommend you try them out. You can also go for other inverter models of your choice too. Just ensure that you connect them in the right way.
You May Also Like…
- How to Build DIY Gas Leak Detector with Arduino and Blynk IoT
- How to Design and Build an IoT-based Power Backup System
- IoT Pump Control for Efficient Irrigation Systems
Step 6: Connect to the Electrical Grid
If you want to take advantage of net metering or sell excess electricity back to the grid, you’ll need to connect your solar power system to the electrical grid. This will require the installation of a grid-tie inverter and coordination with your local utility company.
Step 7: Test and Monitor
Once the installation is complete, it’s important to test and monitor your solar power system regularly. Check the performance of the system and monitor the energy production to ensure everything is functioning optimally. If any issues arise, consult a professional for assistance.
Conclusion
Installing a solar power system can be a rewarding DIY project that not only helps you reduce your reliance on traditional energy sources but also saves you money in the long run. By following this step-by-step guide, you can confidently install your own solar power system and start enjoying the benefits of clean, renewable energy.
FAQs on Solar Power System Installation Guide
1. What are the benefits of installing a solar system?
Installing a solar system offers numerous benefits, including reduced electricity bills, lower carbon footprint, and increased energy independence. Solar power is a renewable energy source that can help decrease reliance on fossil fuels, contributing to environmental conservation. Additionally, many governments offer incentives and rebates for solar installations, making it more financially attractive.
2. How long do solar panels last?
Solar panels typically have a lifespan of 25 to 30 years. However, their efficiency may decrease slightly over time. Most manufacturers provide warranties that guarantee performance for at least 25 years, ensuring that your investment in solar energy will be productive for decades.
3. Do solar panels work during a power outage?
Standard grid-tied solar systems do not provide power during a grid outage to ensure the safety of utility workers. However, solar systems paired with battery storage can continue to supply power to your home during an outage, offering greater resilience and energy security.
4. How much does a solar system cost?
The cost of a solar system varies based on factors such as system size, location, and equipment quality. On average, residential solar systems cost between $10,000 and $30,000 before incentives. It’s important to consider long-term savings on electricity bills and potential incentives that can significantly reduce the overall cost.
5. Can solar panels be installed on any roof?
Solar panels can be installed on most roofs, but the suitability depends on factors such as roof orientation, angle, and structural integrity. South-facing roofs with a pitch between 15 and 40 degrees are ideal for solar installations. It’s recommended to have a professional assess your roof to ensure it can support the solar system and maximize energy production.
6. How do I maintain my solar panels?
Solar panels require minimal maintenance. Regularly checking for debris, dirt, and shading that can affect performance is important. Cleaning the panels with water and a soft brush or cloth can help maintain their efficiency. It’s also advisable to have a professional inspect the system periodically to ensure all components are functioning correctly.
7. Can I expand my solar system in the future?
Yes, you can expand your solar system in the future by adding more panels and possibly upgrading your inverter if necessary. It’s important to design the initial system with potential expansion in mind, ensuring there is enough space and capacity to accommodate additional panels. Consulting with a solar professional can help plan for future scalability.